How to use StudioView for Building Trajectories for Skydel Systems
Tutorial
Challenge
How can users build custom trajectories using Skydel GNSSGlobal navigation satellite system (GNSS): A general term describing any satellite constellation that provides positioning, navigation, and timing (PNT) services on a global or regional basis. See also simulation software?
Orolia Solution
Skydel Software Engine has an integrated tool for building trajectories. The vehicle simulation trajectory type is a great way to quickly make a fairly realistic trajectory. You can import the data from “Use Street Map” (openstreetmap.org). User Manual Link.
For customized trajectories, like off-road or aircraft scenarios, our StudioView Software is a good option. GSGA GNSS Signal Generator is a device that is able to create simulated satellite signals and generate real RF signals by first producing I/Q data and calculating the orbits of satellites at a user-defined time, location and trajectory. StudioView software companion is historically designed and used for GSG 5 and GSG 6 simulator generations. It can help to setup scenarios and test GSG 5/6 simulator units.
For Skydel users, StudioView is a smart Toolbox for generating files to be deployed for GSG 8 and Skydel solutions. It can be used for building trajectories or antenna patterns and Rinex files modifications. This document will describe how to export a trajectory file from StudioView to be used by Skydel.
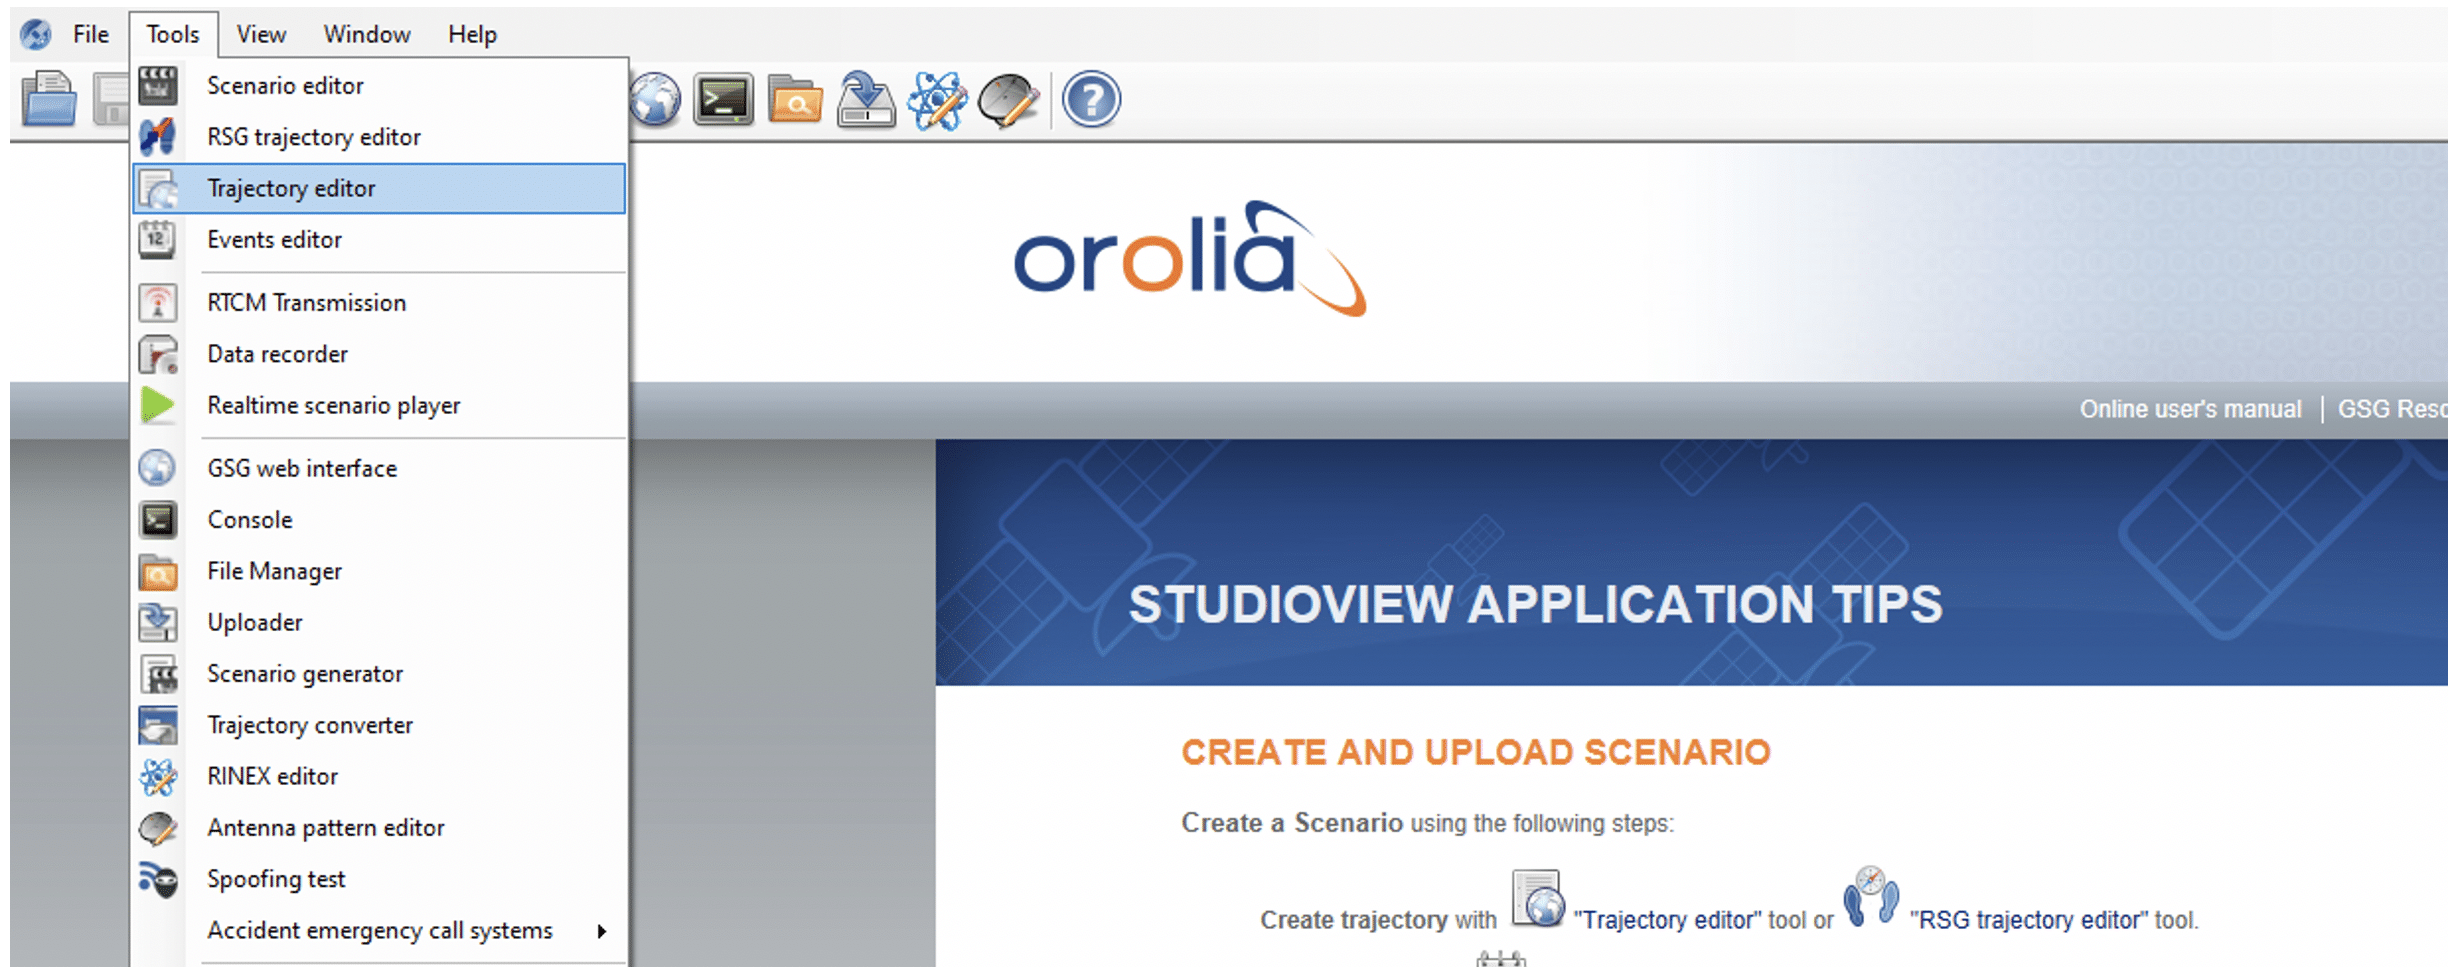
Tip: A Free StudioView License can be provided upon request for each Skydel System or GSG 8 owner (Windows platform).
Process
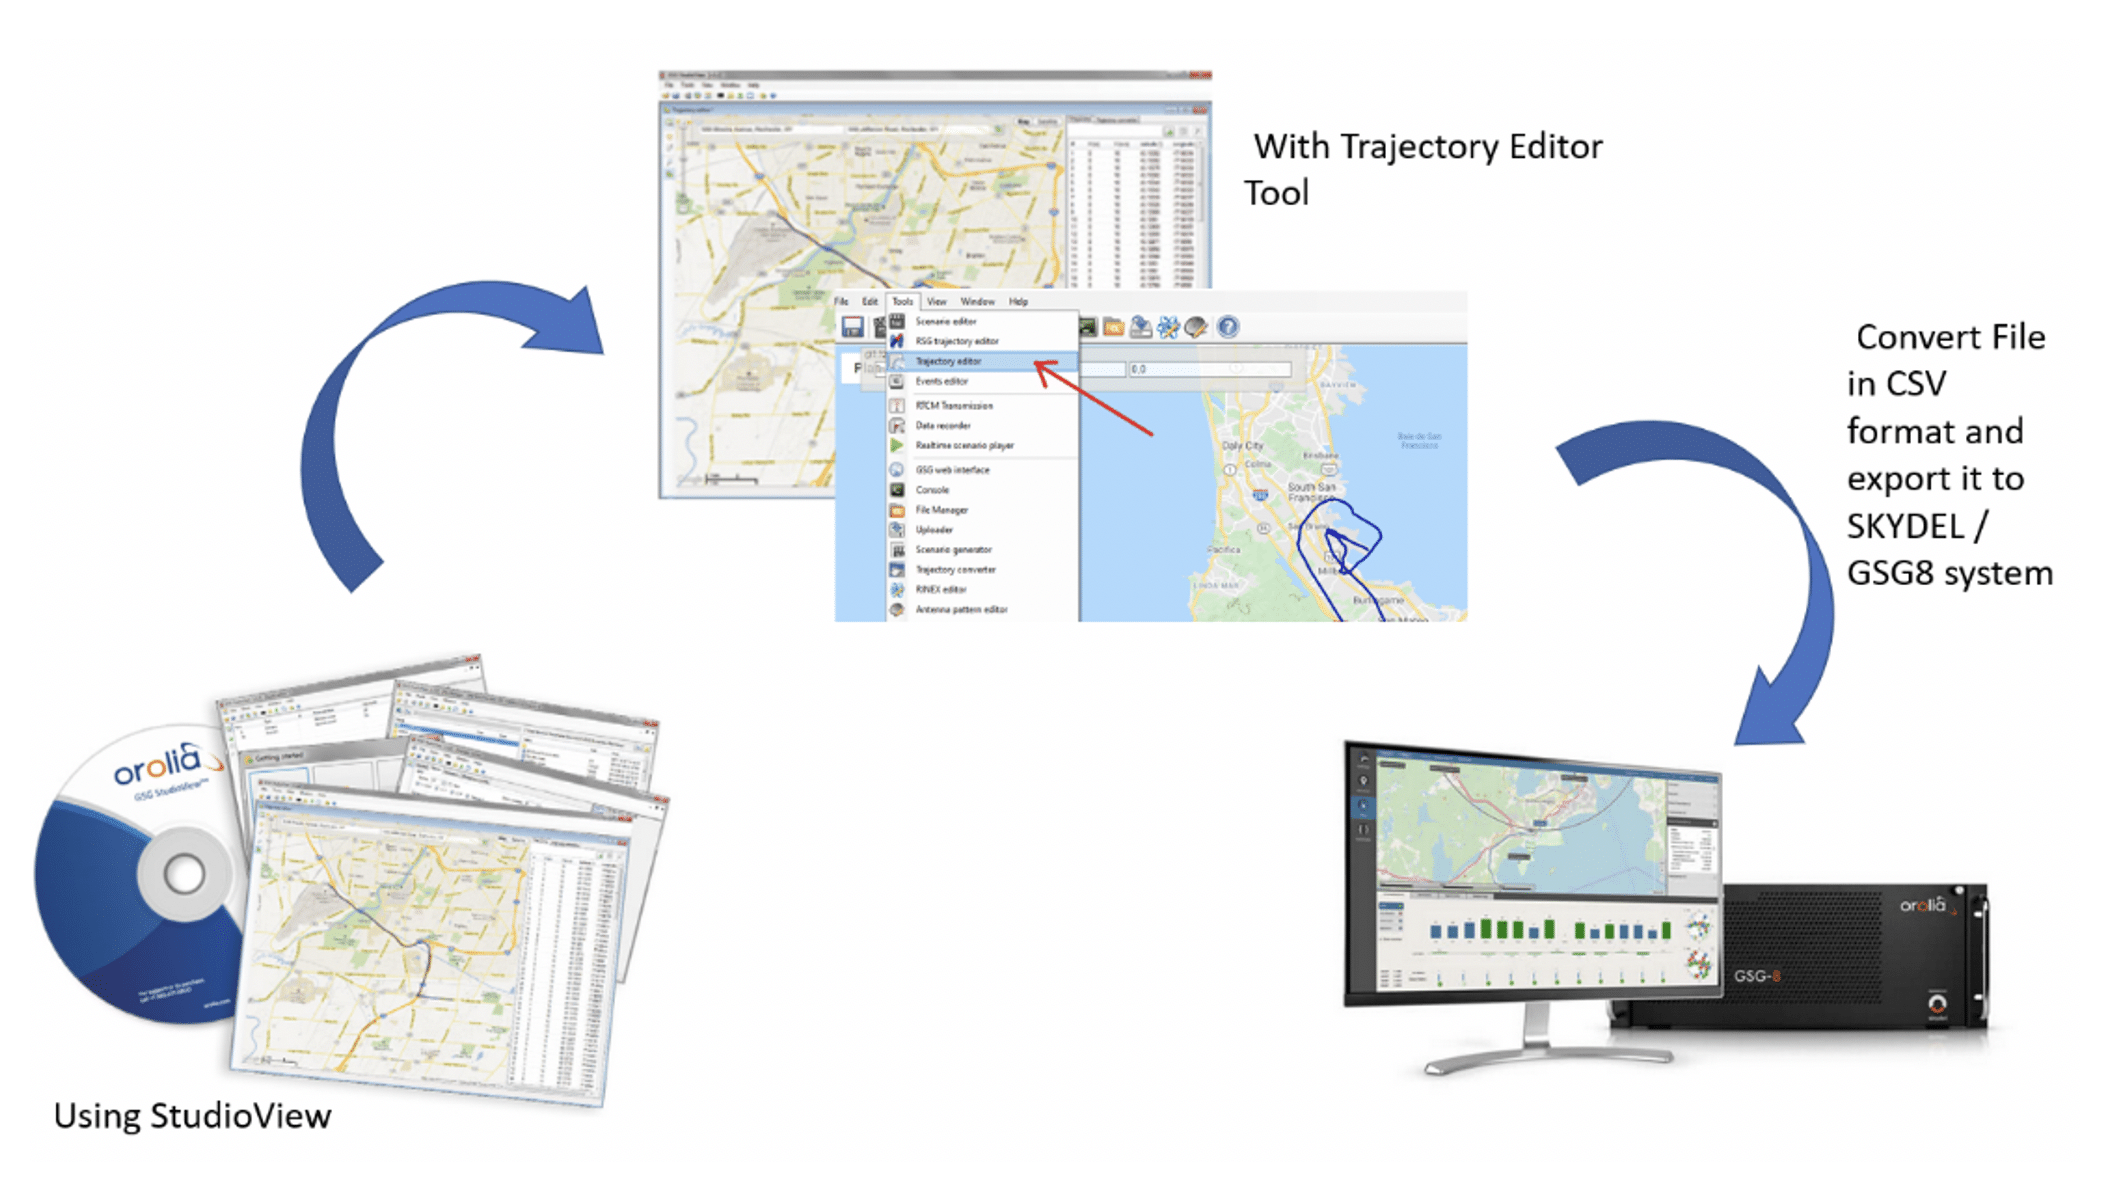
We will use StudioView to create trajectories and export them to Skydel / GSG 8 systems.
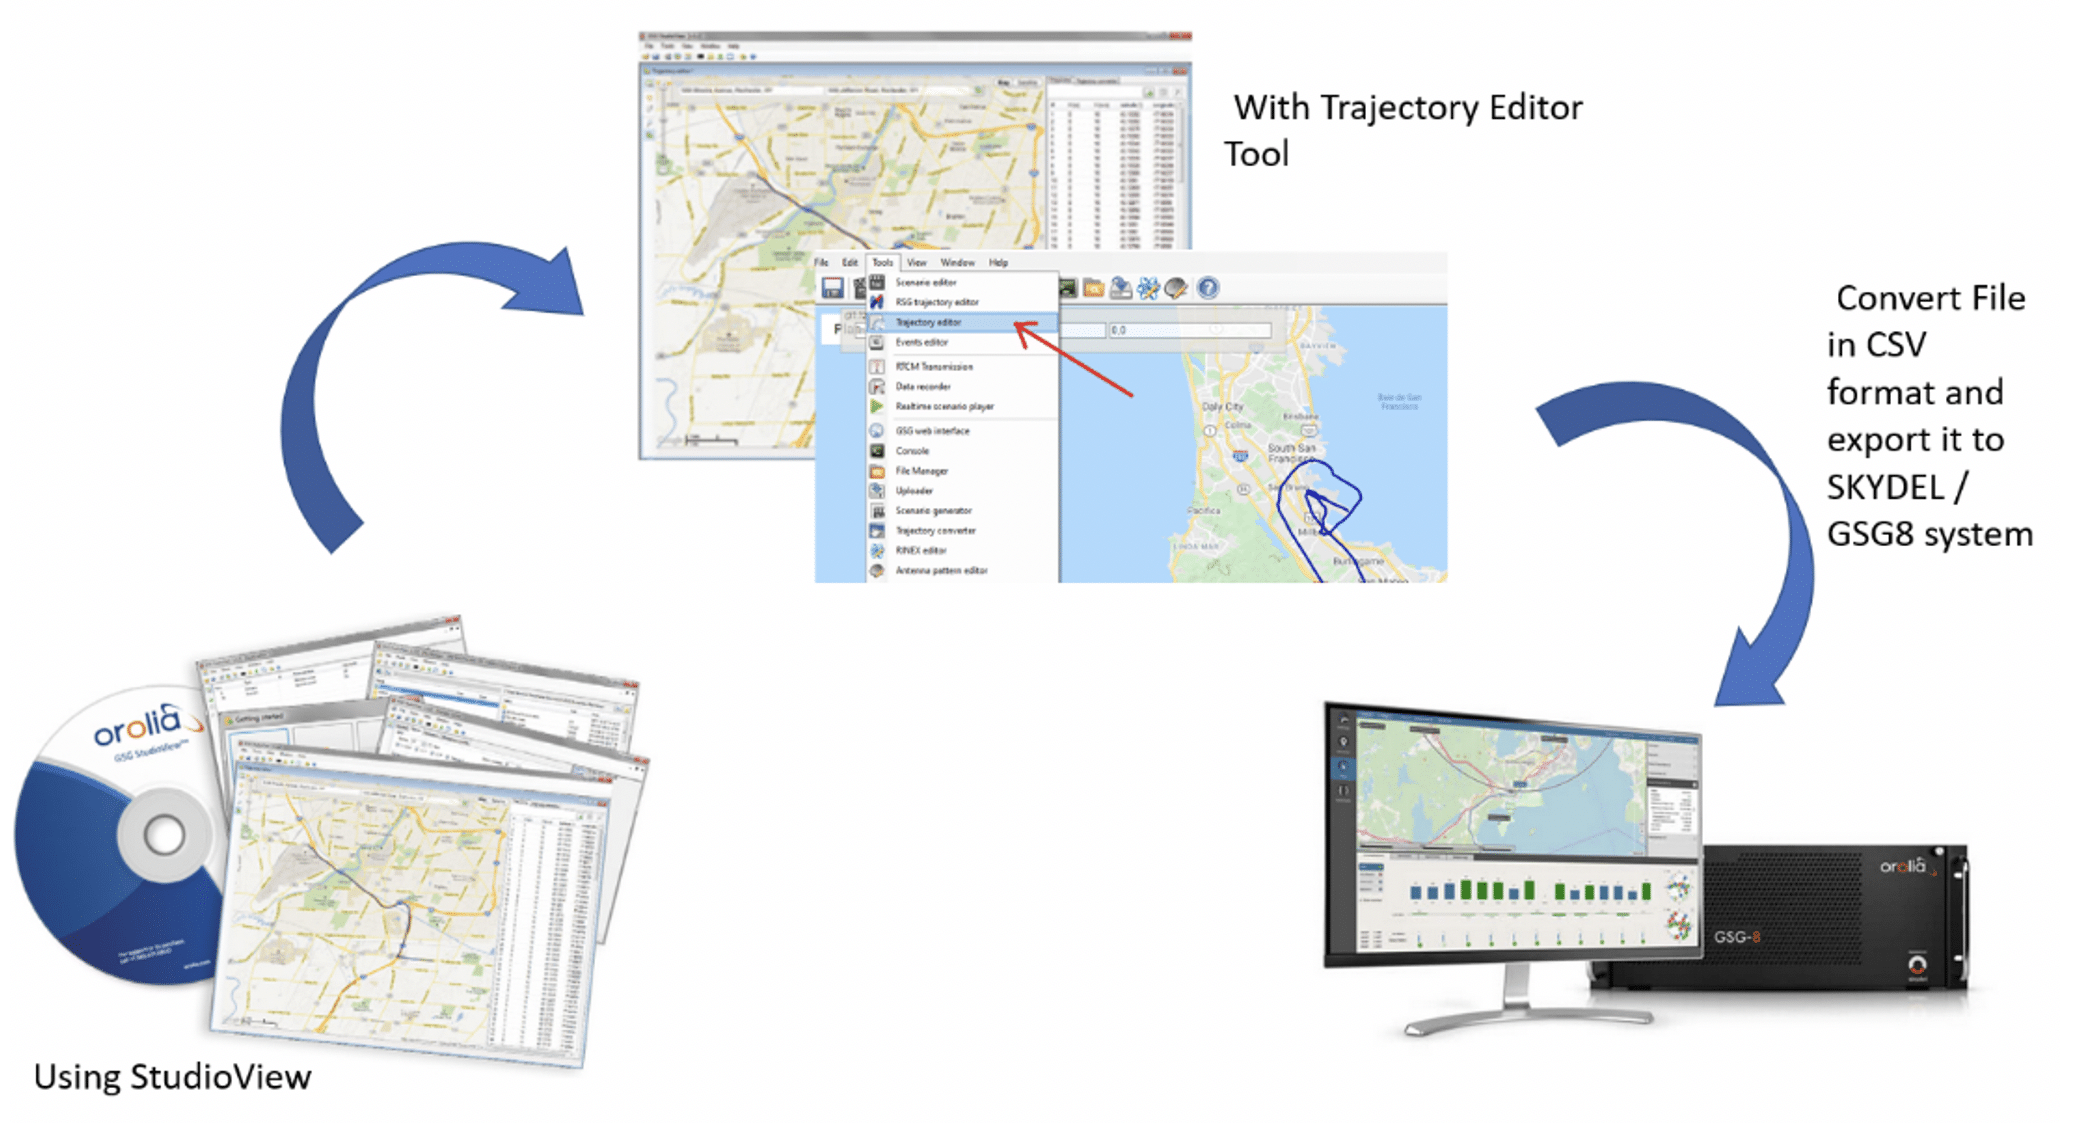
StudioView Software has 2 different tools to help user to build trajectory scripts:
-Trajectory Editor : used to manually create a trajectory as a sequence of waypoints through Google Maps plugin.
-RSG Trajectory Editor : can be used to describe a motion-based trajectory (proprietary format) – In this case, you don’t create waypoint list but a sequence of commands to change position and/or attitude for the vehicle.
For this application note, we will explain the use of the trajectory editor tool only.
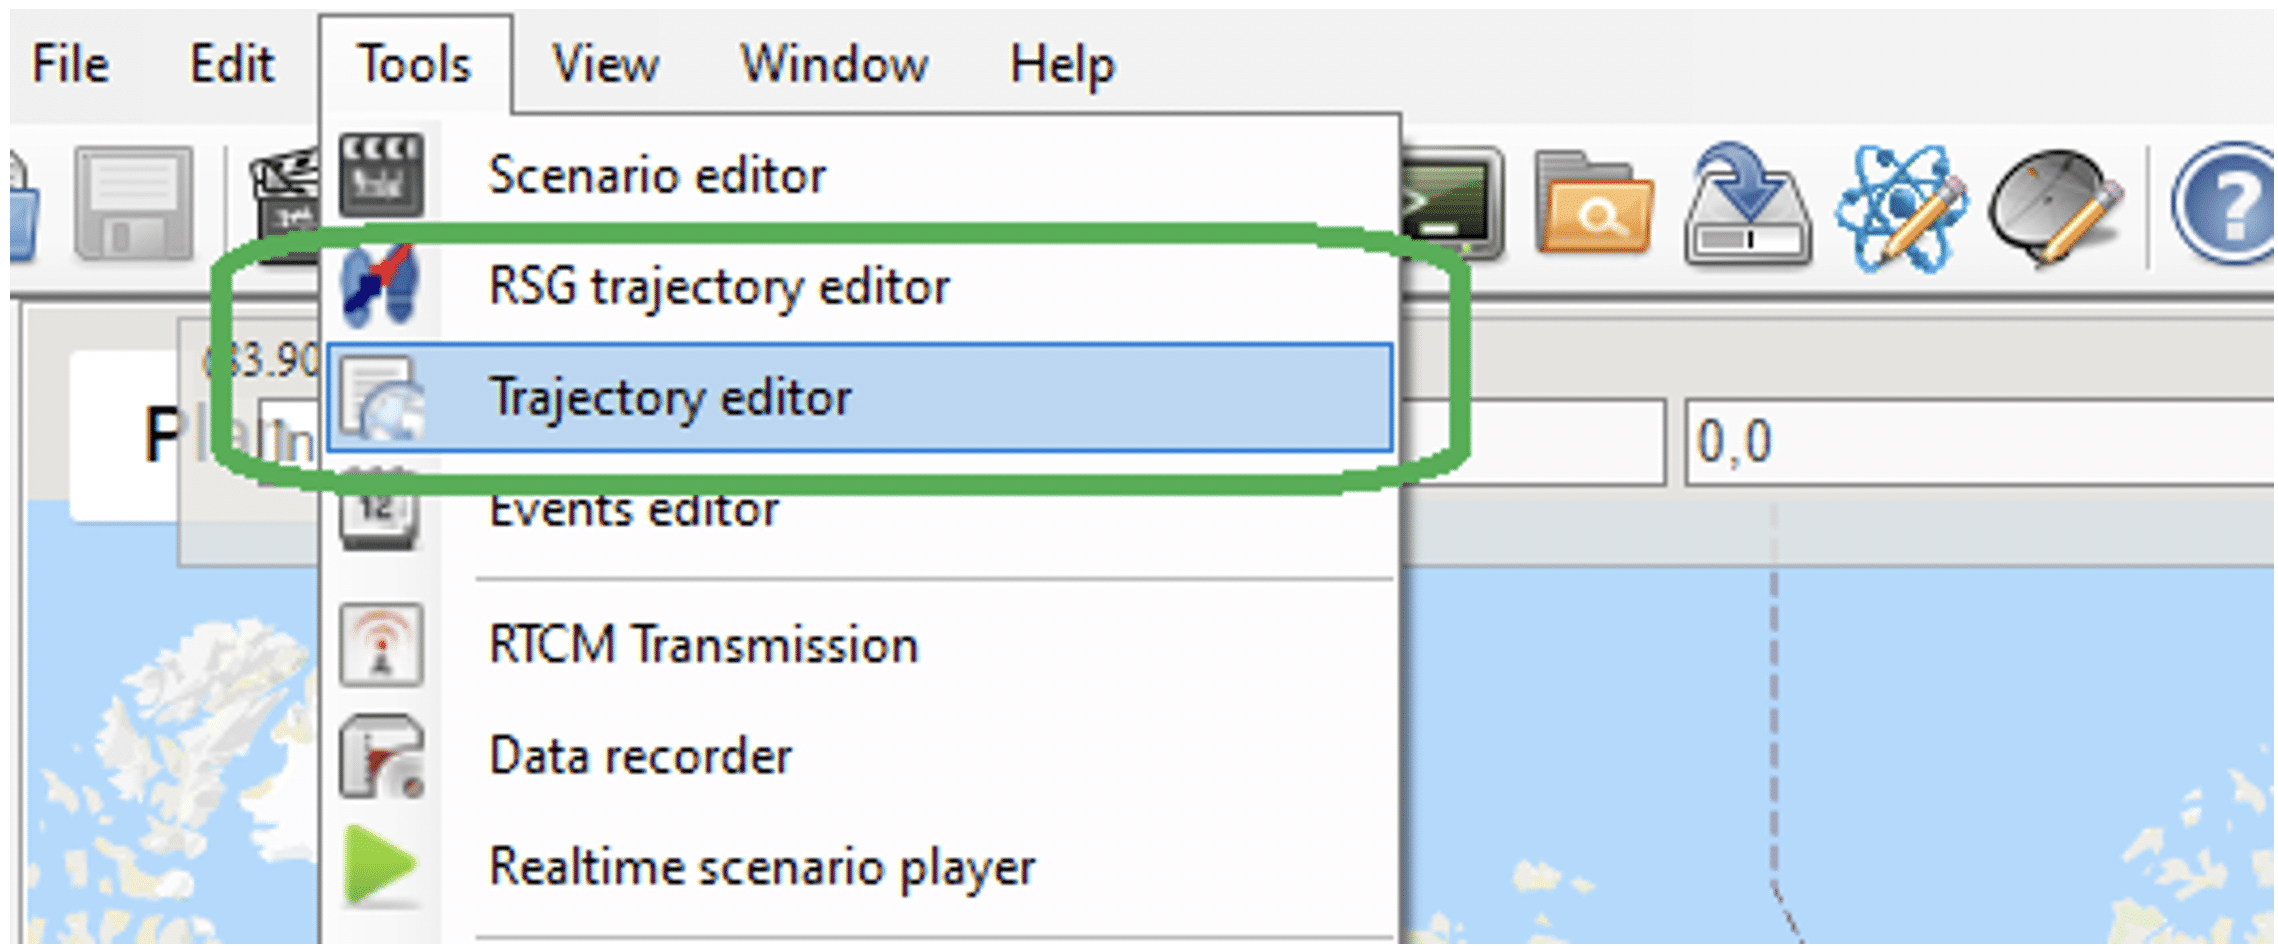
User manual link for detail: https://safran-navigation-timing.com/manuals/GSG/Content/GSG/Topics/Tasks/SV_Trajectory.htm
Example 1 – Aircraft trajectory
An example of a trajectory script made by StudioView Software is provided with the application note. This trajectory file is one of the samples provided by default when installing StudioView.
Preparing your StudioView trajectory file
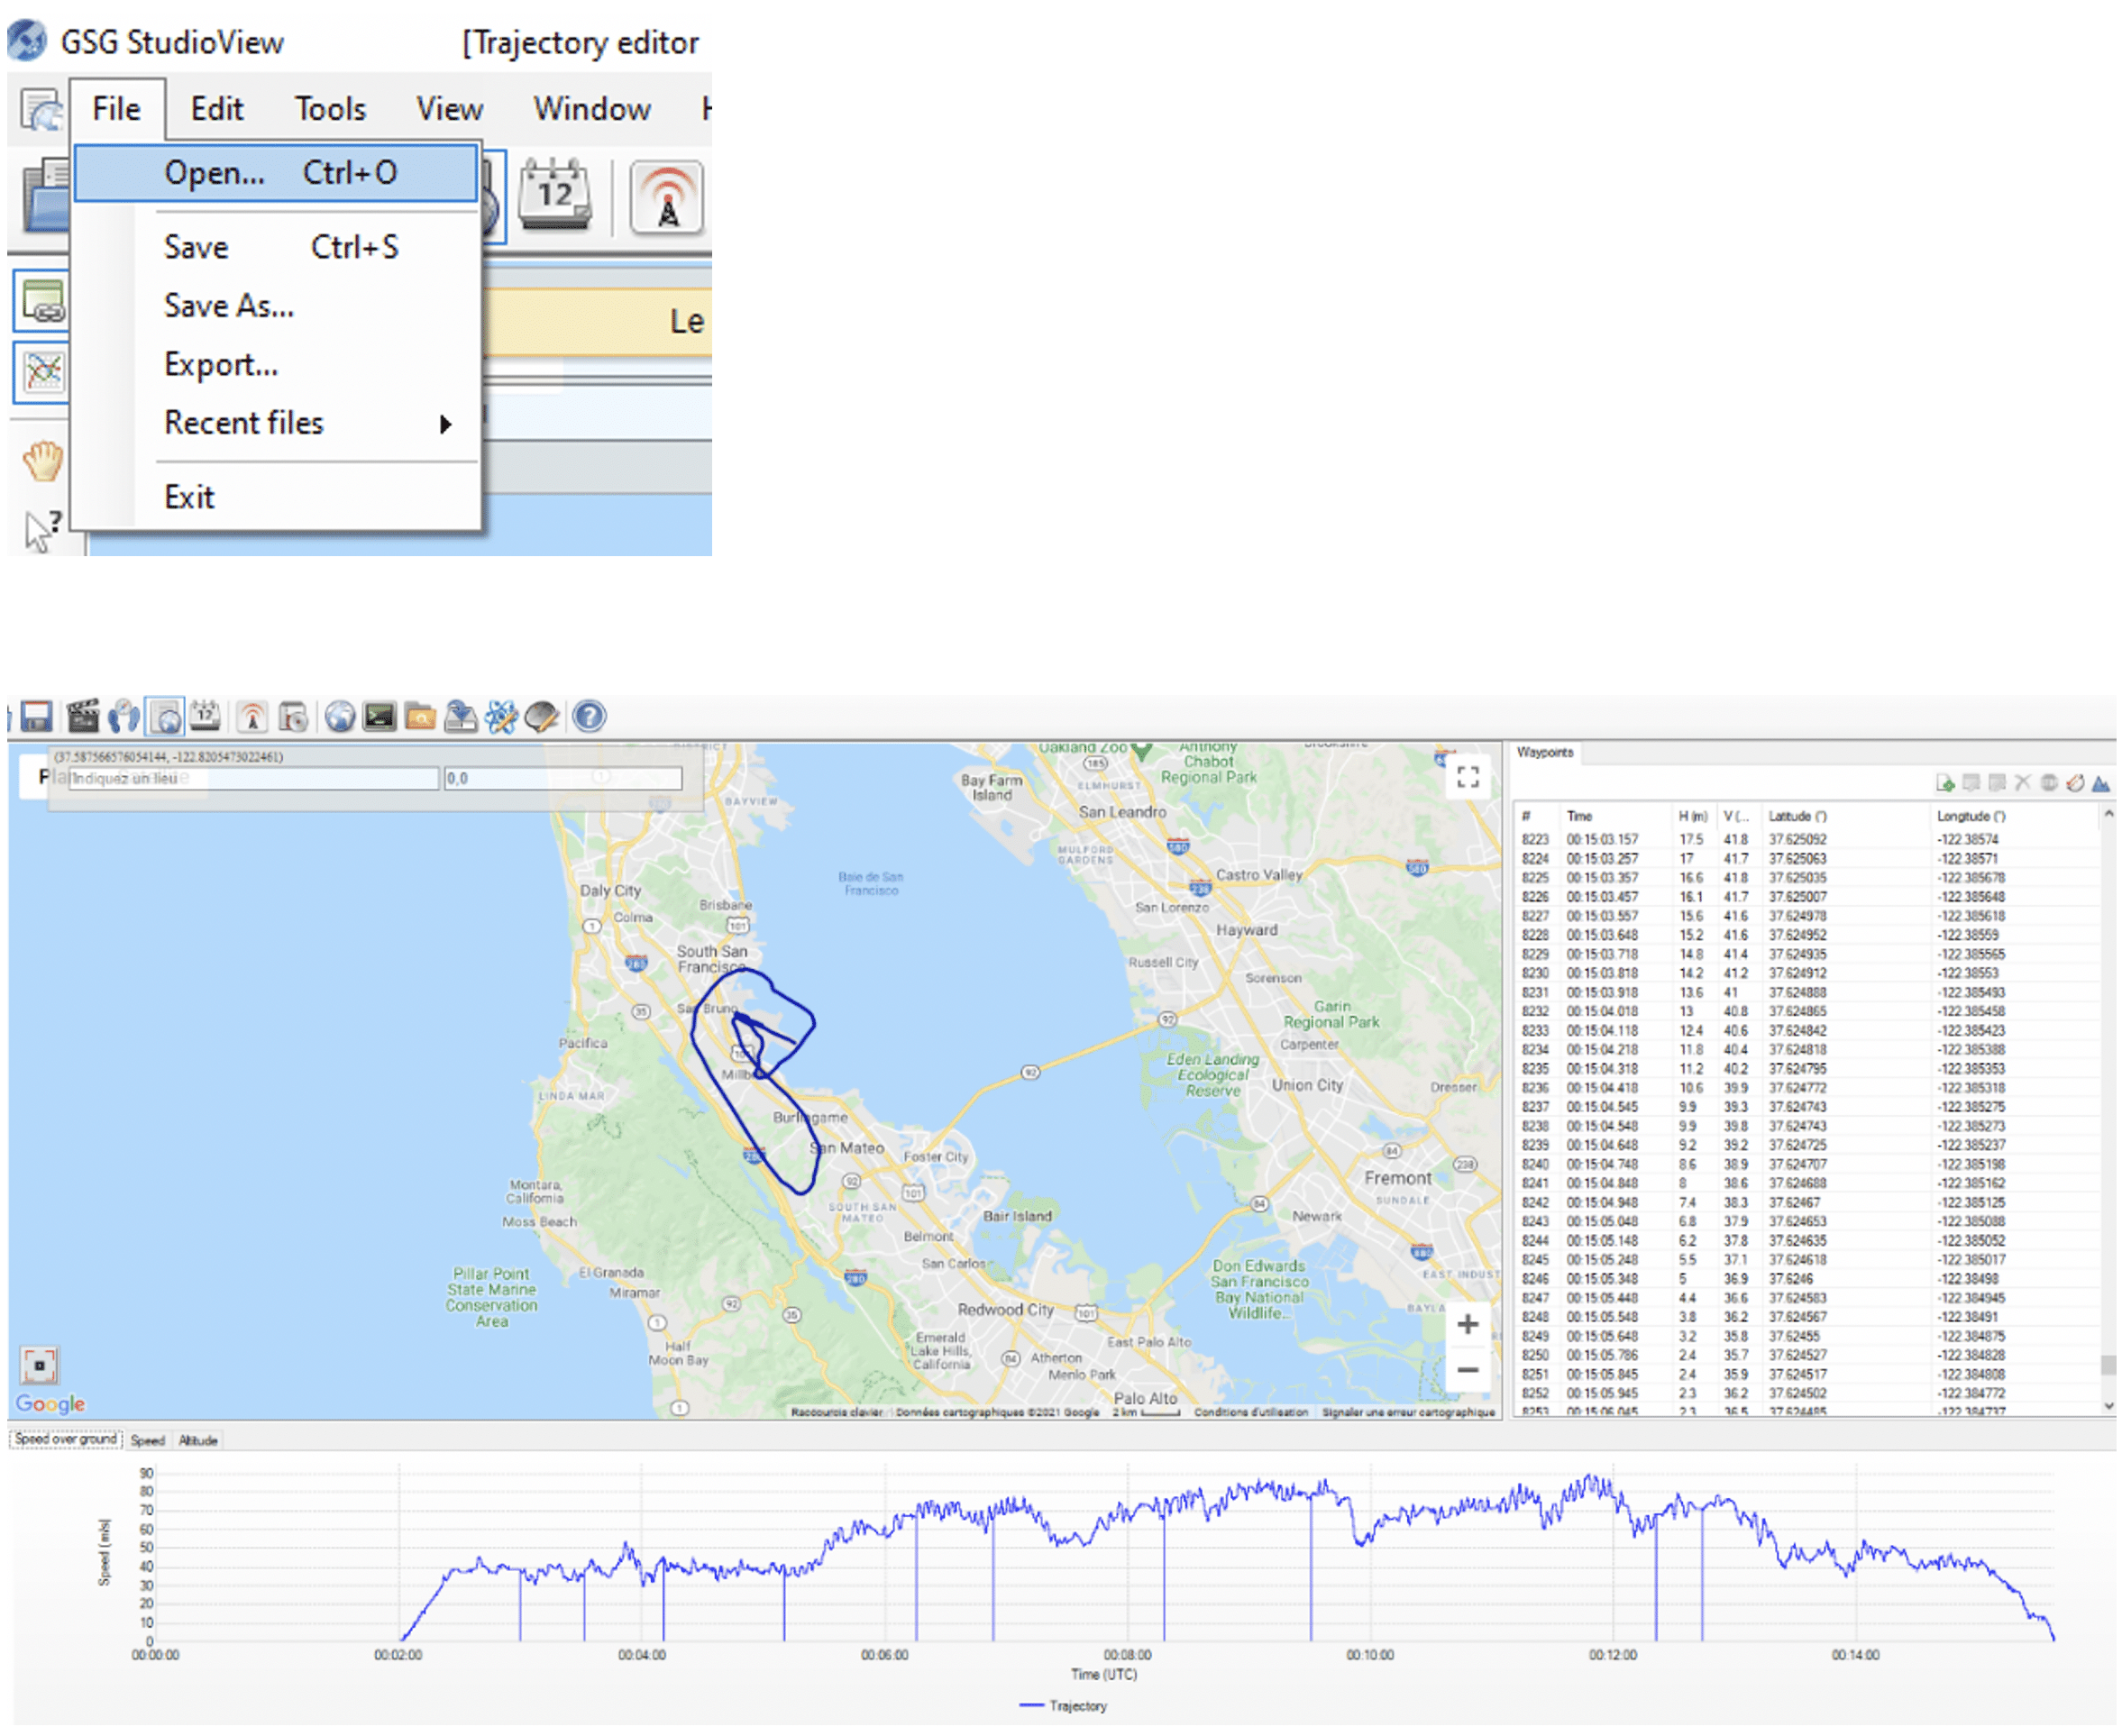
Trajectory Editor allows the user to create trajectory manually as sequence of points on Google Maps. It contains Map window, Waypoints table and Velocity and Height charts. Tool provides common GoogleMap functions. Internet connection is needed for updating map, there is no OFF-Line process existing for StudioView to use the Google Maps plugin.
You can search for particular place on the map, build a route using GoogleMap or add intermediate point to your route. You can also easily navigate through trajectory points clicking on points or using arrow keys on keyboard.
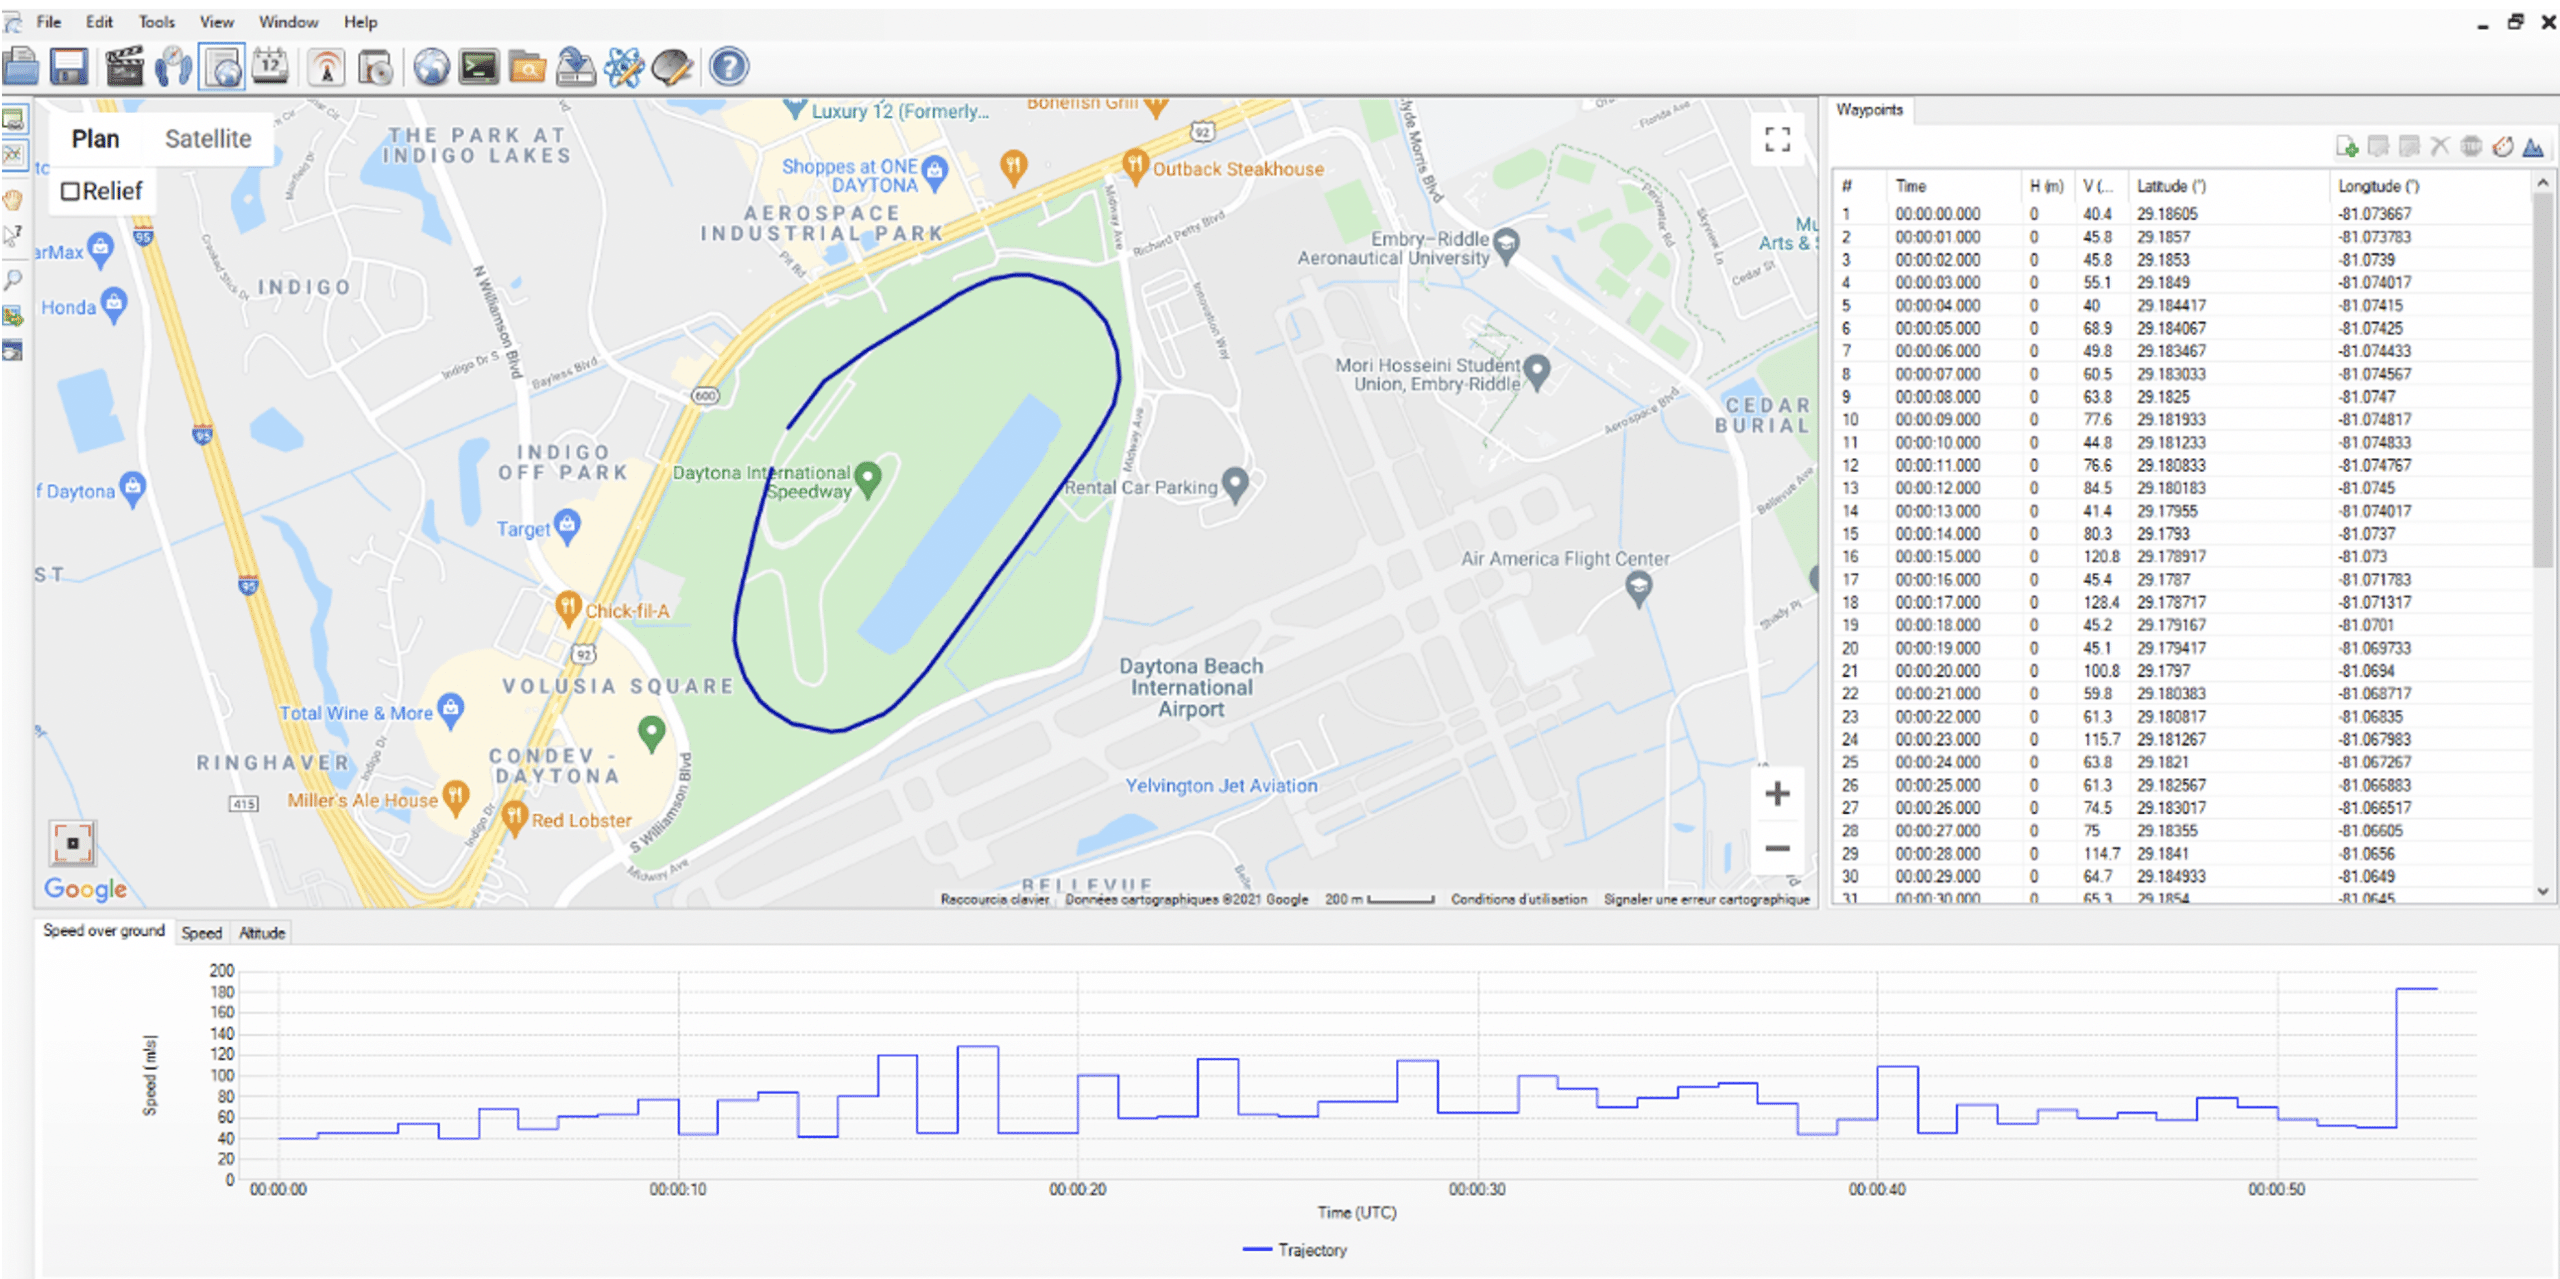
Opening the file through StudioView will automatically display the trajectory on the map and list the waypoints on the right side. You can get also graphic view of speed and altitude.
Each waypoint can be modified by the user.
Open your file or create new one (StudioView template file used in this example is FlightUS.nmea)
You can take advantage of another tool for Trajectory conversion, a useful function of GSG StudioView, if you want to use a trajectory created in different formats using receivers, third party software, or input it manually in an Excel spreadsheet. Currently supported formats are .nmea, .csv, .gpx, .kml, .kmz.
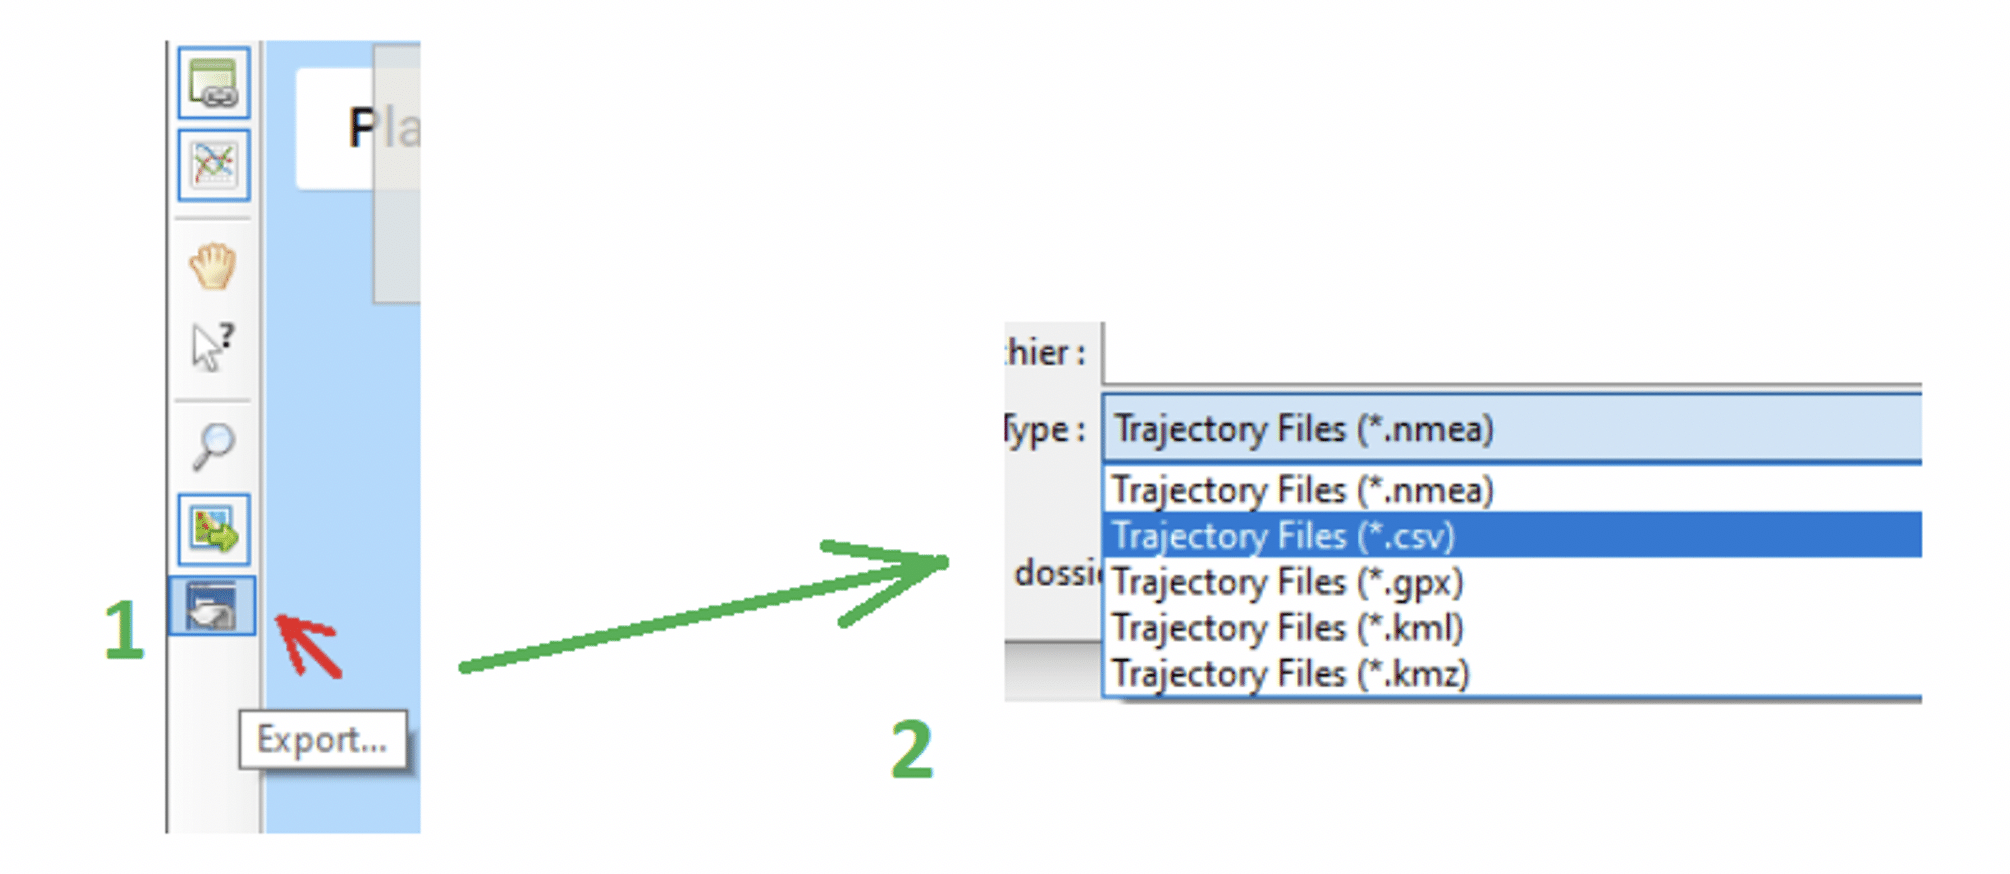
Clicking on the export button will open Trajectory converter tool.
You can select and name a new file in output trajectory field.
Tip : When saving file you can also export it to CSV format (or others like kml/kmz). For Skydel use, select .csv file.
After, select the Aircraft model* and click on “Apply” to update parameters
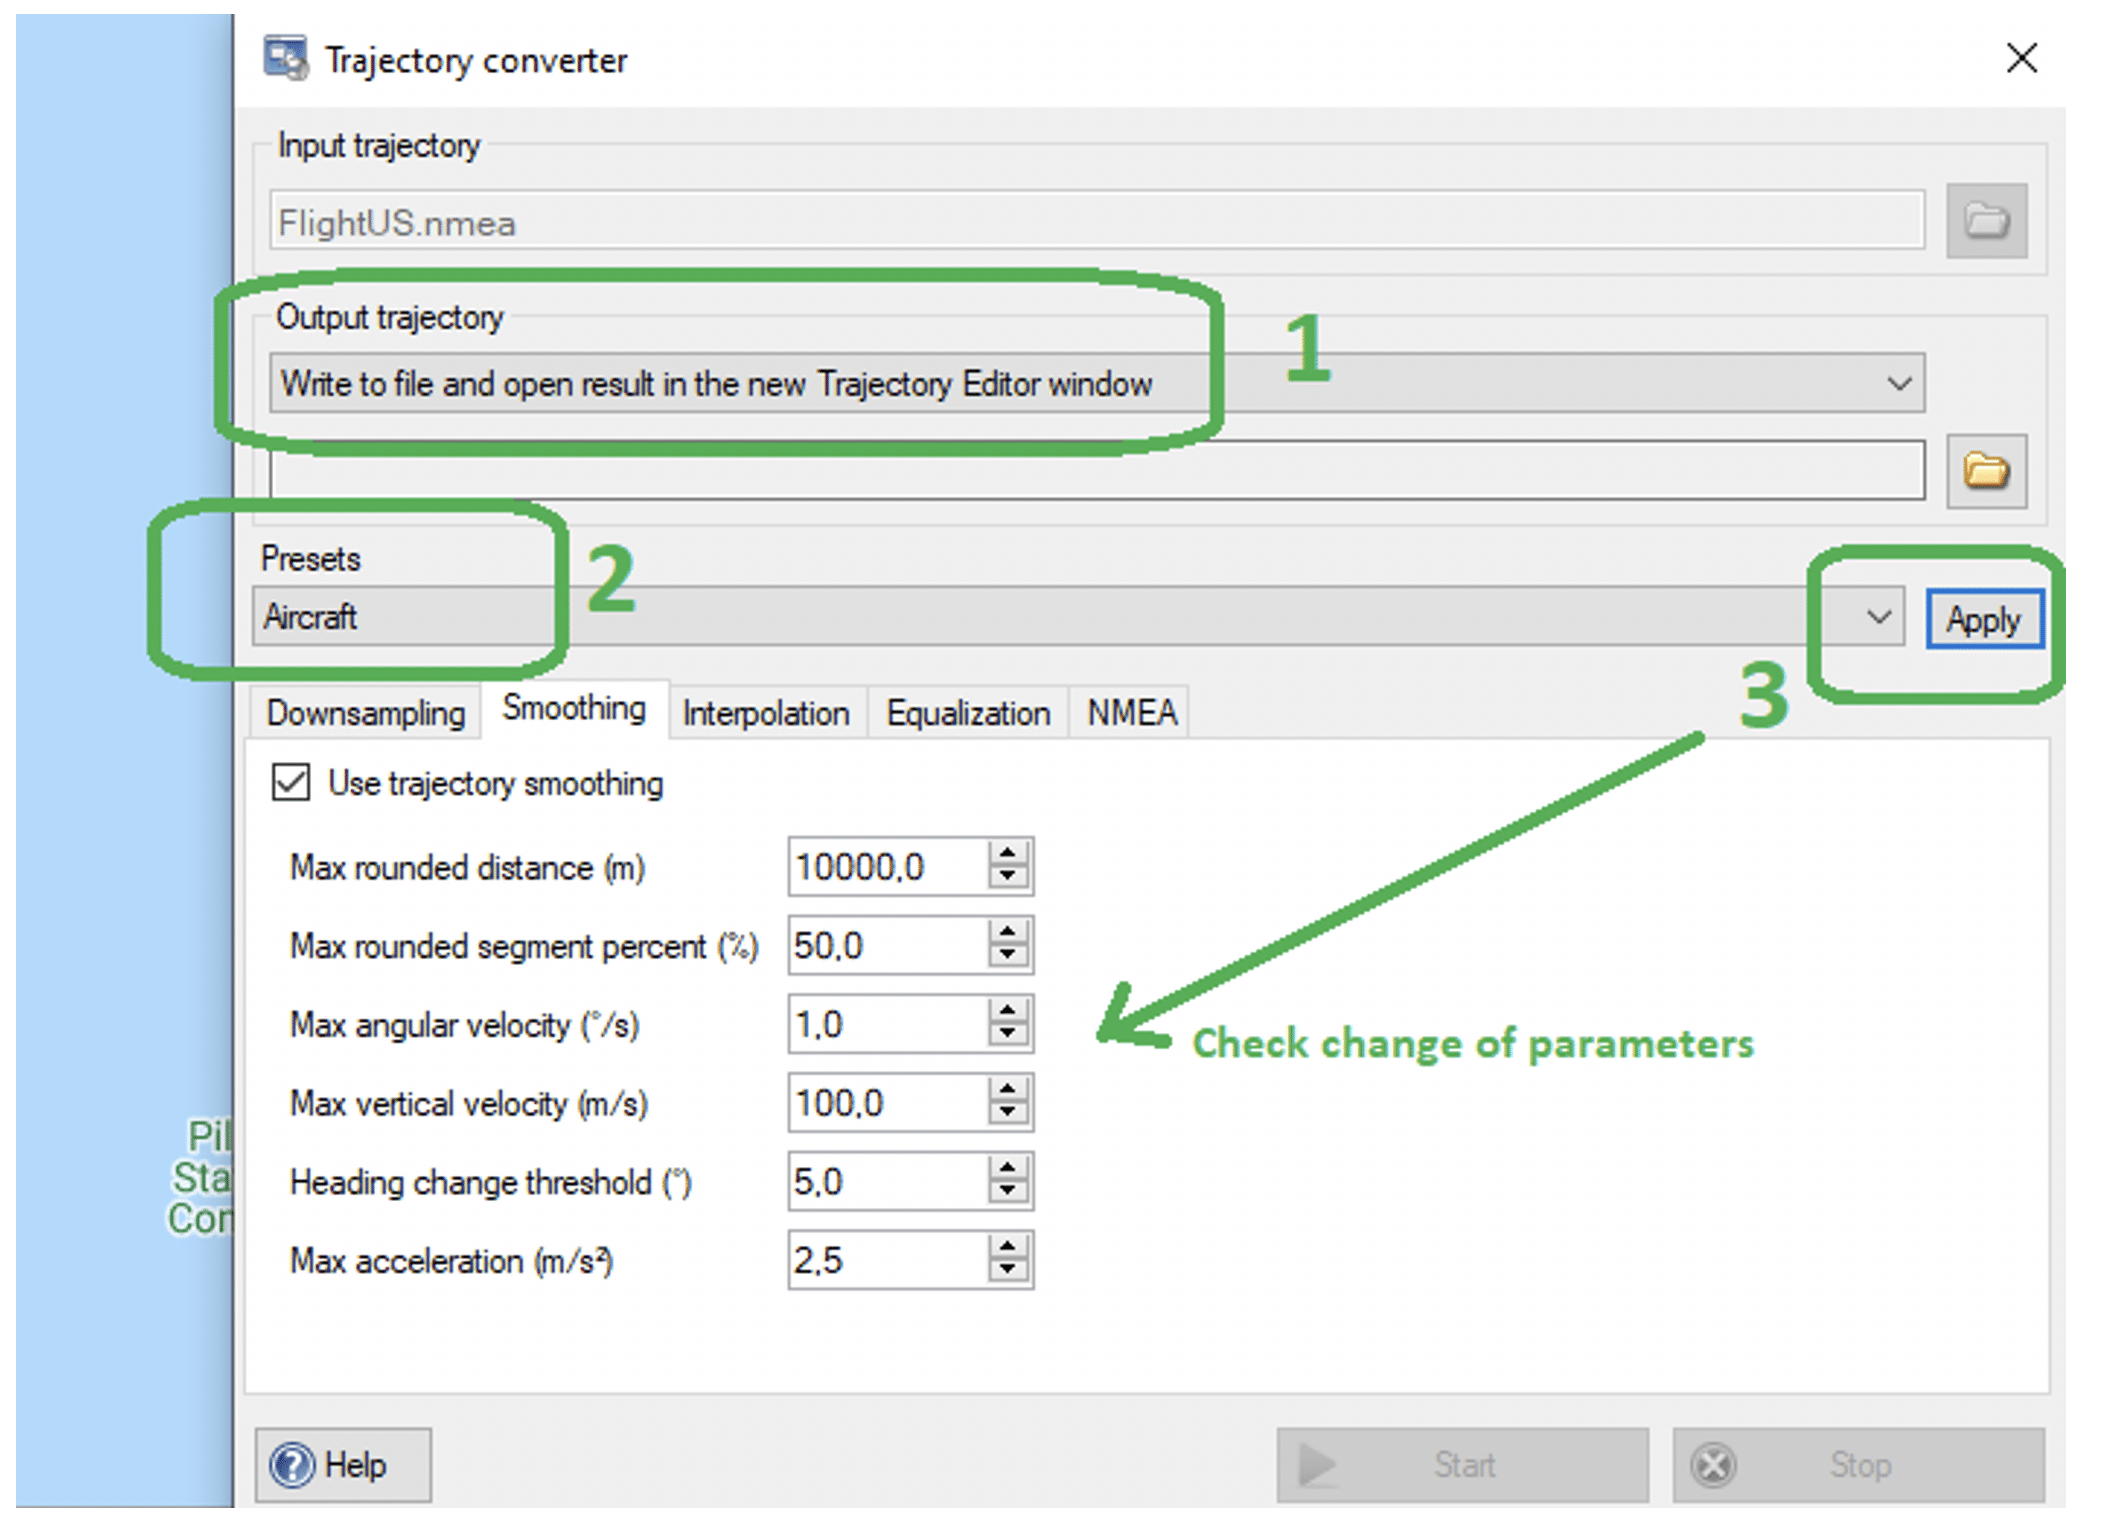
*There are some presets in drop-down menu available for trajectory definition, in order to make it more “realistic” and “suitable for receiver” – Vehicle, Ship, Aircraft. User can set it up pressing the Apply button. Values of these parameters can be seen in the Smoothing tab.
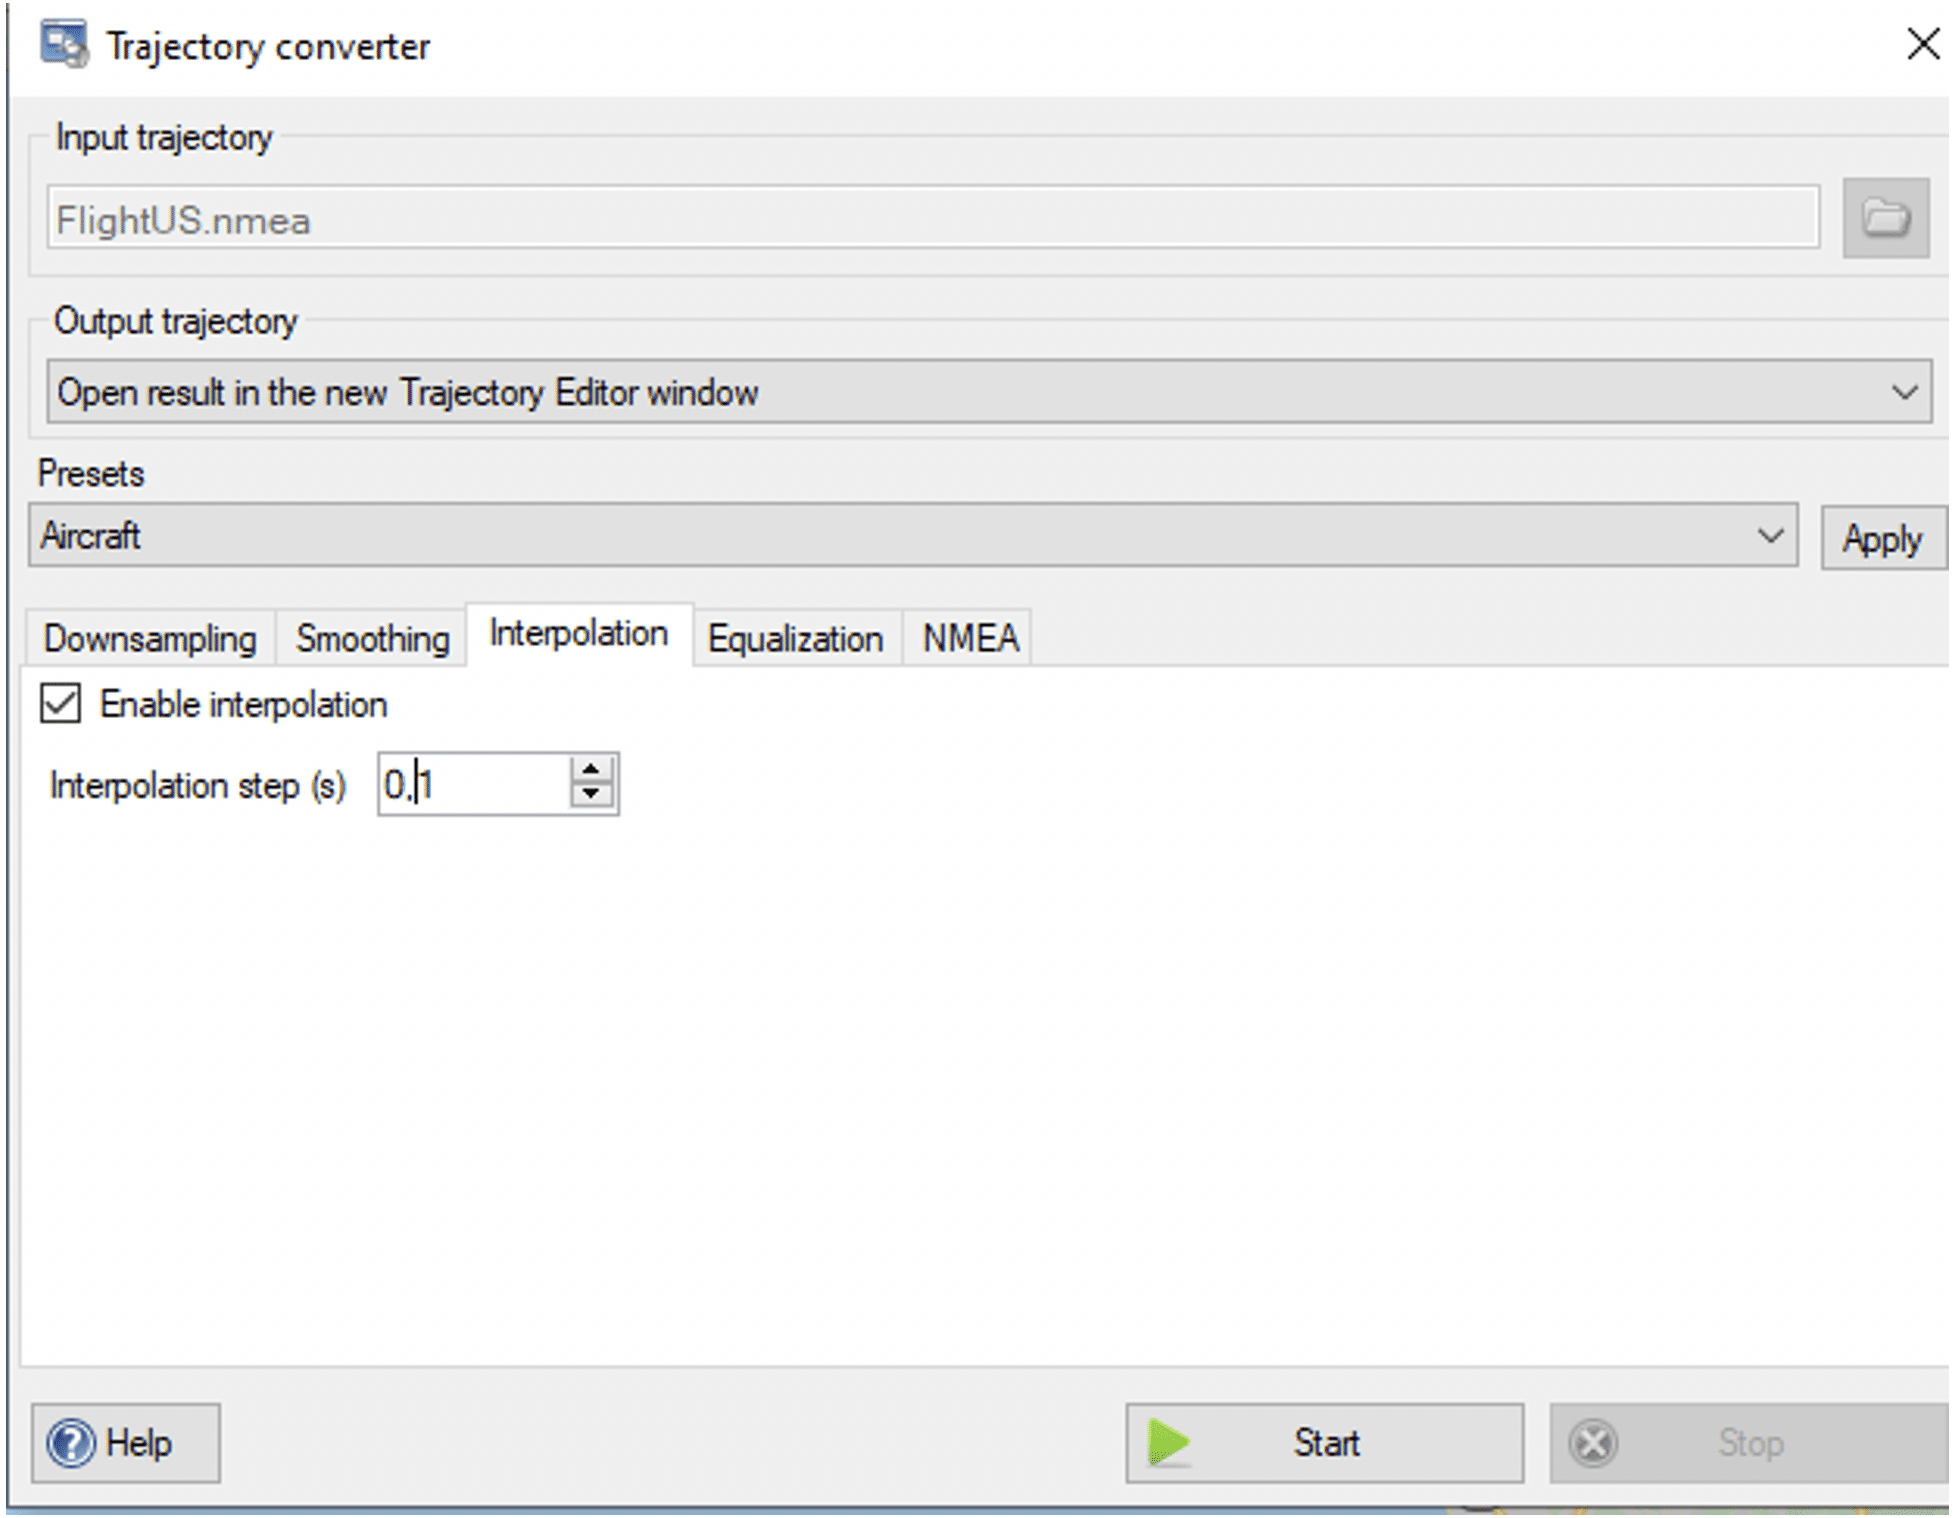
Using “Interpolation” allows to generate a list of waypoint at a specified time steps.
Example : Add interpolation step of 0.1s. This will create a waypoint every 100ms in the final file and prepare the output file for Skydel import.
Once your conversion setup is ready, then submit “Start” button.
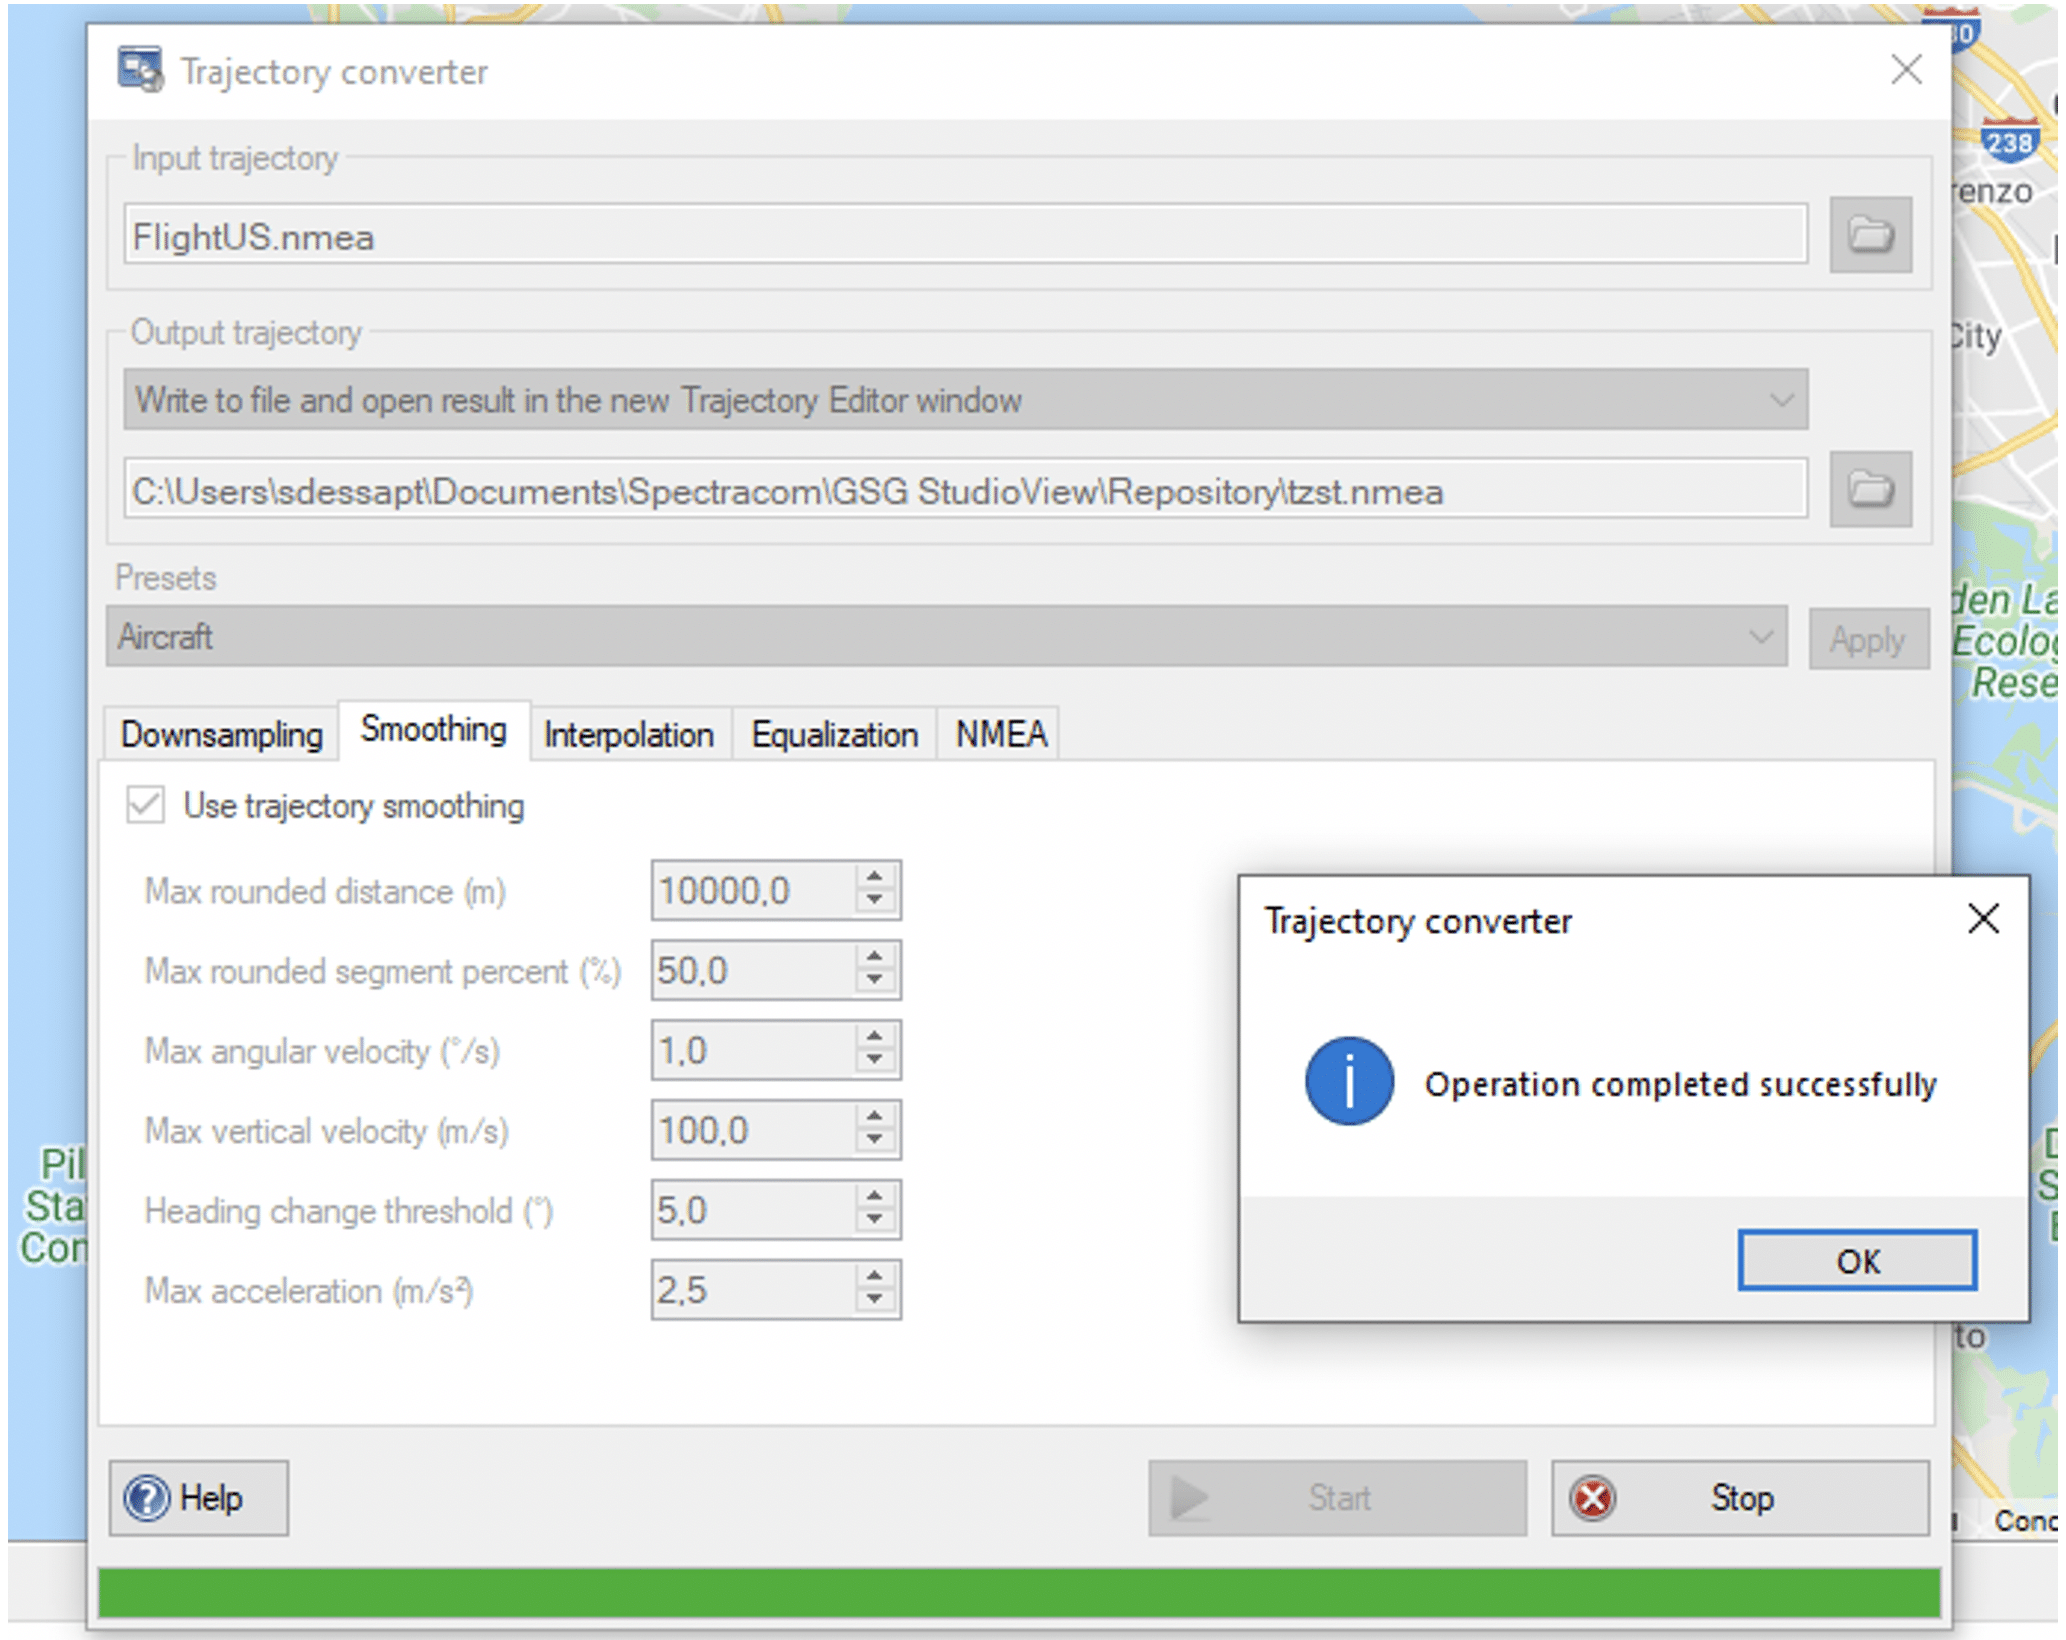
Wait until the operation completes successfully.
For Skydel use, you can export and save your trajectory file into CSV type. This CSV will be ready to be imported in your Skydel scenario.
Conclusion : Trajectory Editor tools can be used for preparing specific trajectory scripts using mapping tool, and also for converting files with speed limits and acceleration parameters, including smoothing and interpolation rules for different models (Car/ship or also aircraft).
Import your CSV file into SKYDEL
When preparing your Skydel scenario, go to vehicle body model and select Track playback mode.
Select option to import and manage “CSV with timestamps”
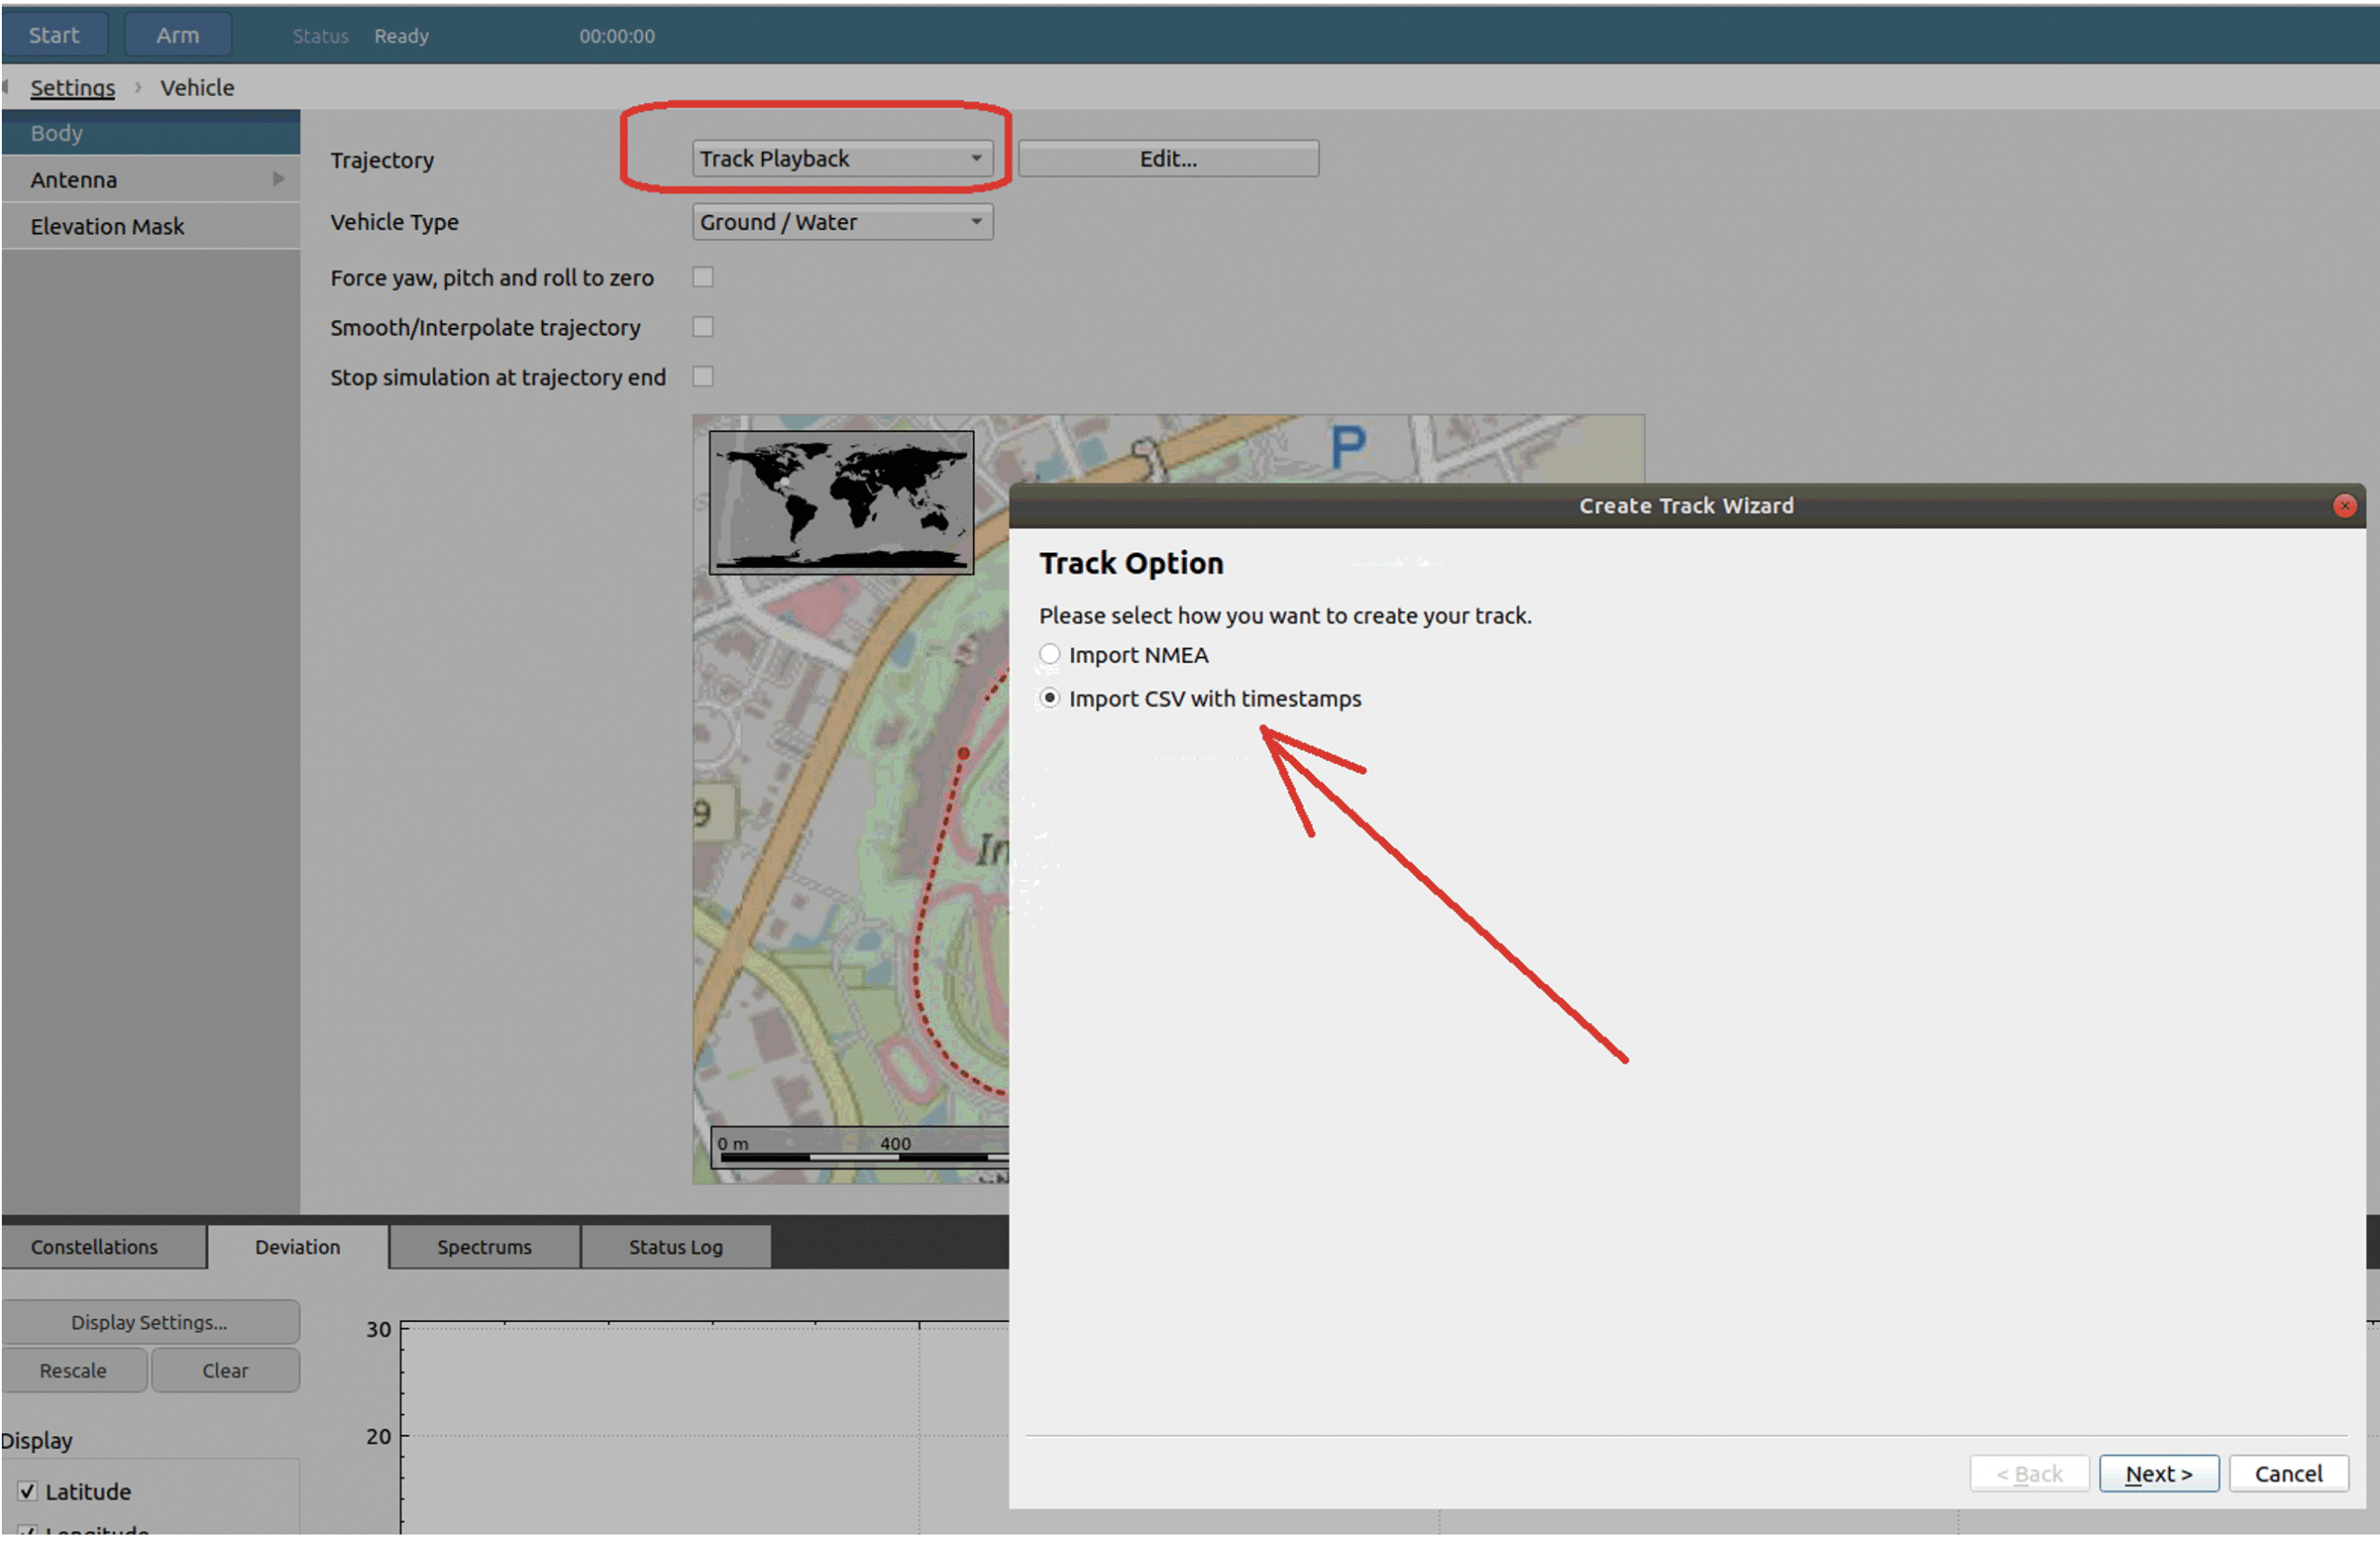
The detailed description for using vehicle motion tab is available through the Skydel user manual.
Skydel’s menu allows you to smooth/interpolate the file. Your file prepared with StudioView can be ready to use and if you are happy with it you don’t need to add any processing on it. However, Skydel’s engine runs at 1000 Hz so the imported trajectory must be interpolated. For low speed or low dynamic motion cases, a linear interpolation should be sufficient to keep a continuous tracking, but for aircraft trajectories we strongly recommend using Skydel’s Smoothing tool.
Actually, when converting StudioView files to Skydel, Orolia recommends to always select the Smooth/Interpolate option and airborne type. This can be done even if you have car or other types of trajectories. Skydel will apply a cubic spline interpolation function between plots with no modification of the original trajectory.
You can also decide if the scenario will stop or not at the end of the trajectory.
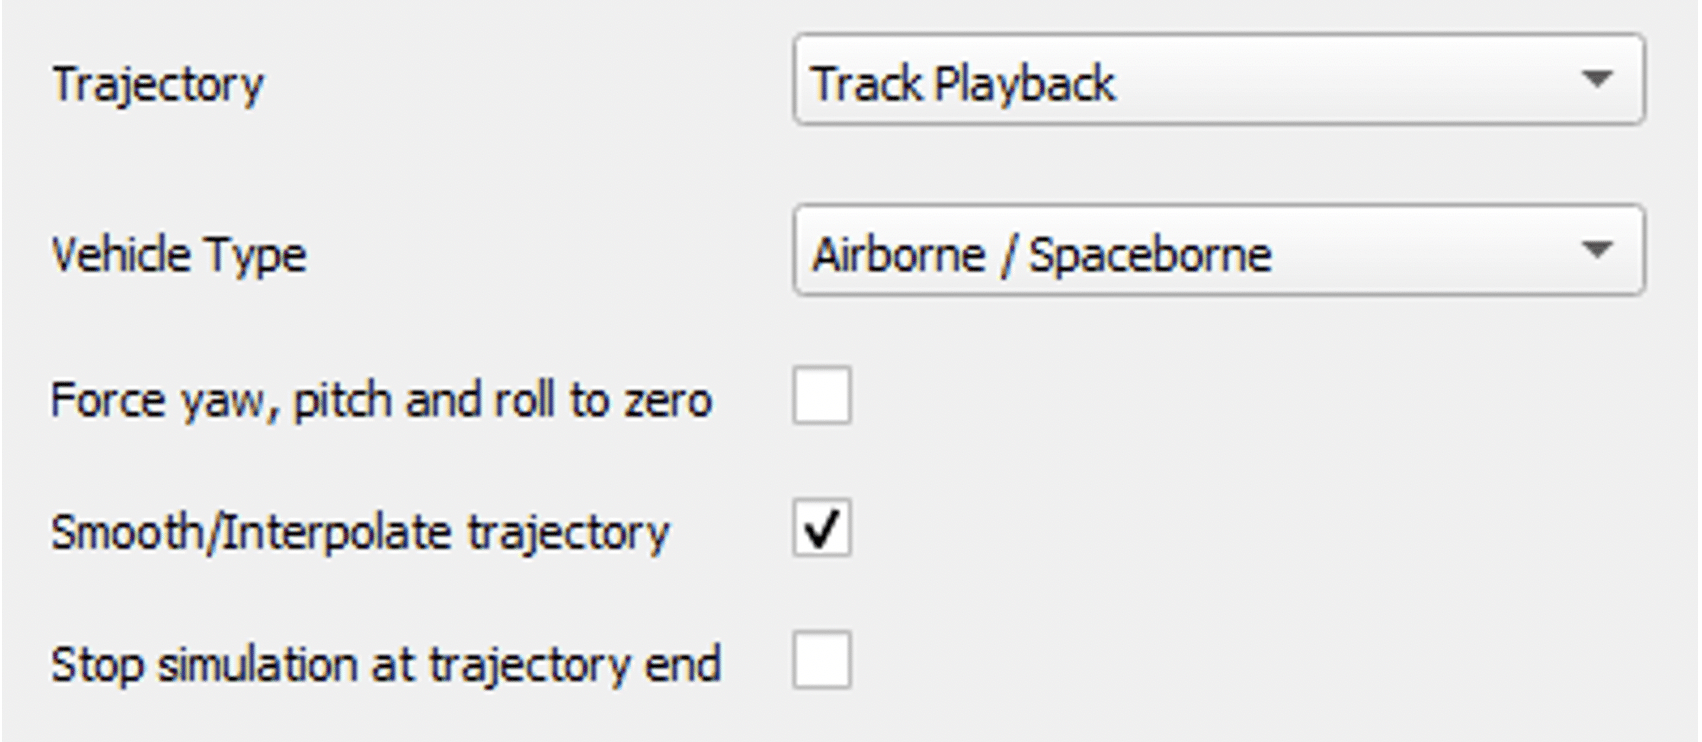
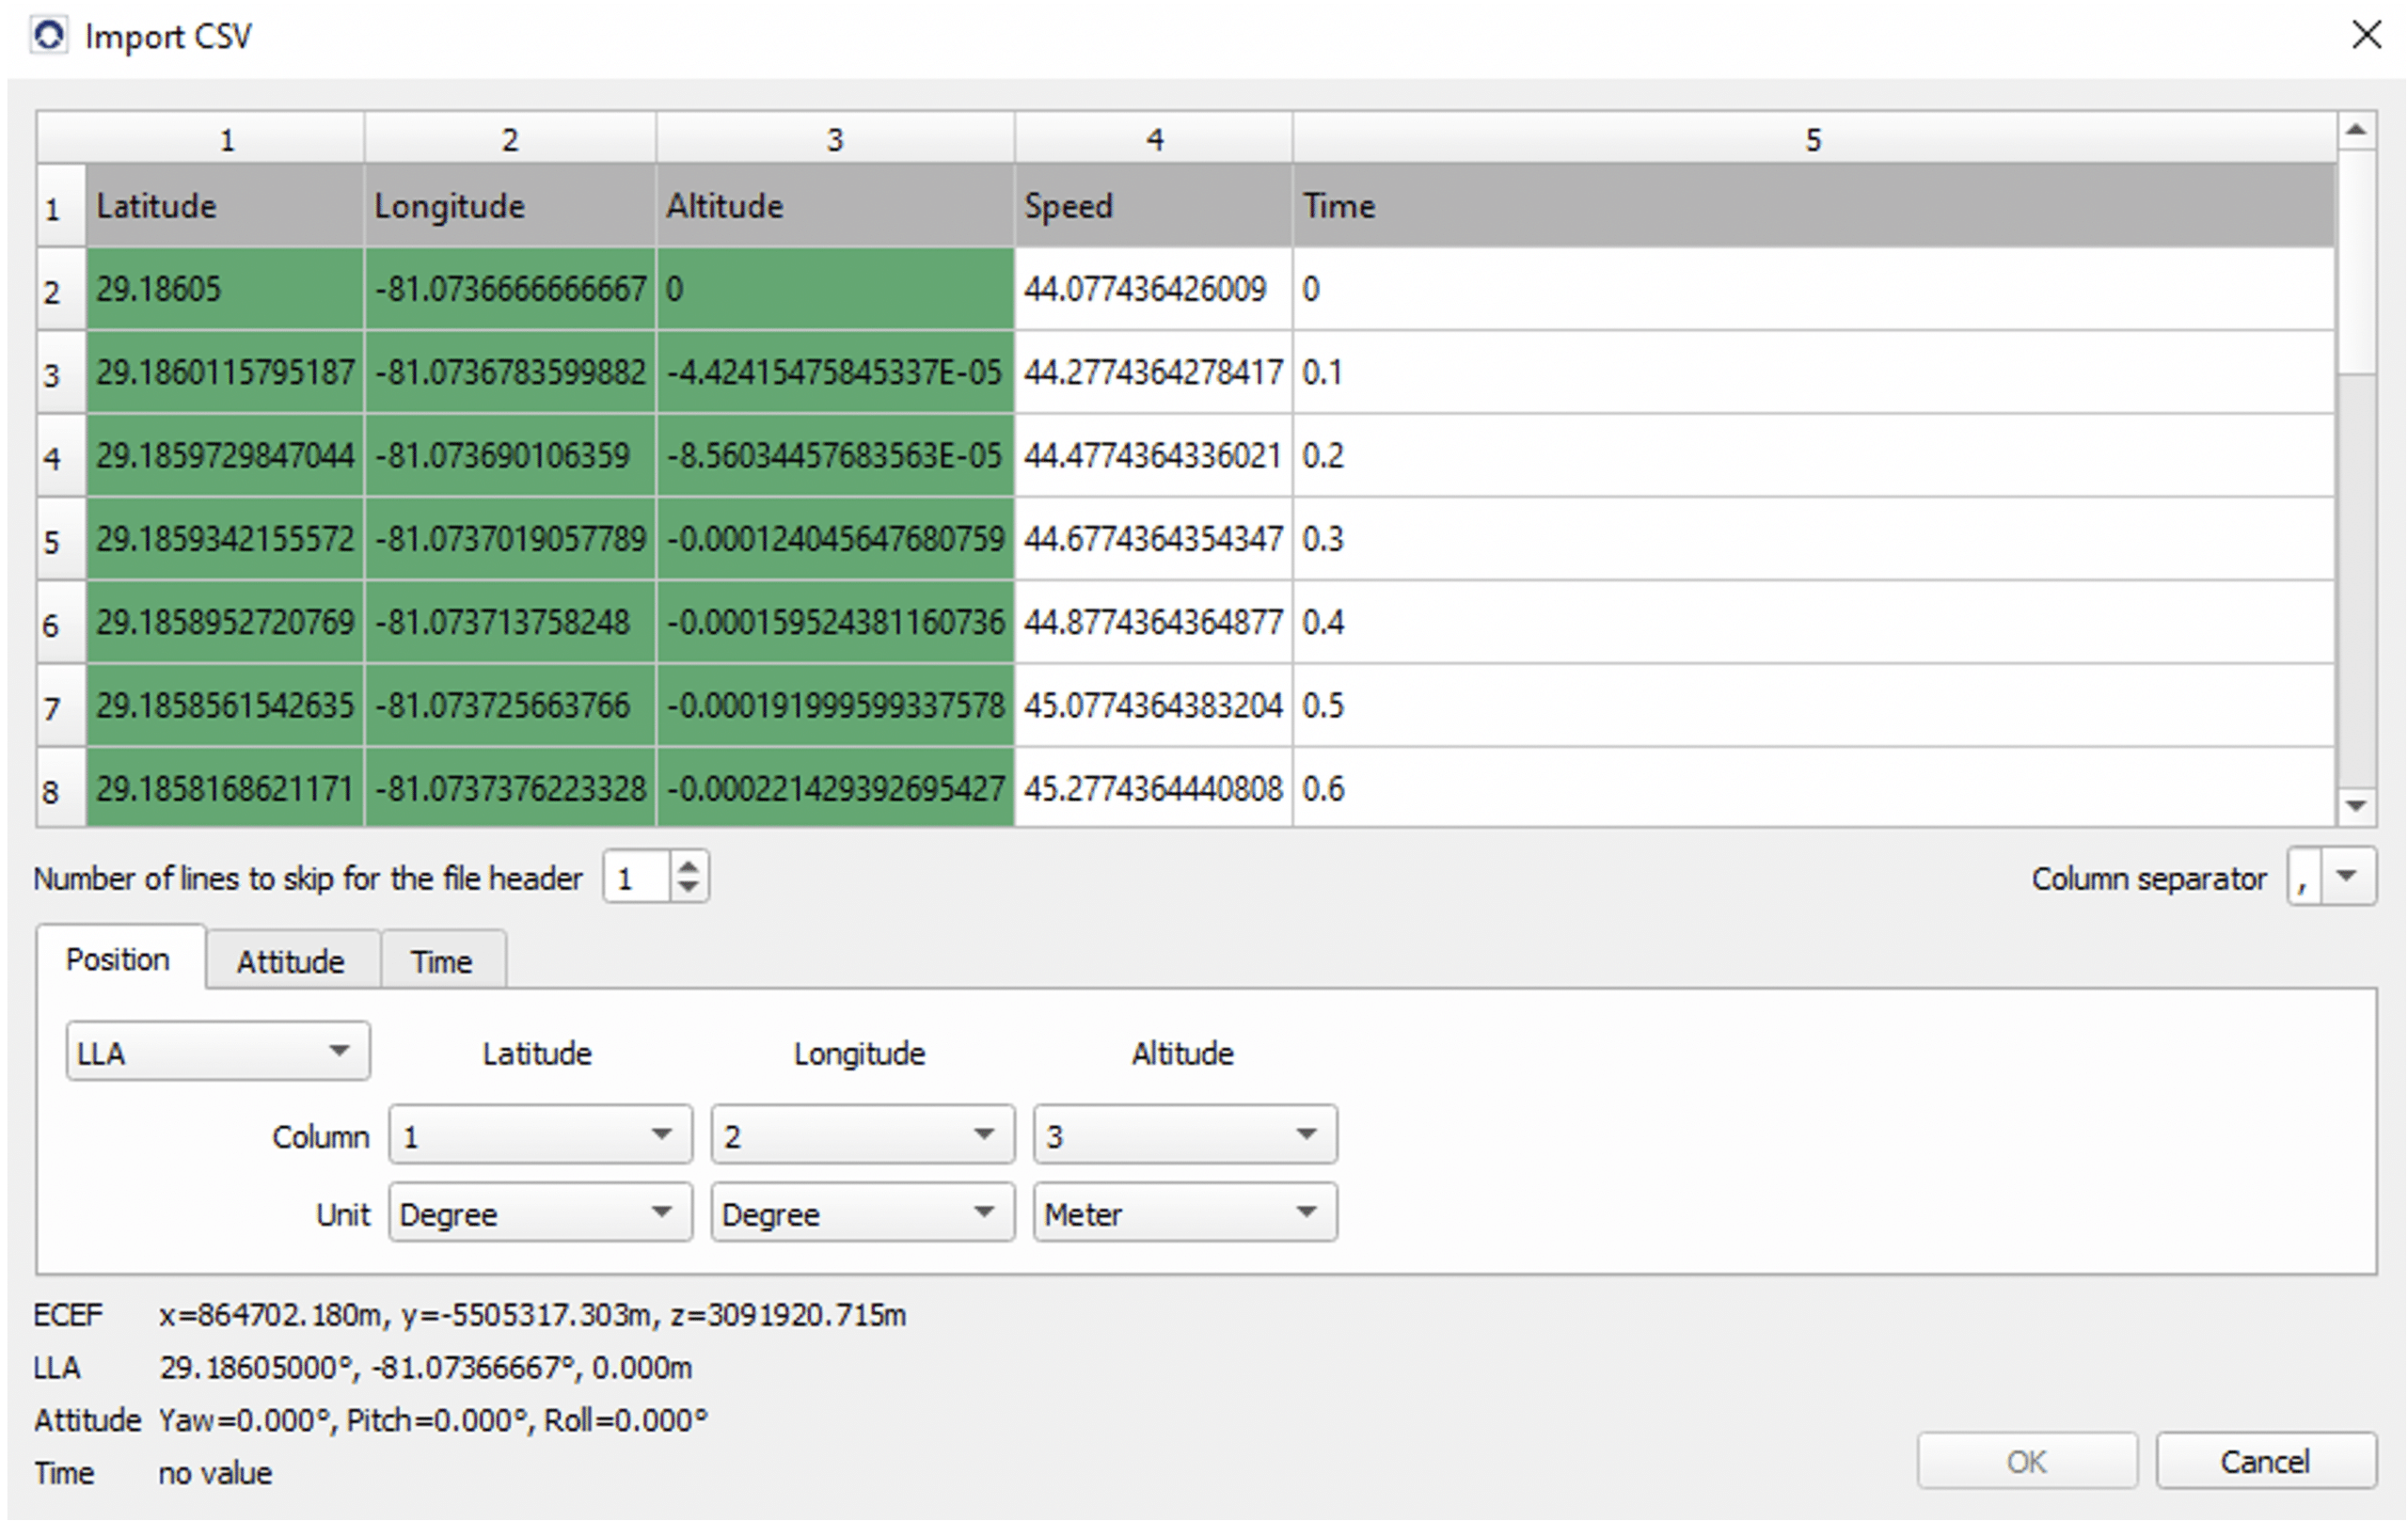
When processing the file for importation: select Column separator “,” and skip the first Header line generated by StudioView format. This will separate properly the values to process and exclude the useless lines.
Position format is LLA. Select appropriate columns and define the unit for each parameter. (see example below)
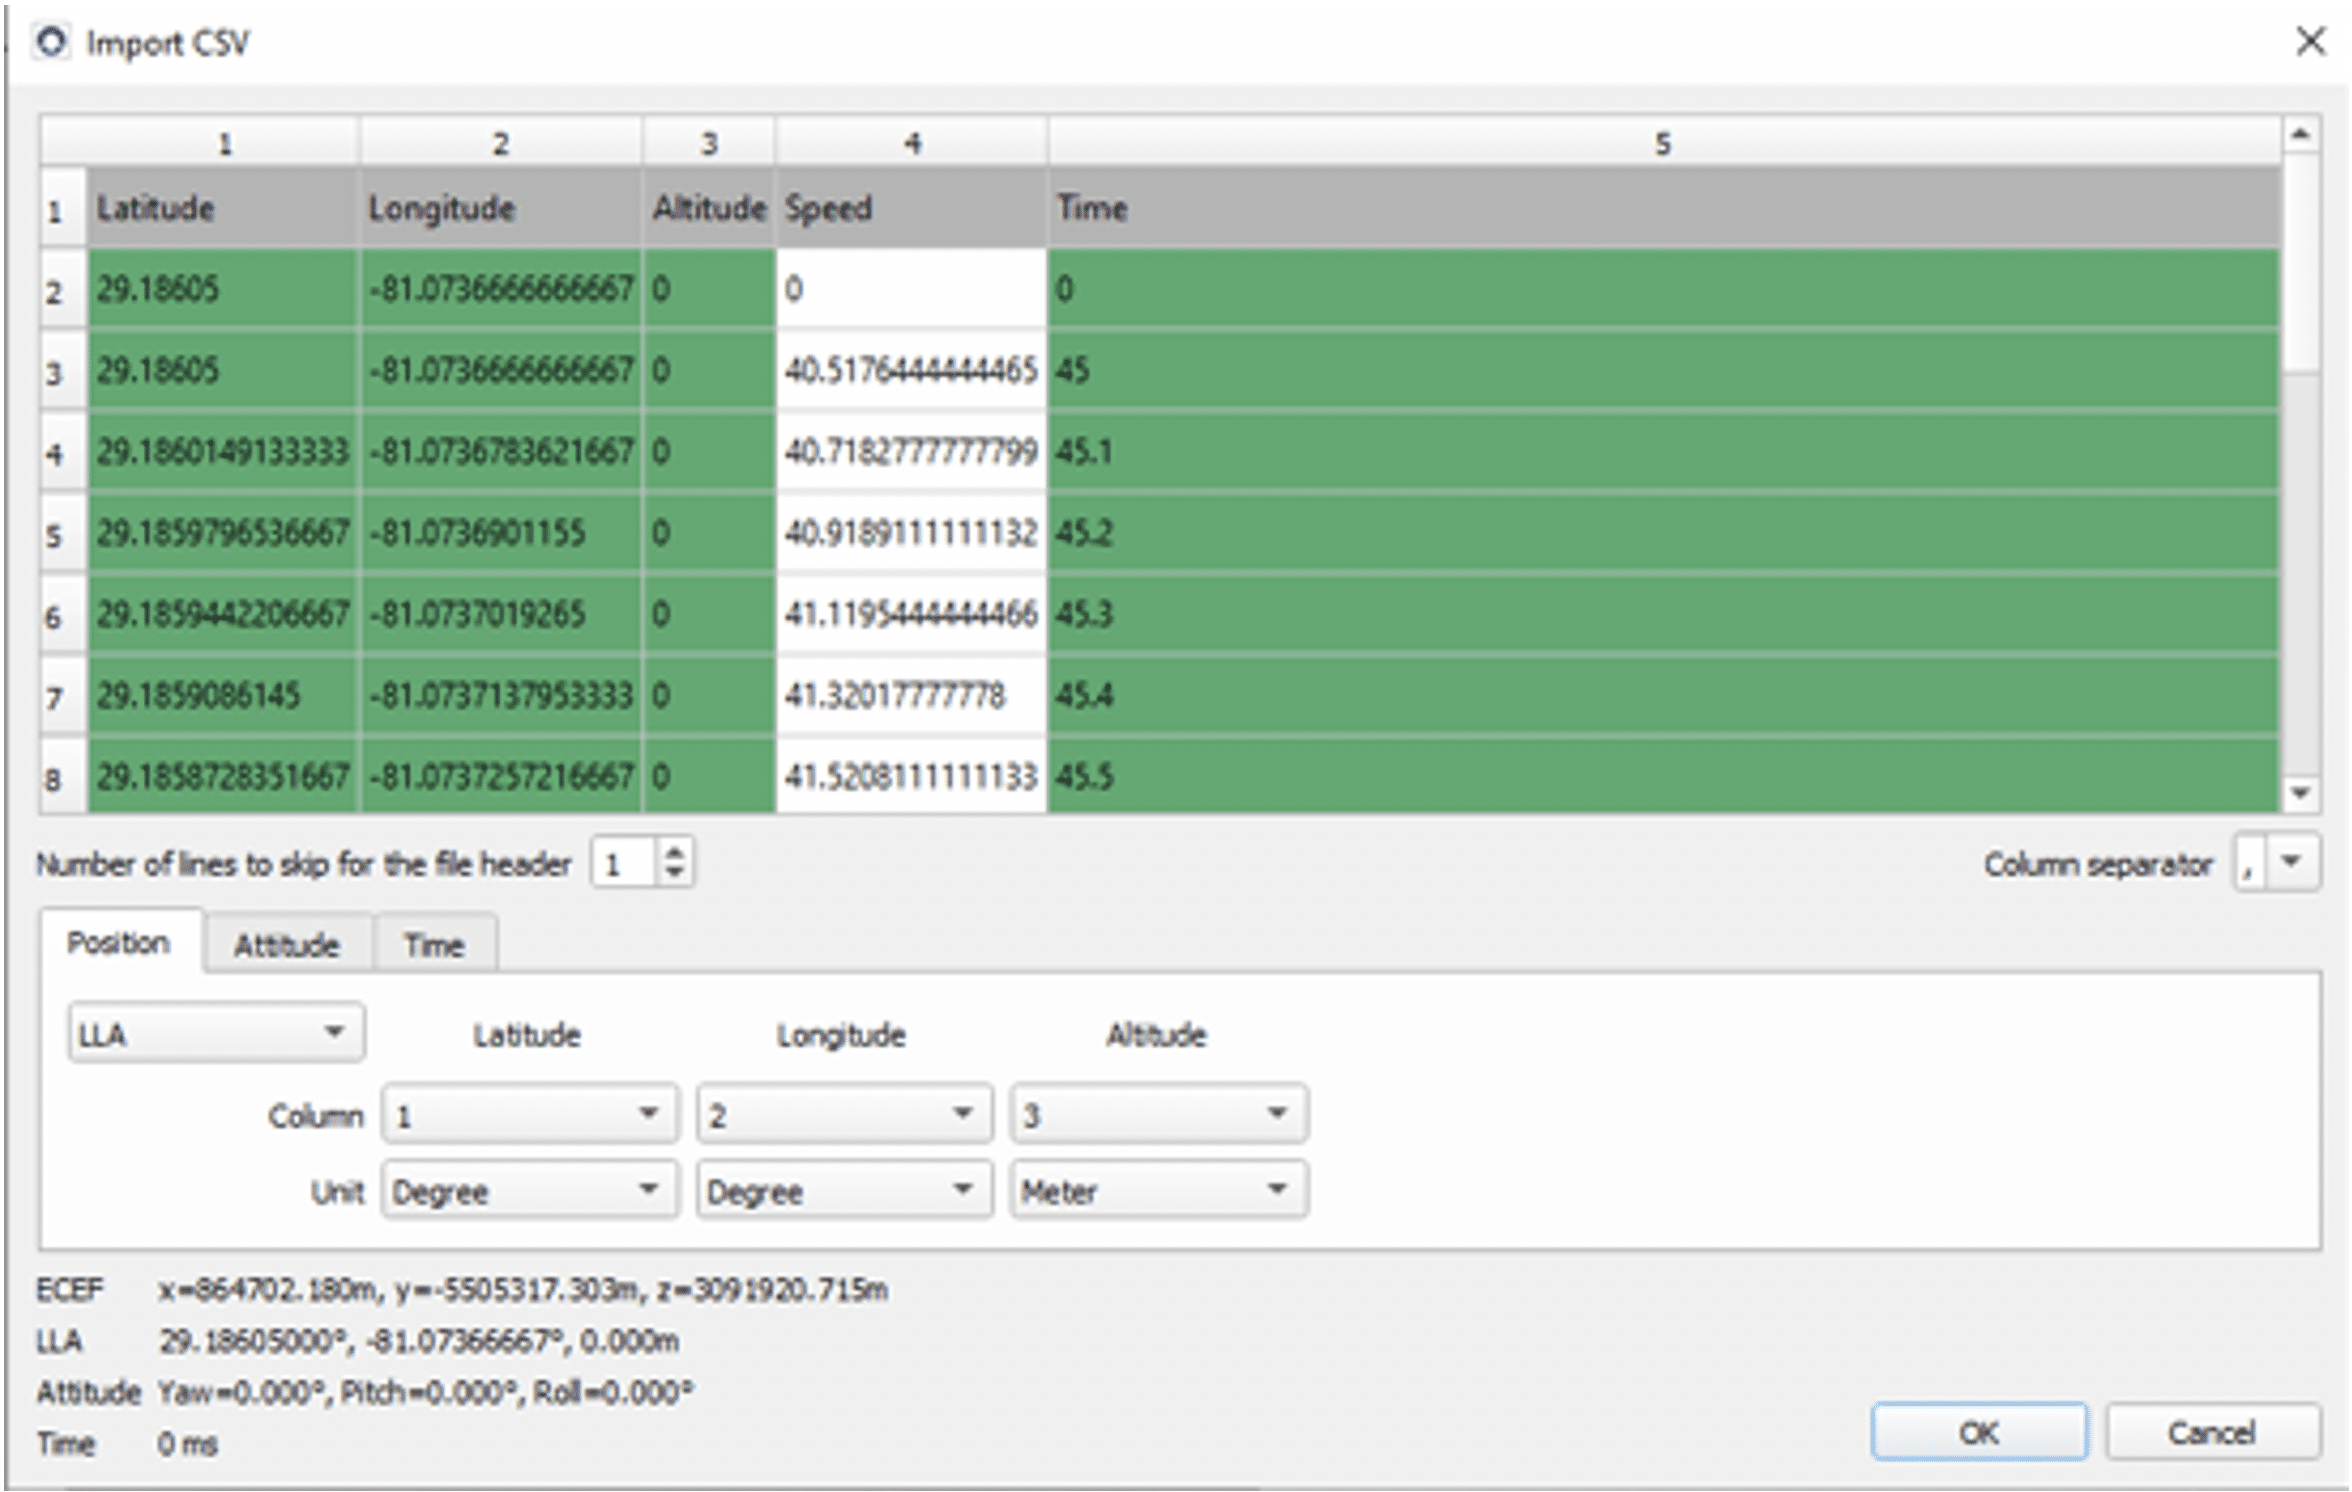
Attitude is not provided in the original StudioView file because this type of trajectory record has been done only with position change (through waypoint script) and with no change in pitch, roll, yaw parameters. Attitude setup can be skipped at this step. When importing RSG trajectory files, you will have the possibility to import also attitude changes (see dedicated application note available separately).
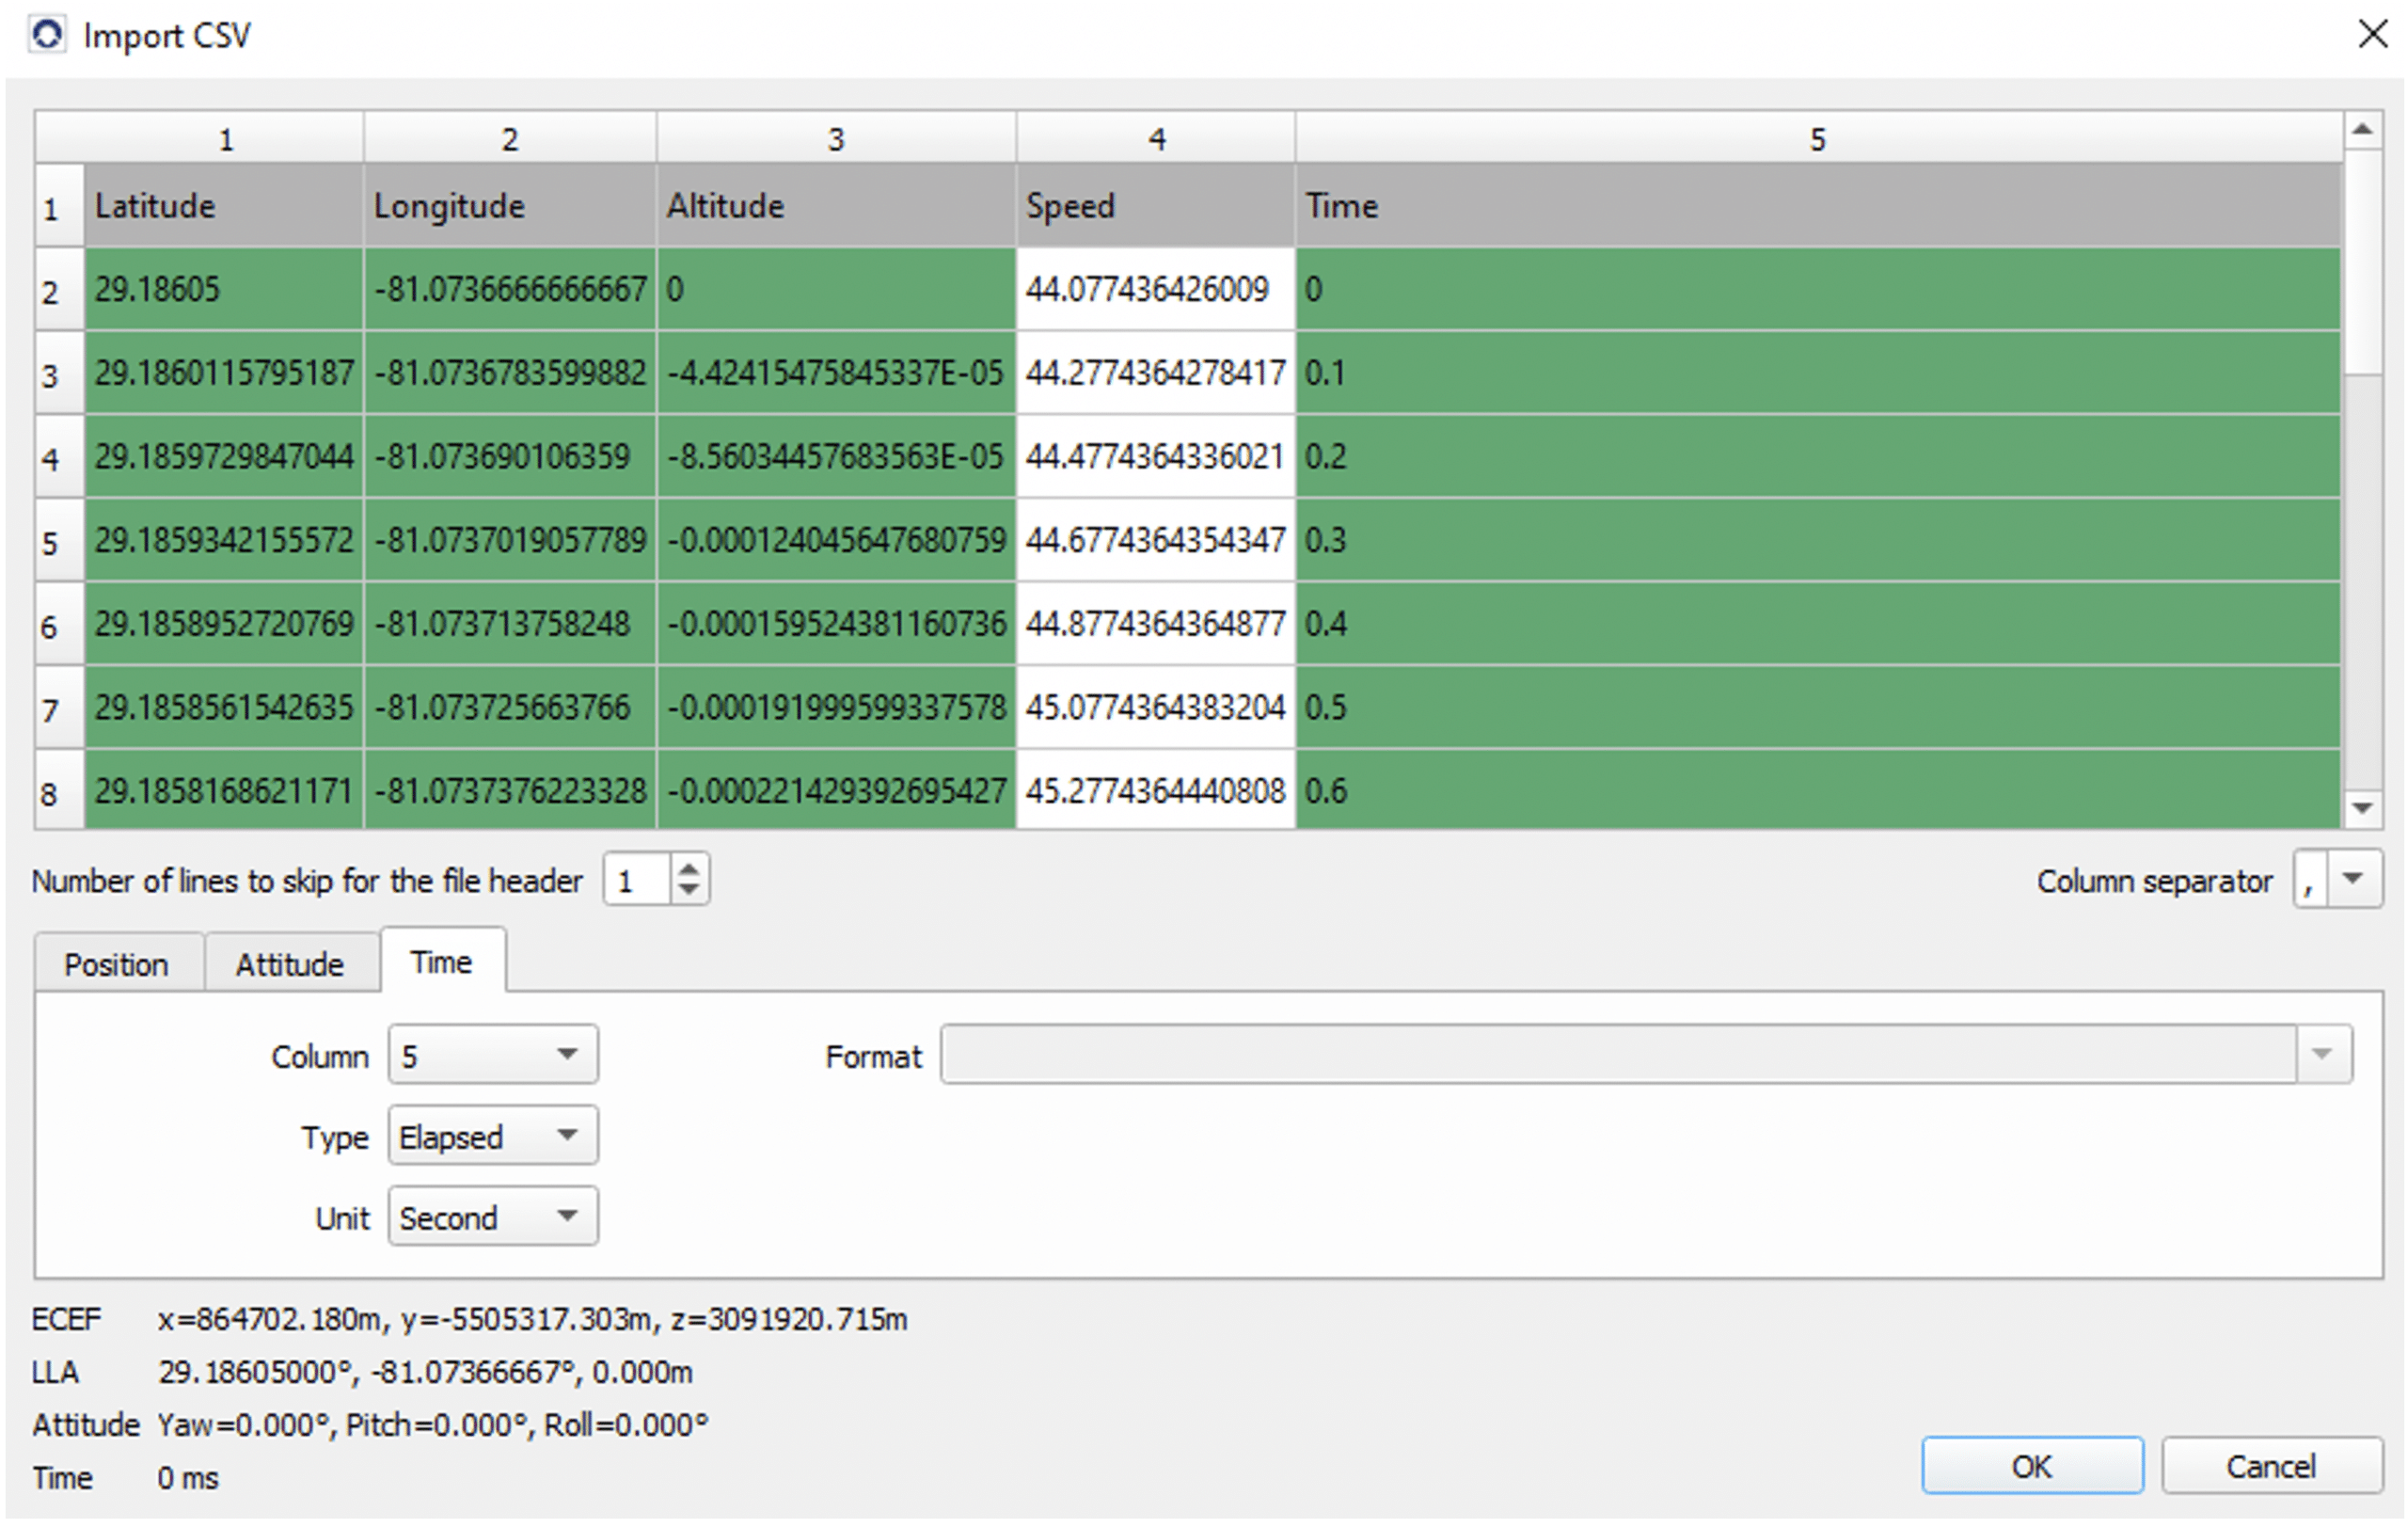
Time is available on column “5”. Select it and set Type as “Elapsed” and Unit in “Second”
Speed column (#4) is ignored in our case as Skydel does not need it for this import process when position and time stamps are provided.

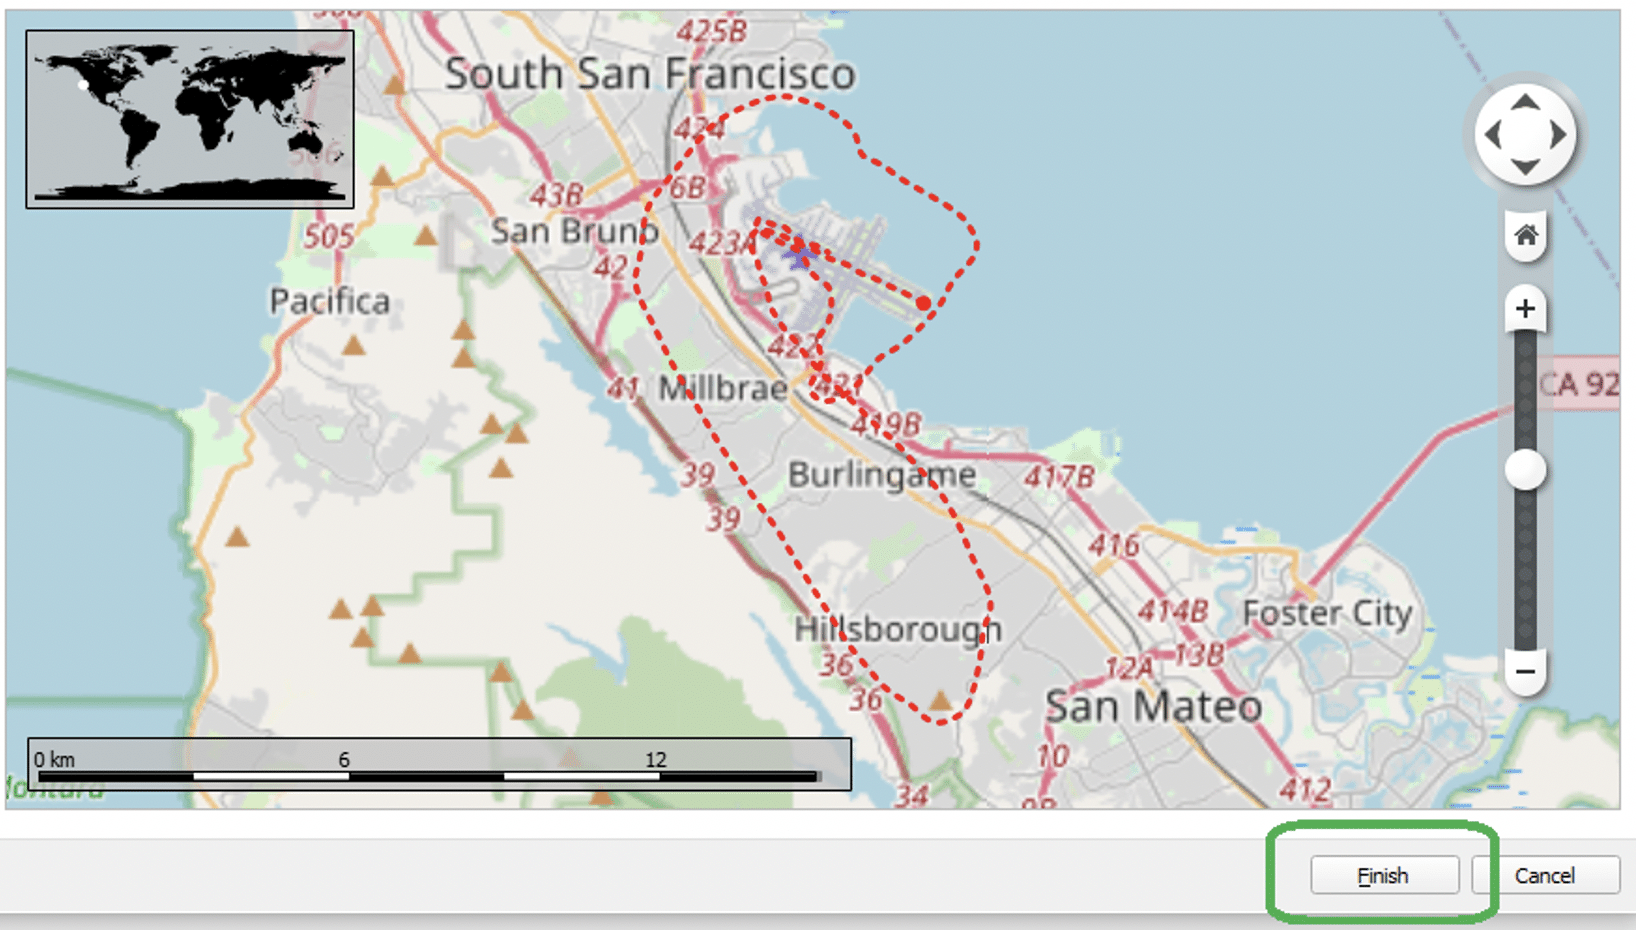
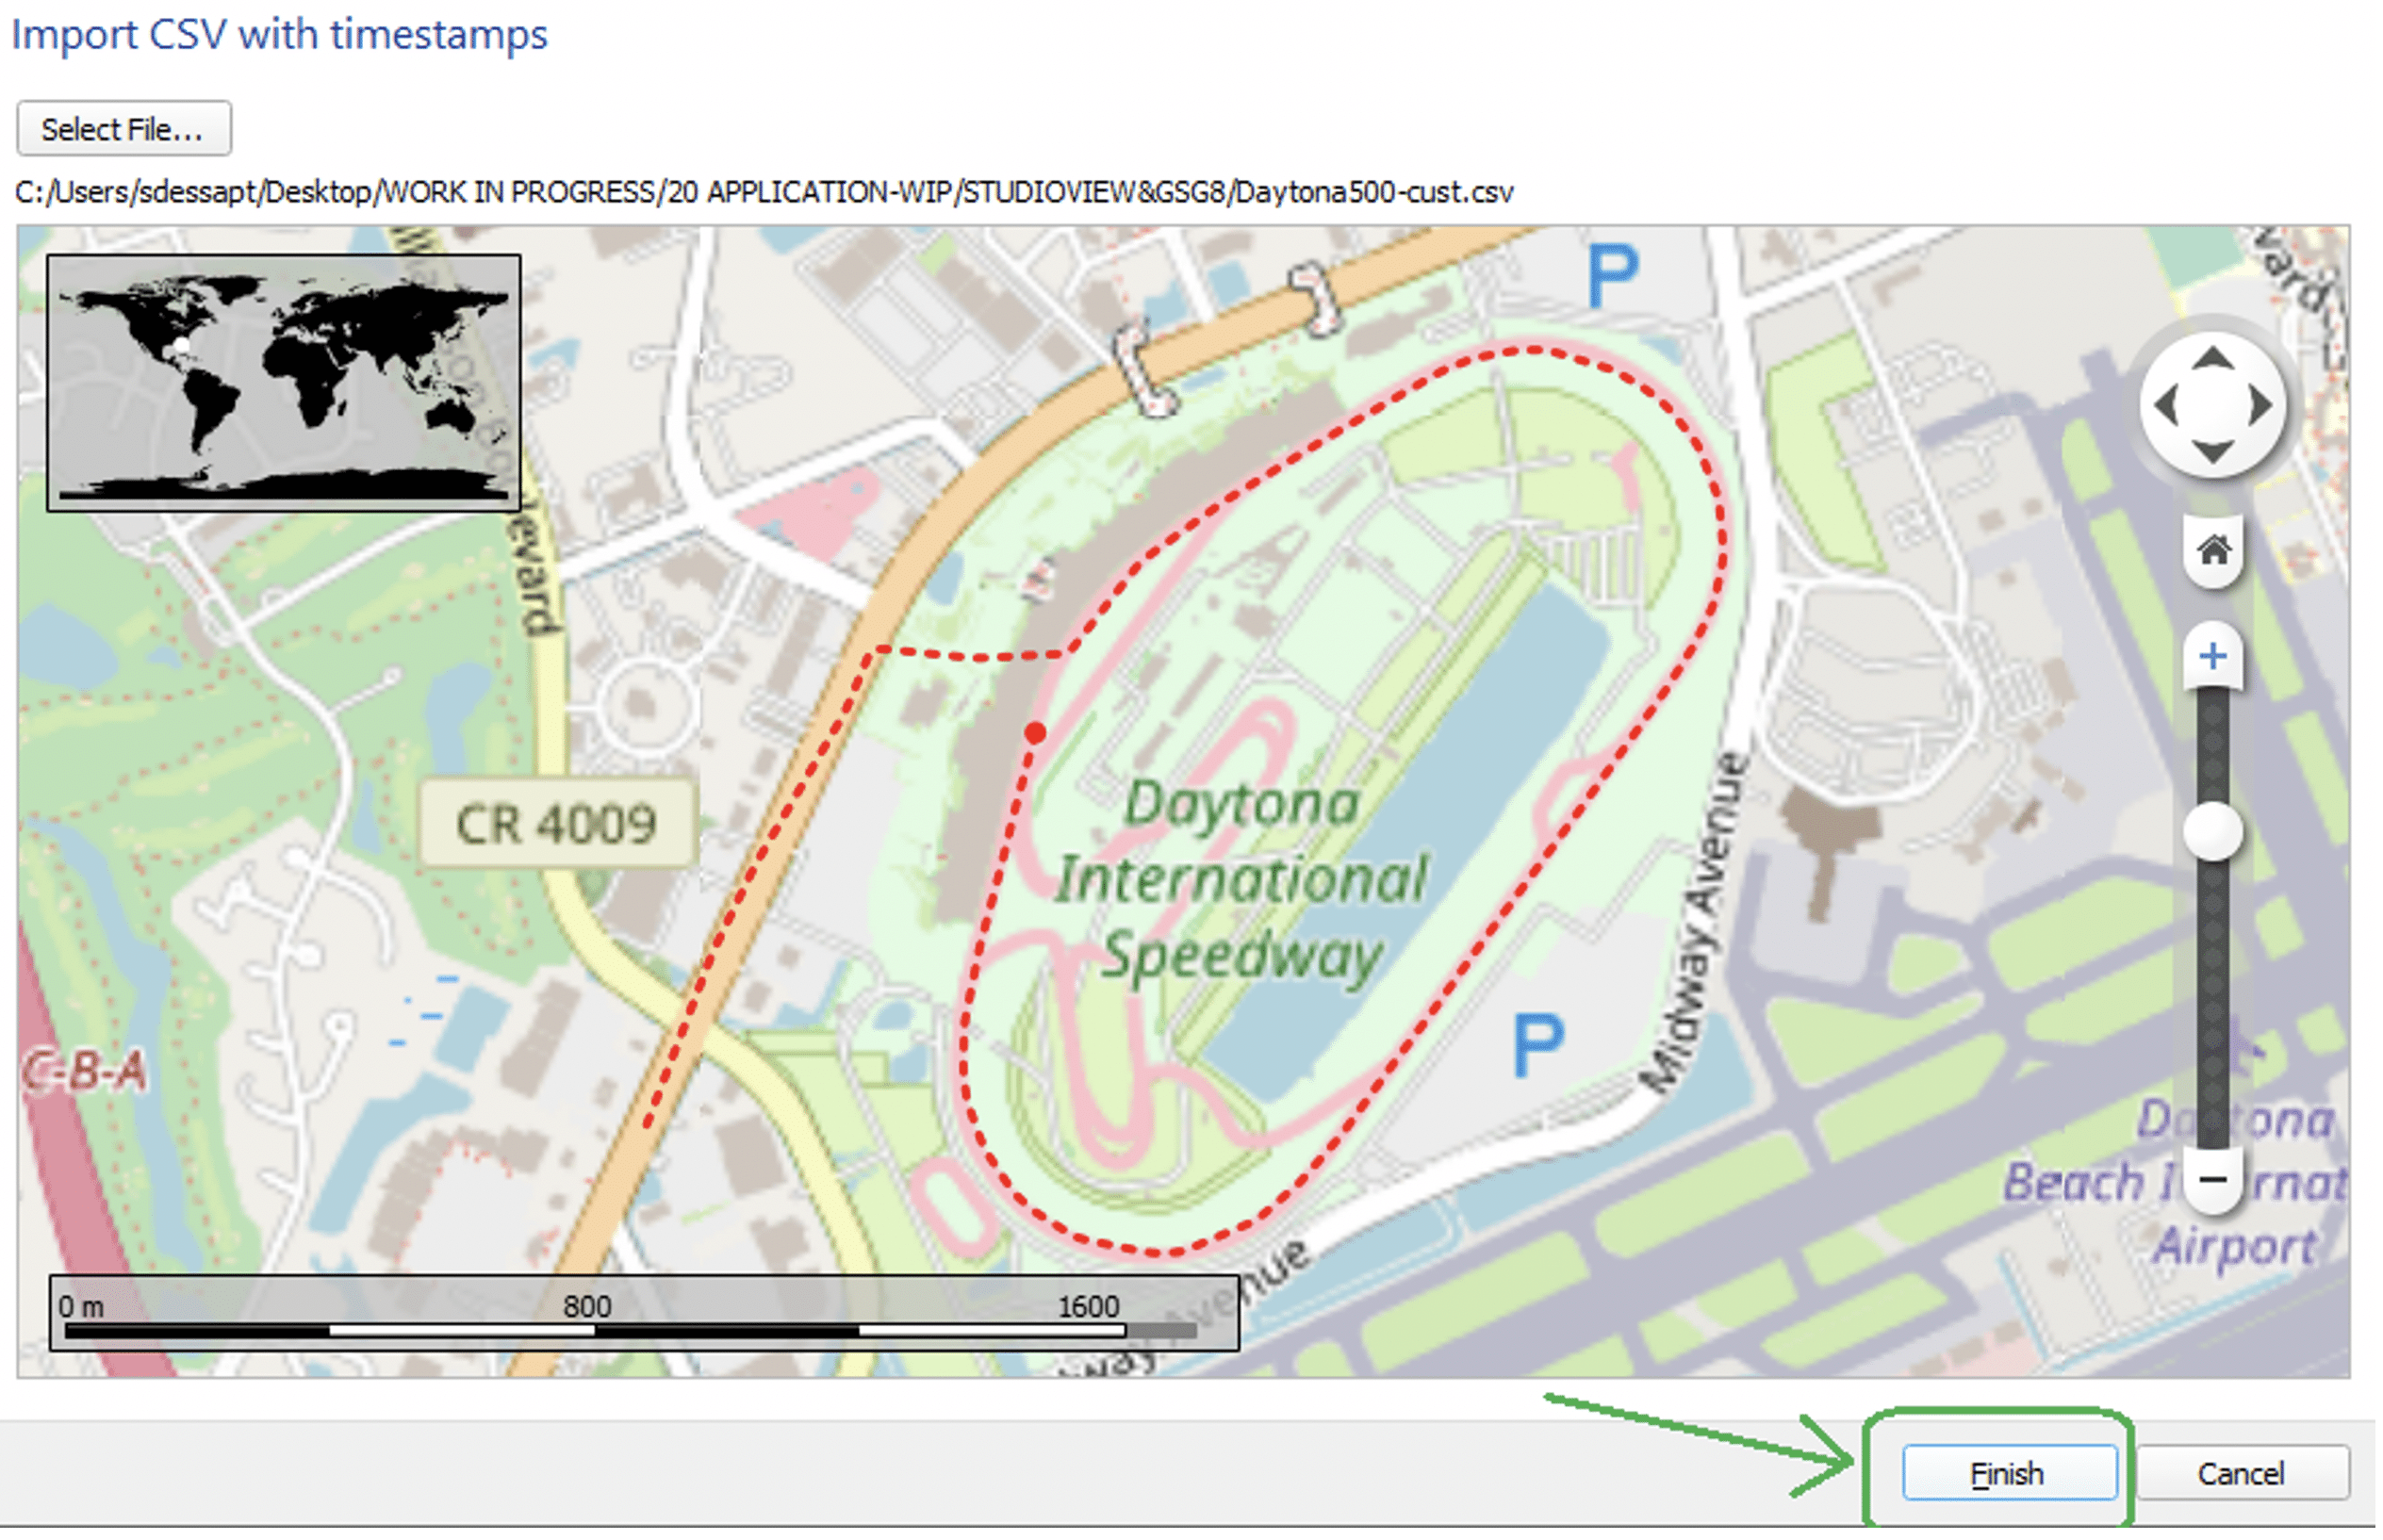
When all parameters are set, you can submit the import process by pressing “OK” and get the final setting as below. Then you can include the trajectory into your scenario (skydel.sdx file) by clicking on “Finish”.
Warning: In some cases when importing files, you can get warning message mentioning “uncontinuous time interval between positions”. This can be caused by previous interpolation processing from StudioView. In this case, check points in your original file and remove it. In most cases, you can find such behavior on the last points of the file (see example below).
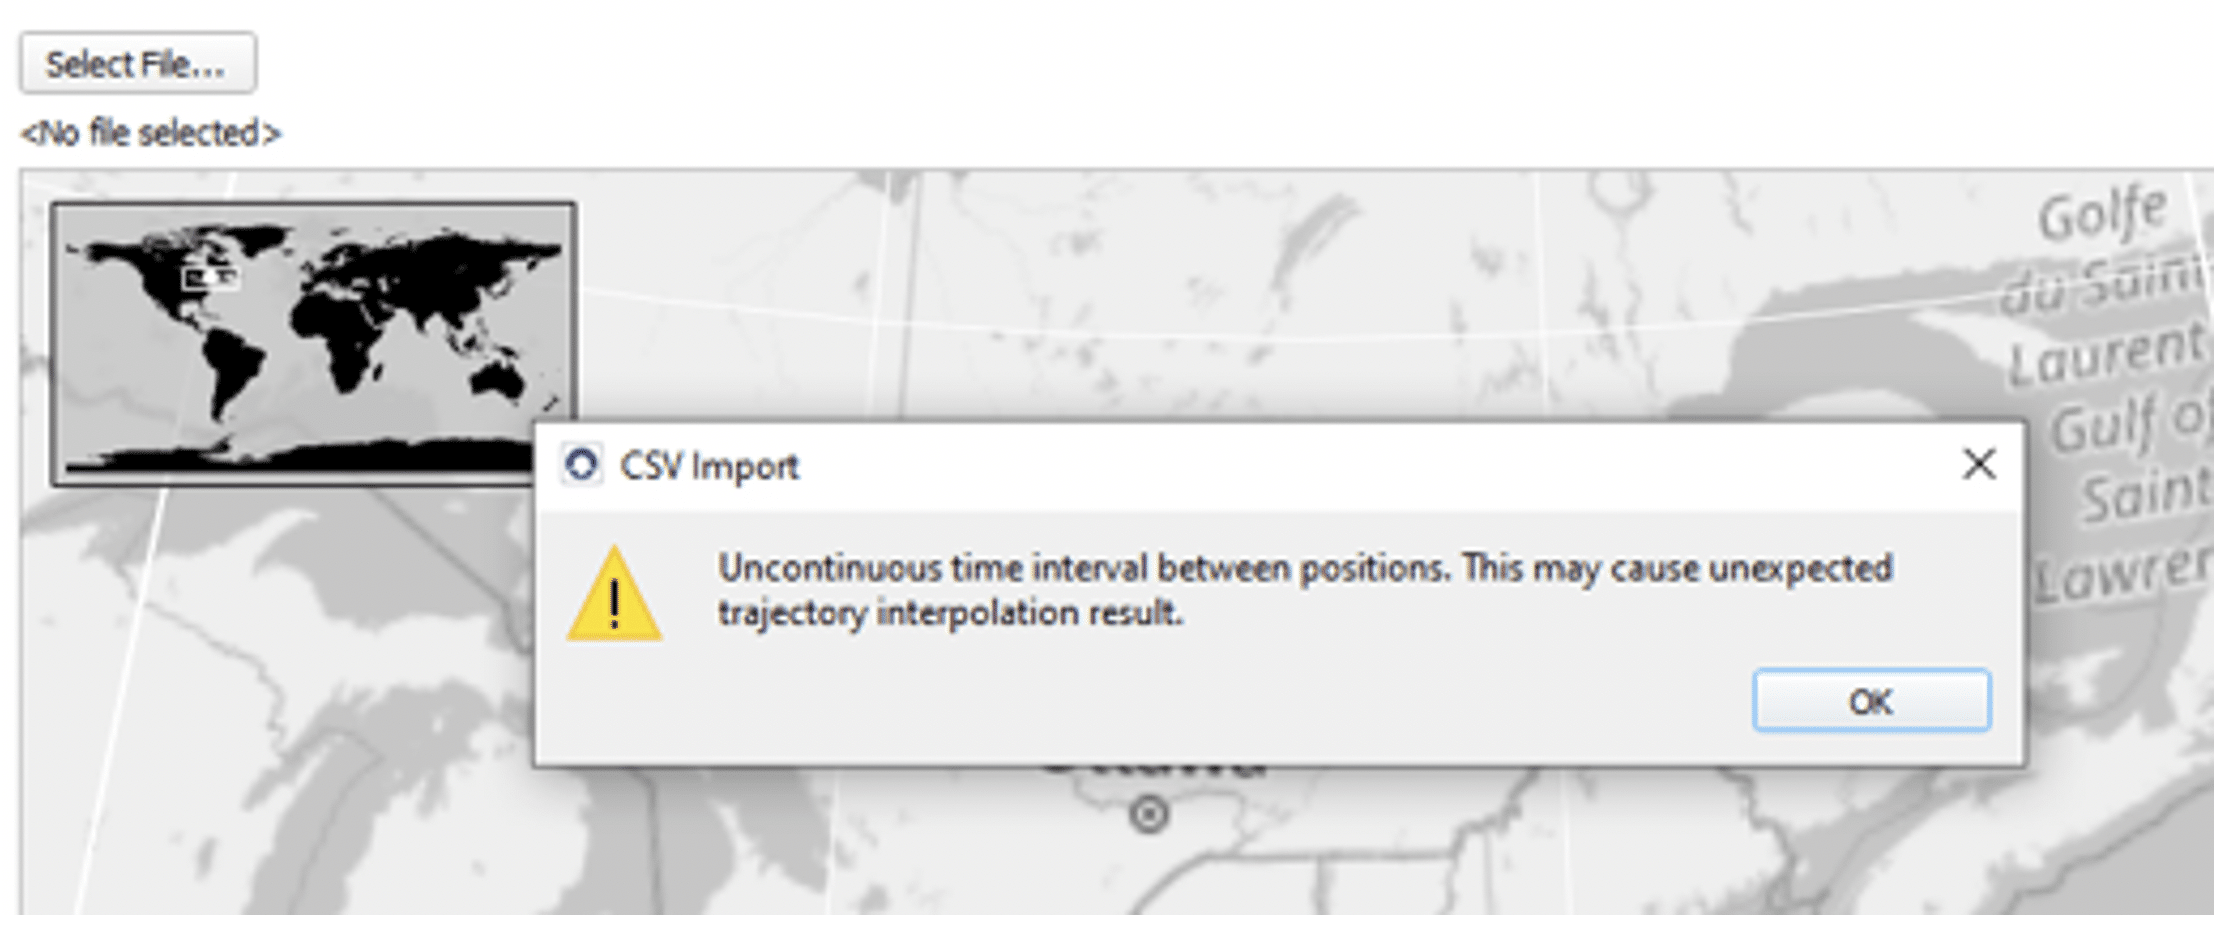
Below, this example shows that last point has not 0.1s time interval, so a warning is raised by Skydel

Launch your Skydel scenario
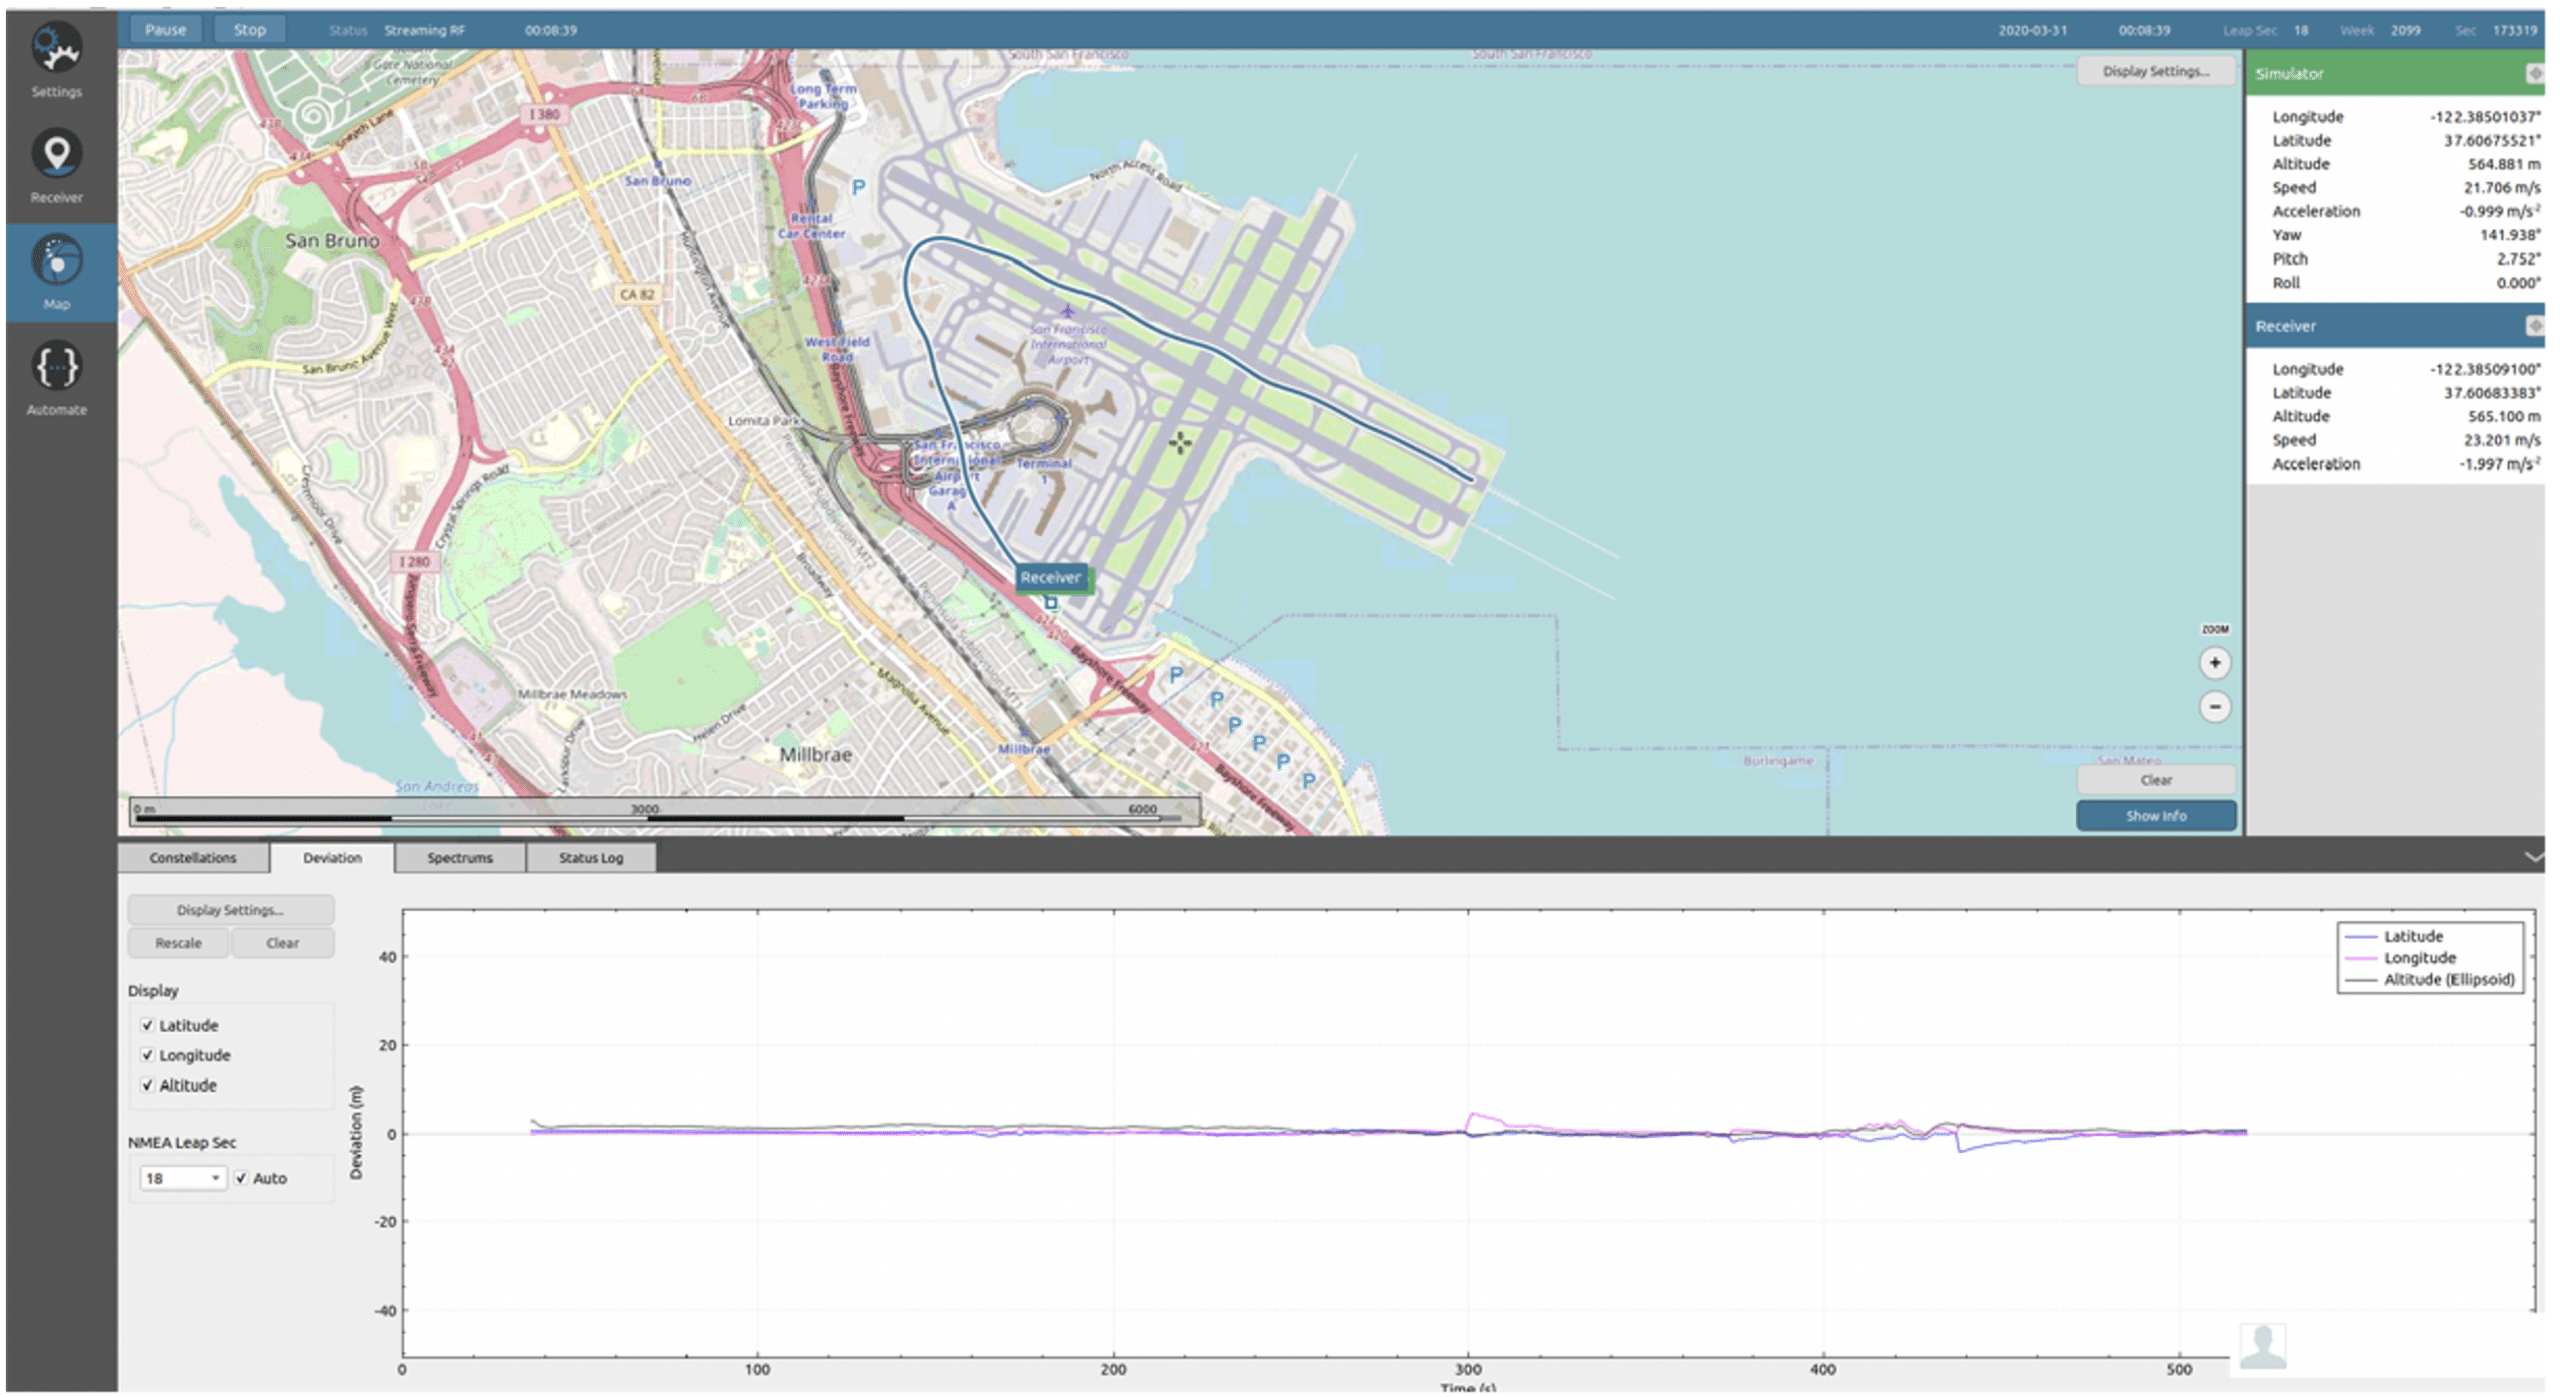
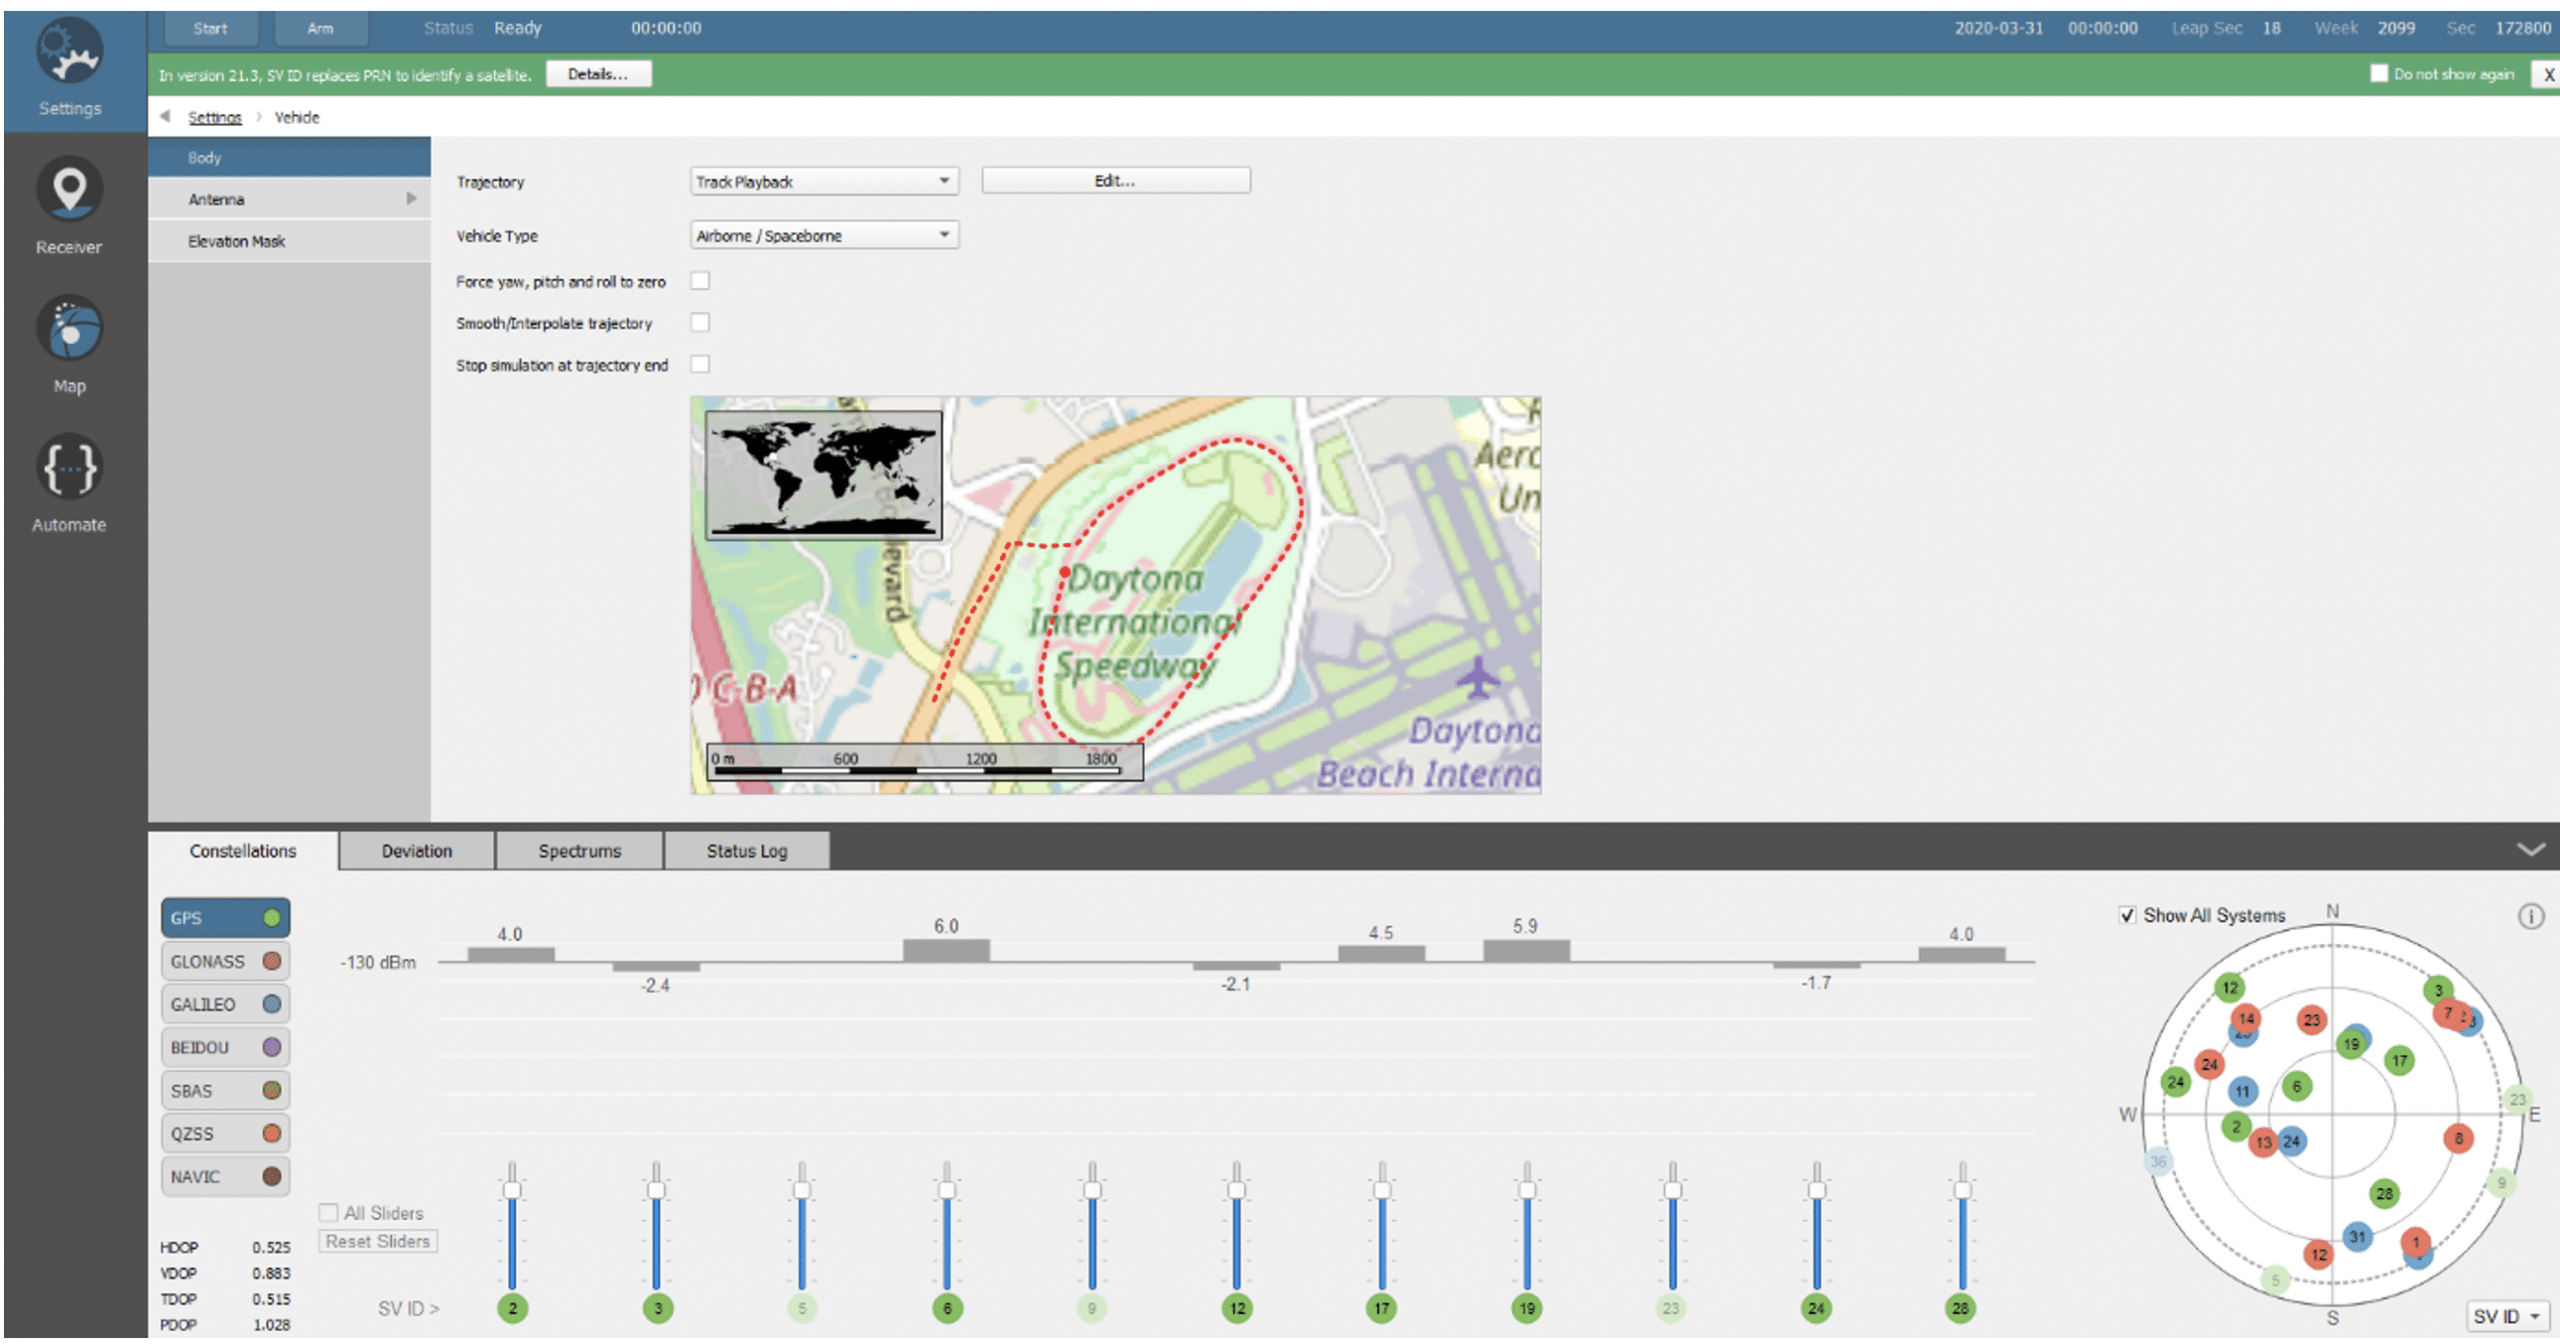
Once your trajectory file is loaded, you can set your Skydel configuration file (choosing your constellations, frequency bands, navigation parameters etc…) and launch the simulation with the START button.
Example 2 – car trajectory
Proceed to do the same for another trajectory file.
Load Daytona500.nmea template file from StudioView.
You can customize your file with new waypoints by clicking on the map
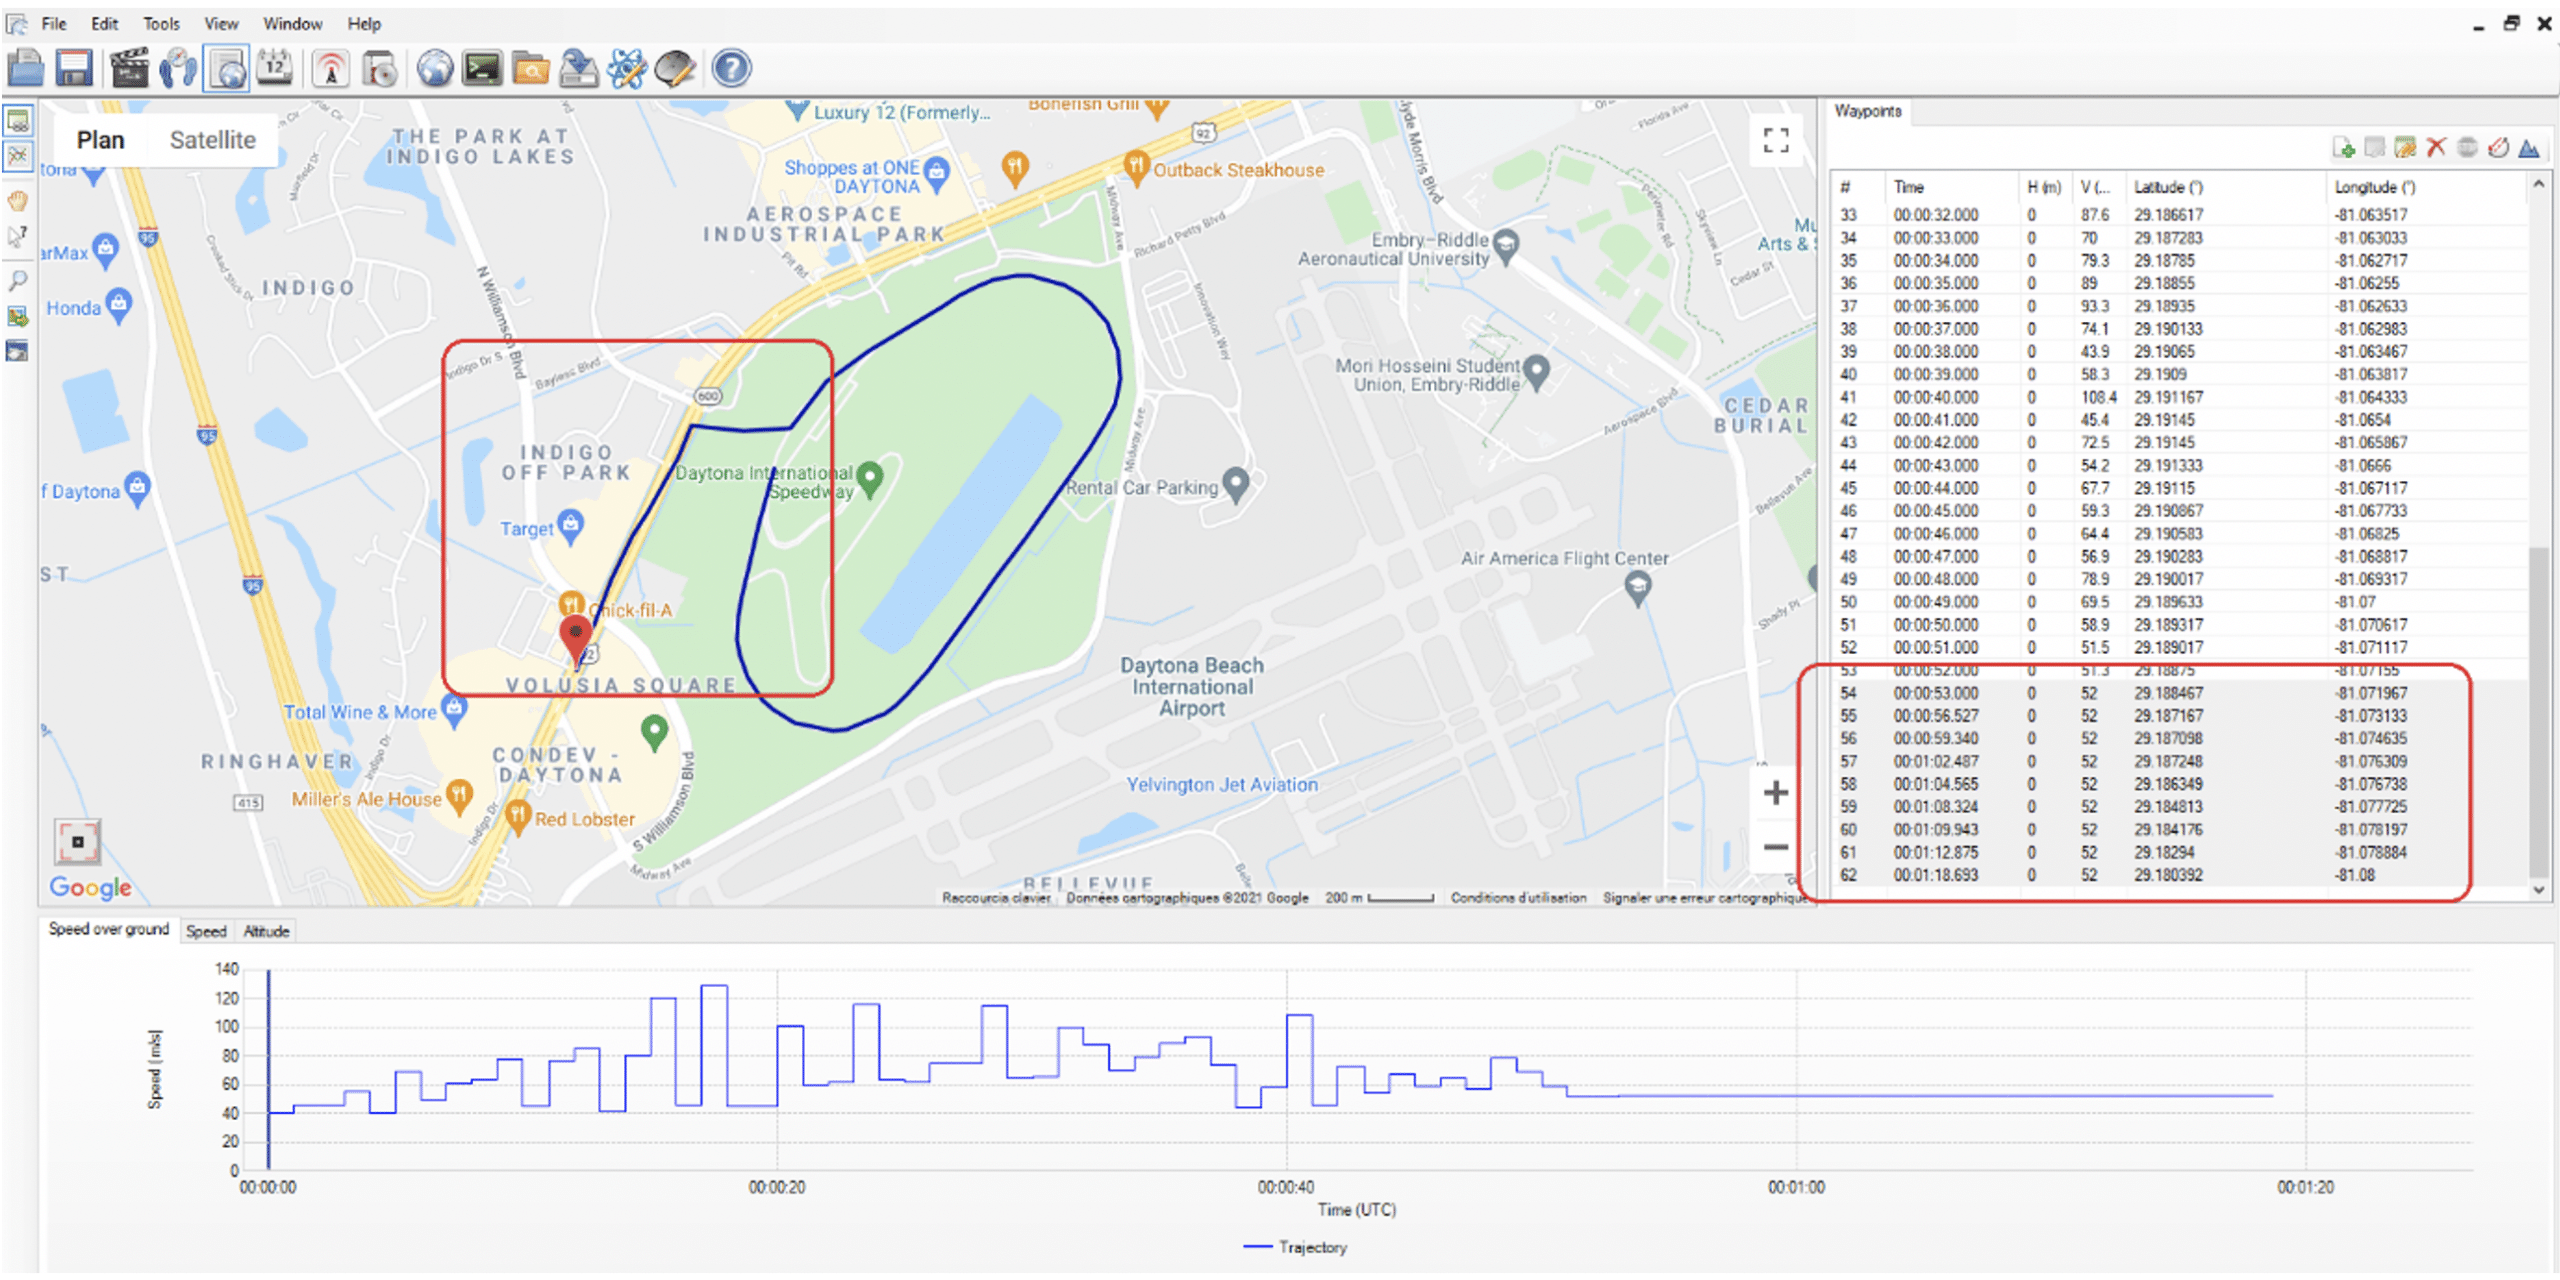
Convert the file into CSV with 0.1s interpolation
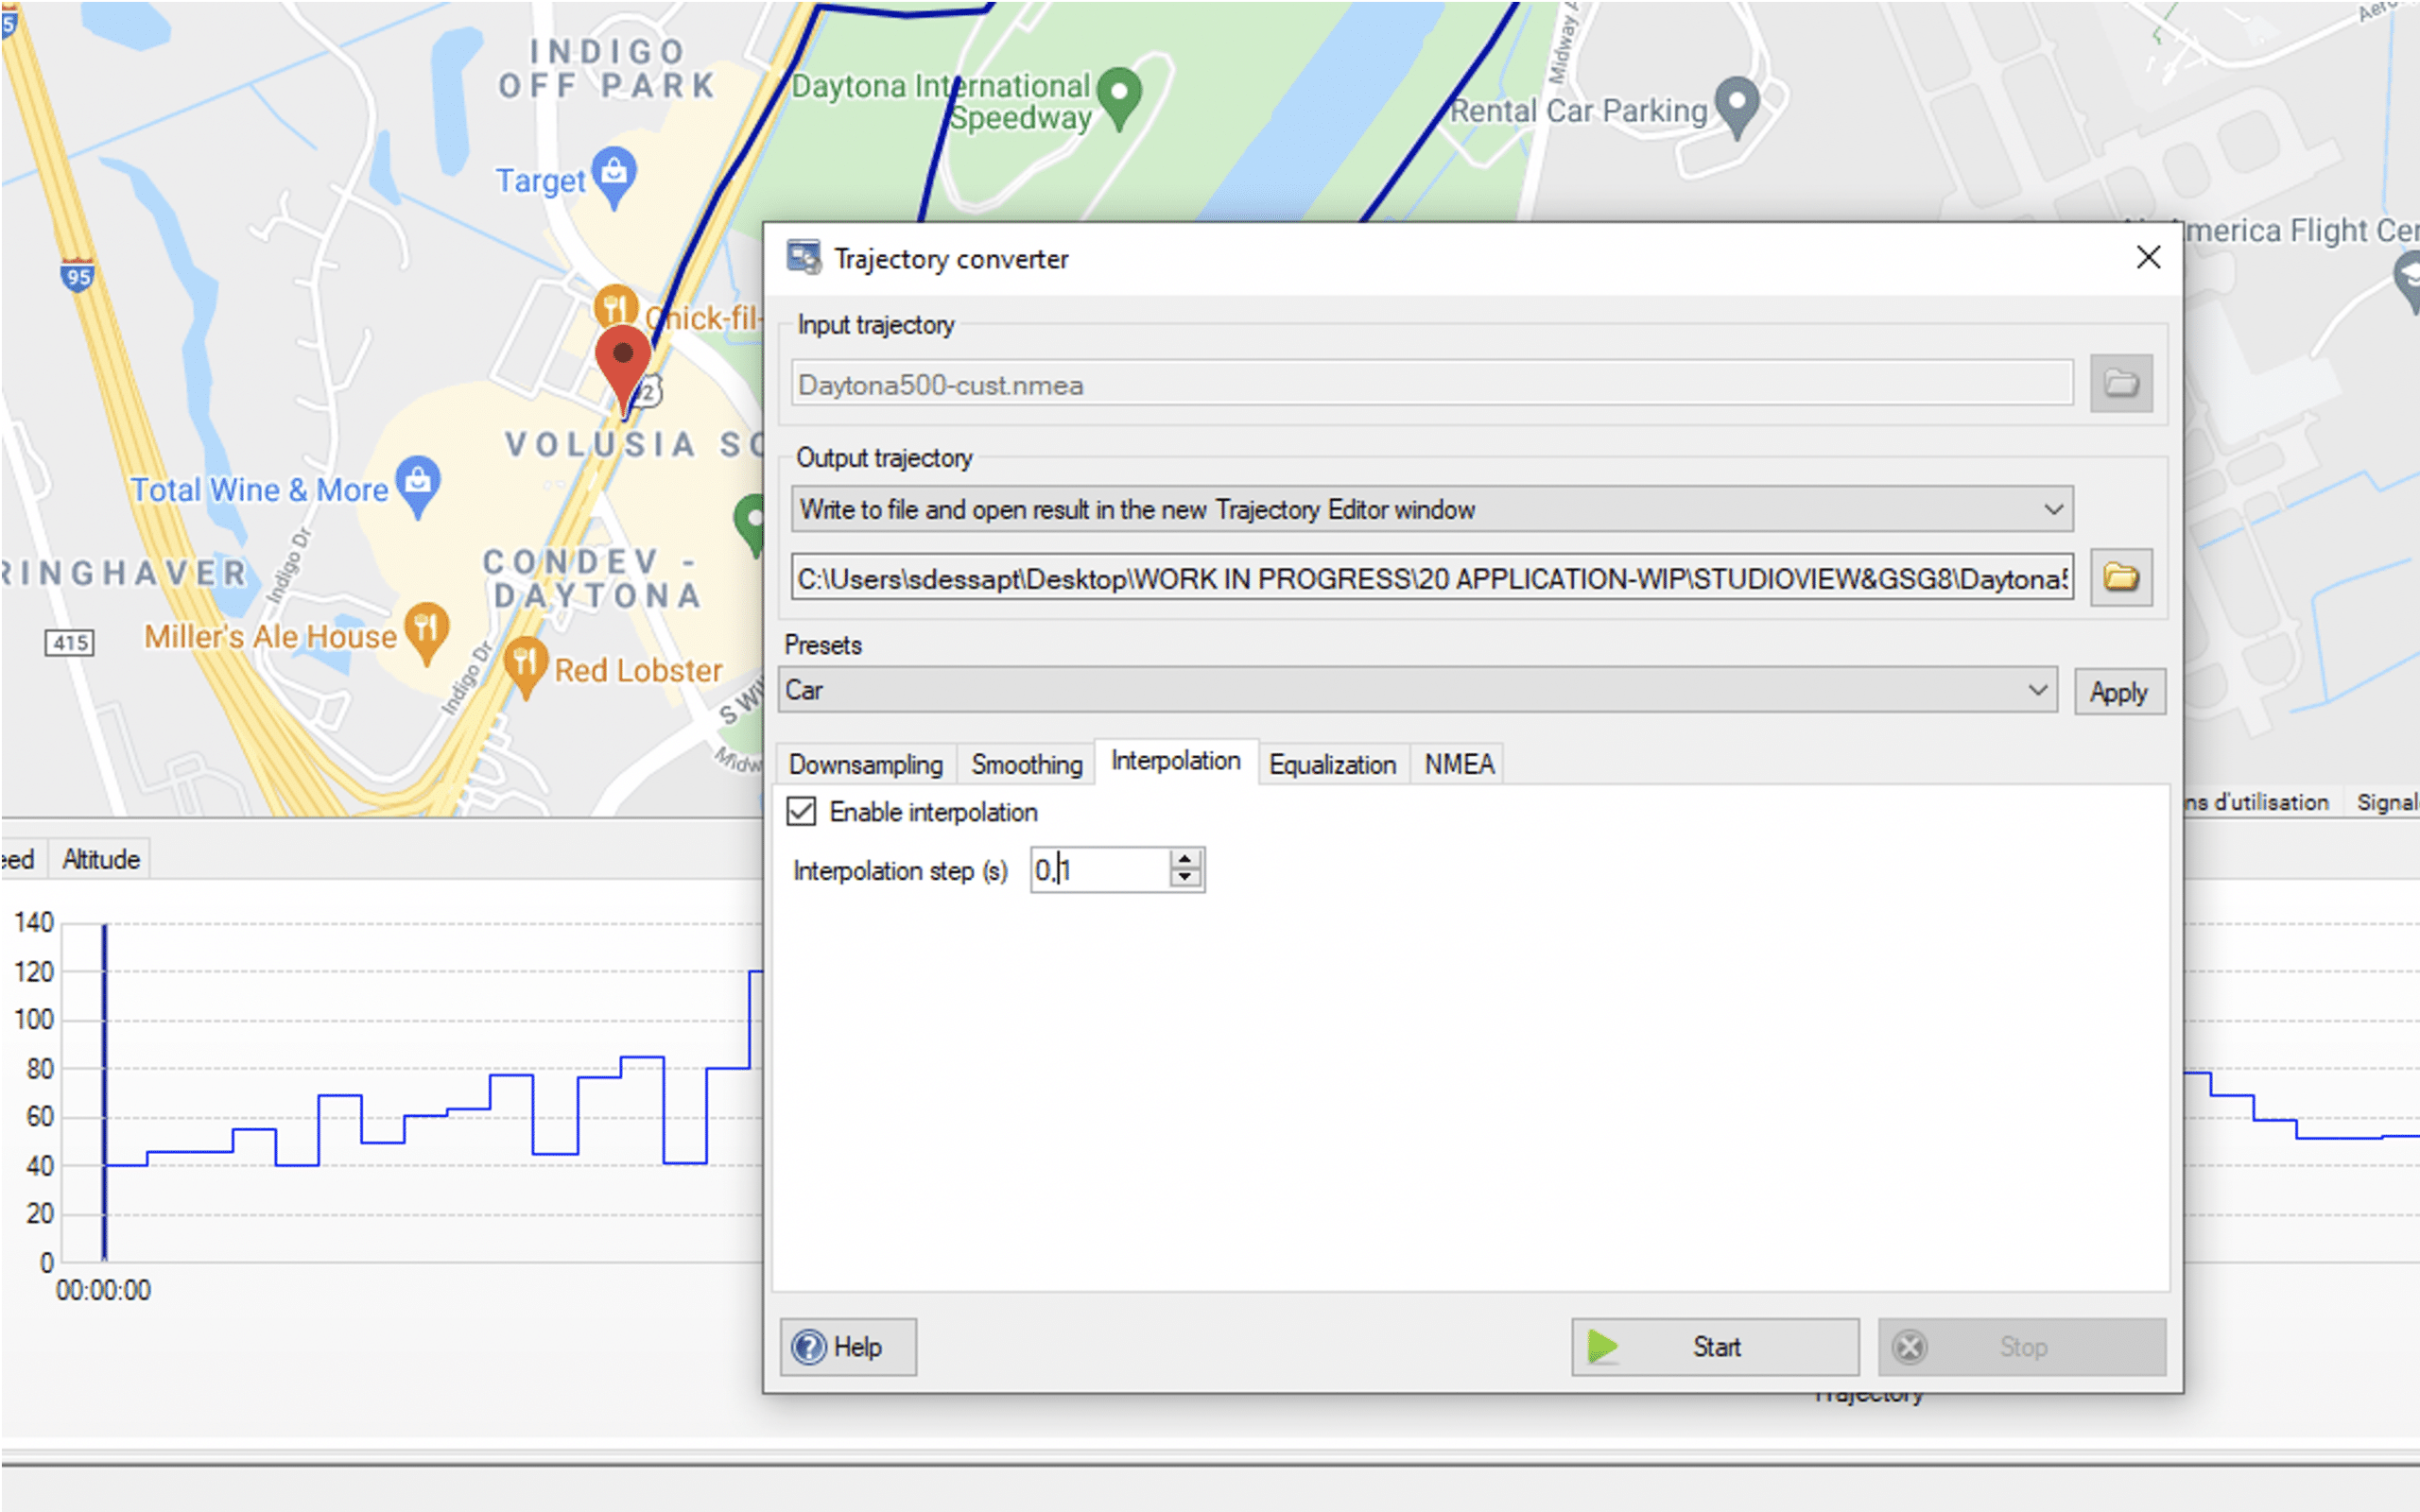
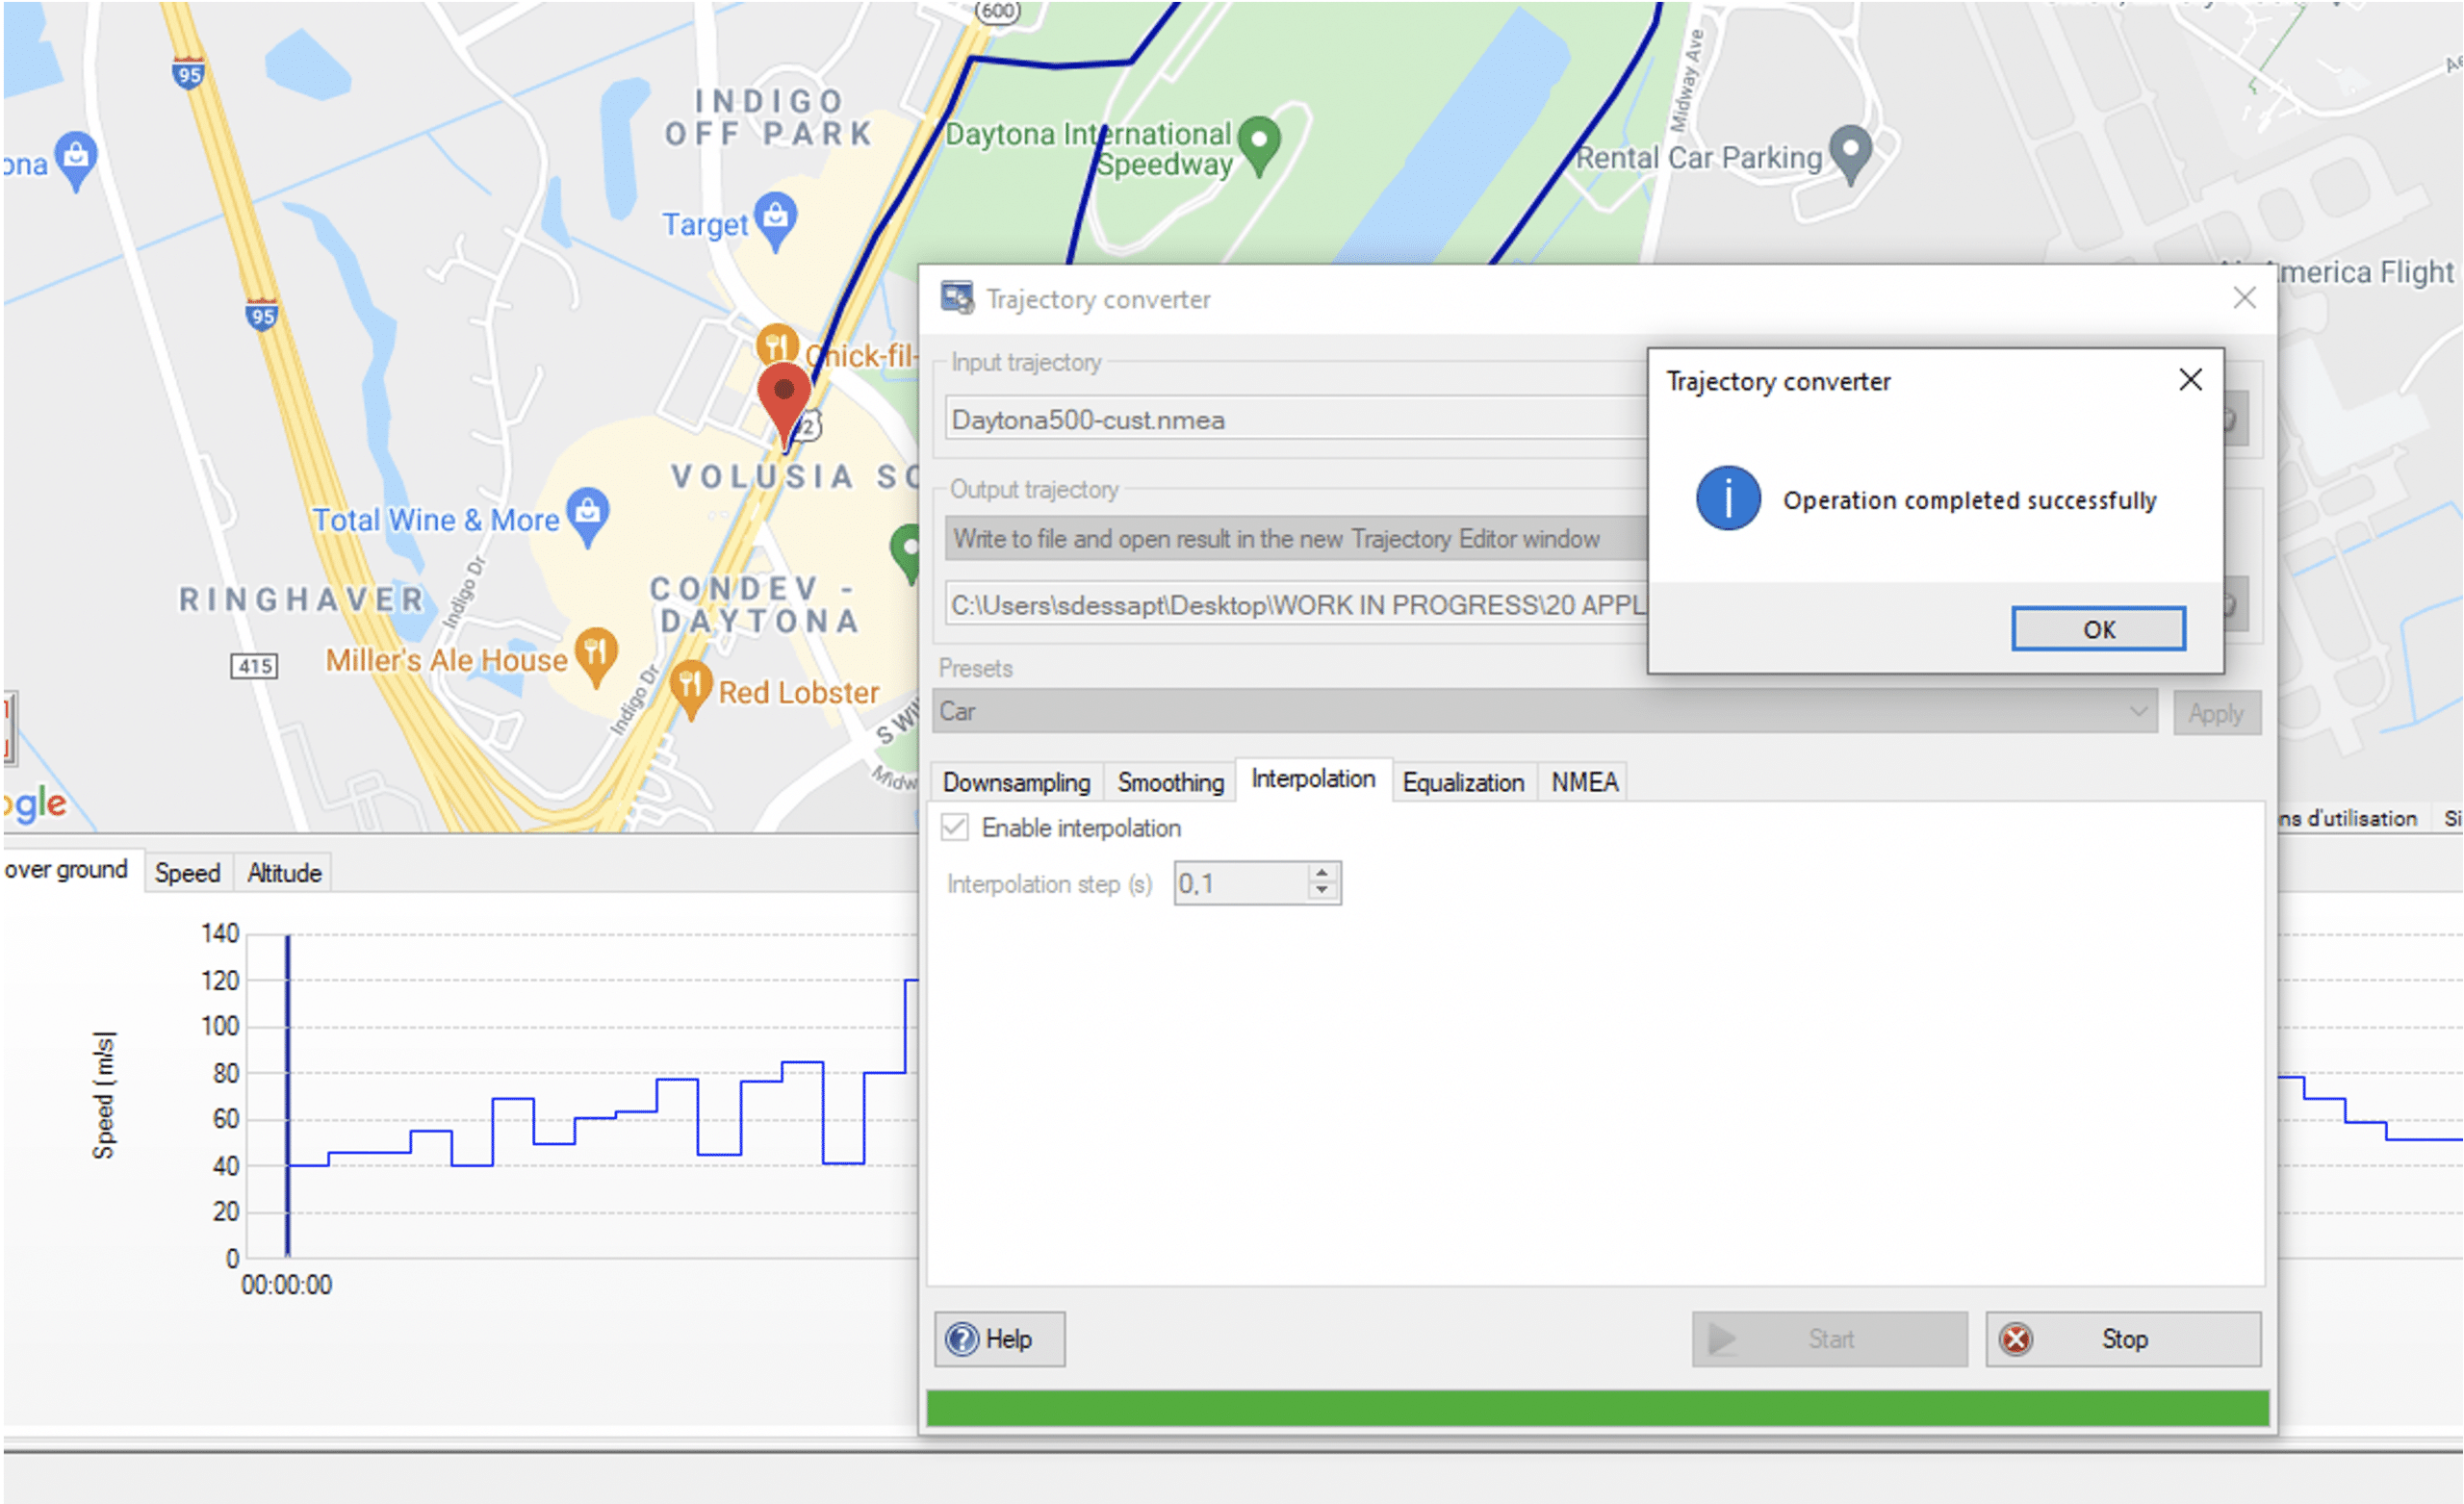
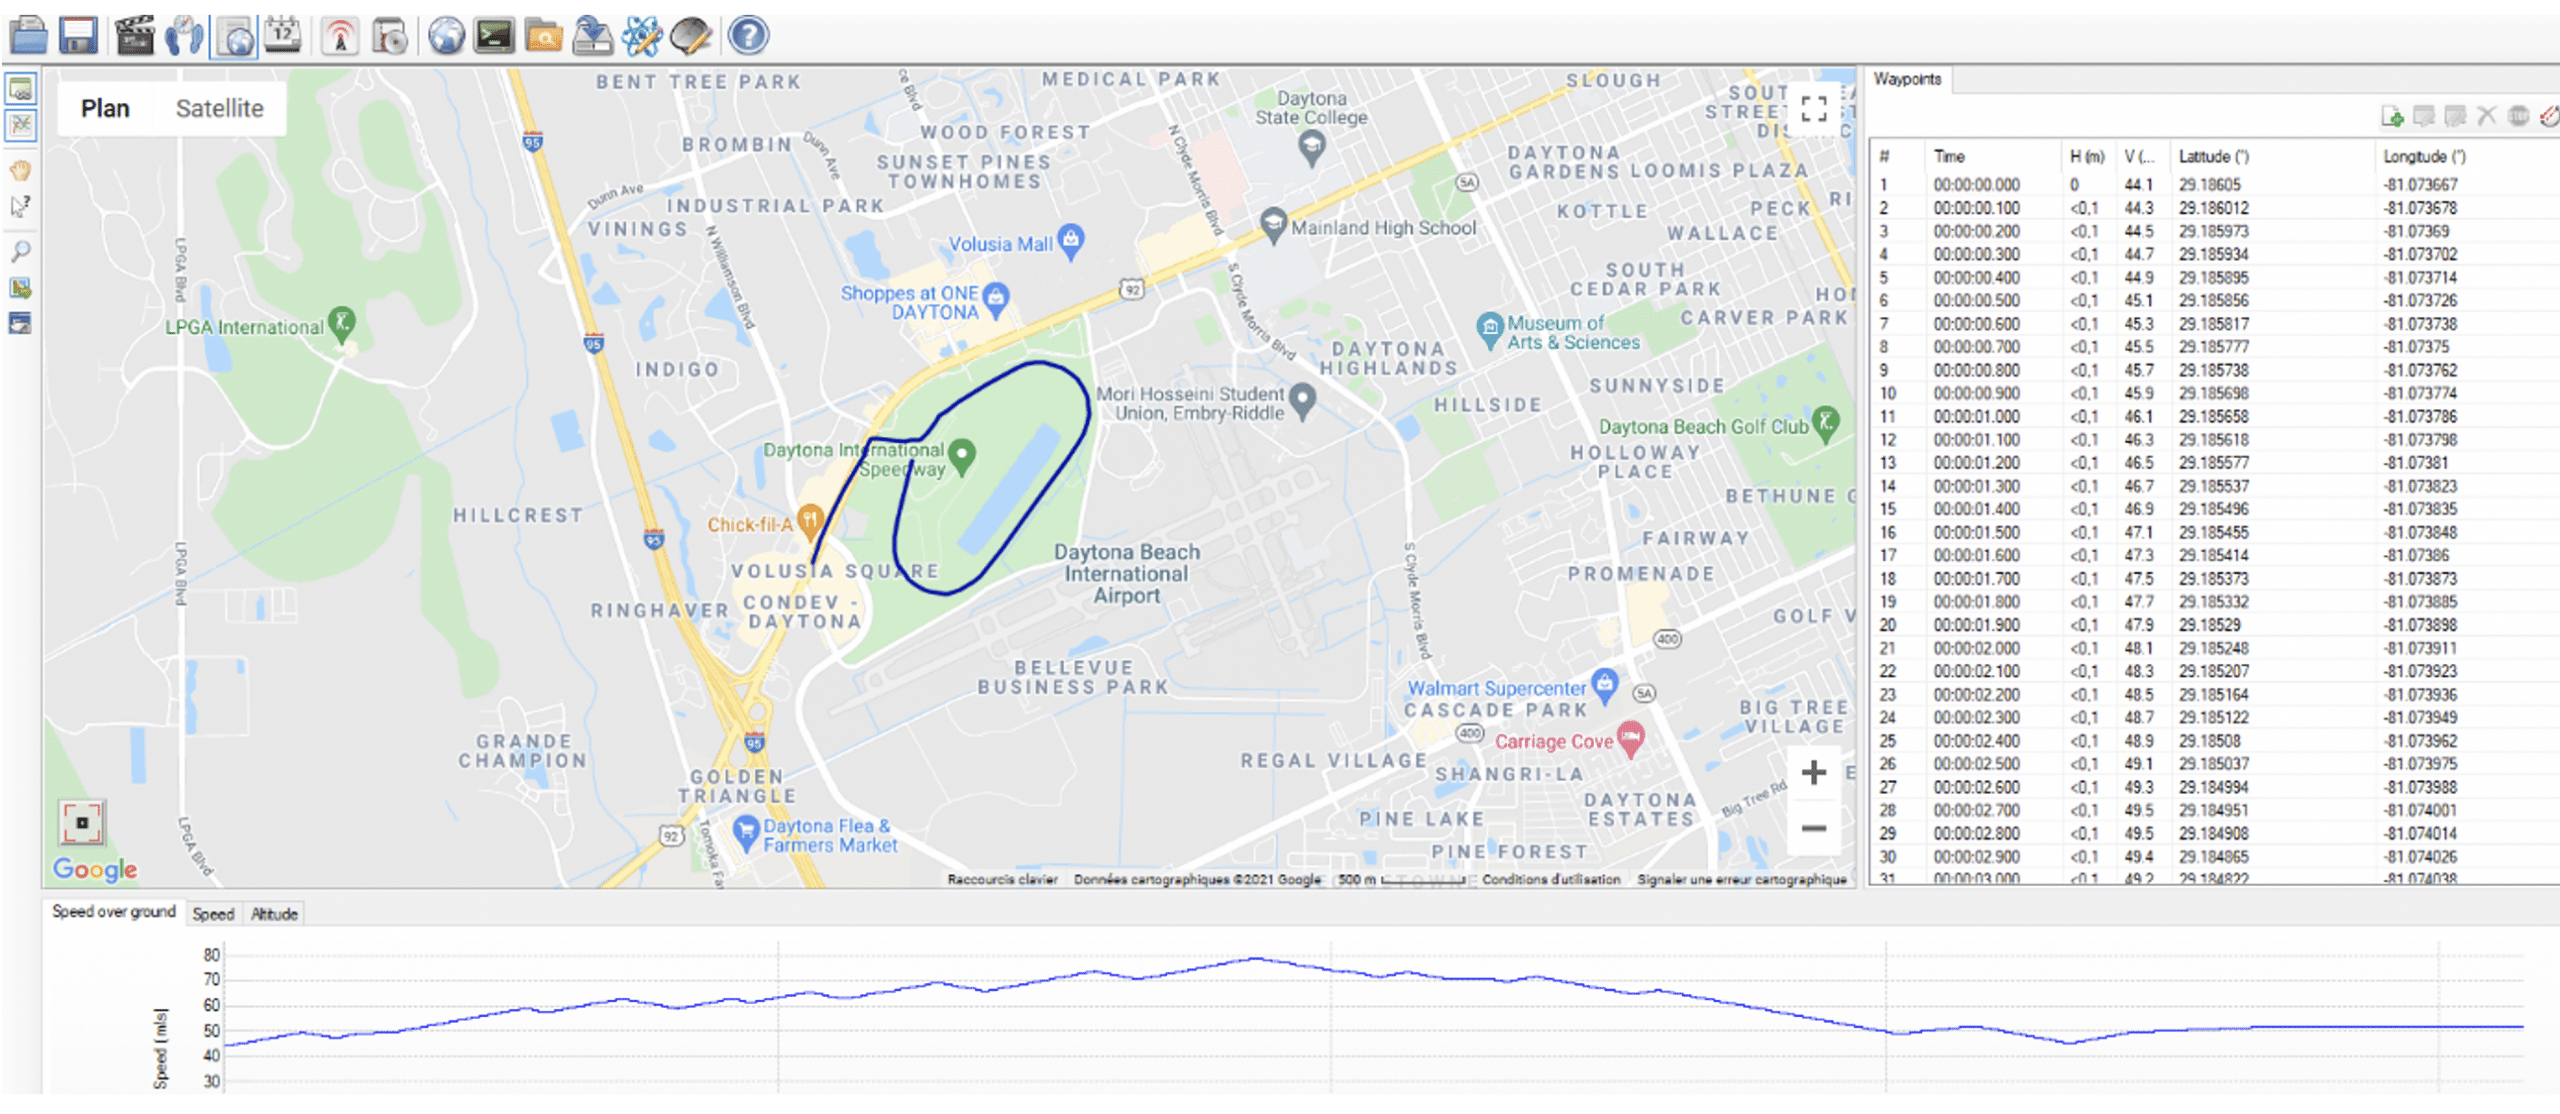
At the end of the process, StudioView has now generated a new file in CSV format with interpolation ready to be imported into SKYDEL.
Prepare the file – Open the CSV text file and remove the last point to avoid any warning about discontinuity.

Open Skydel and set Vehicle / Body / trajectory file – use Track Playback mode
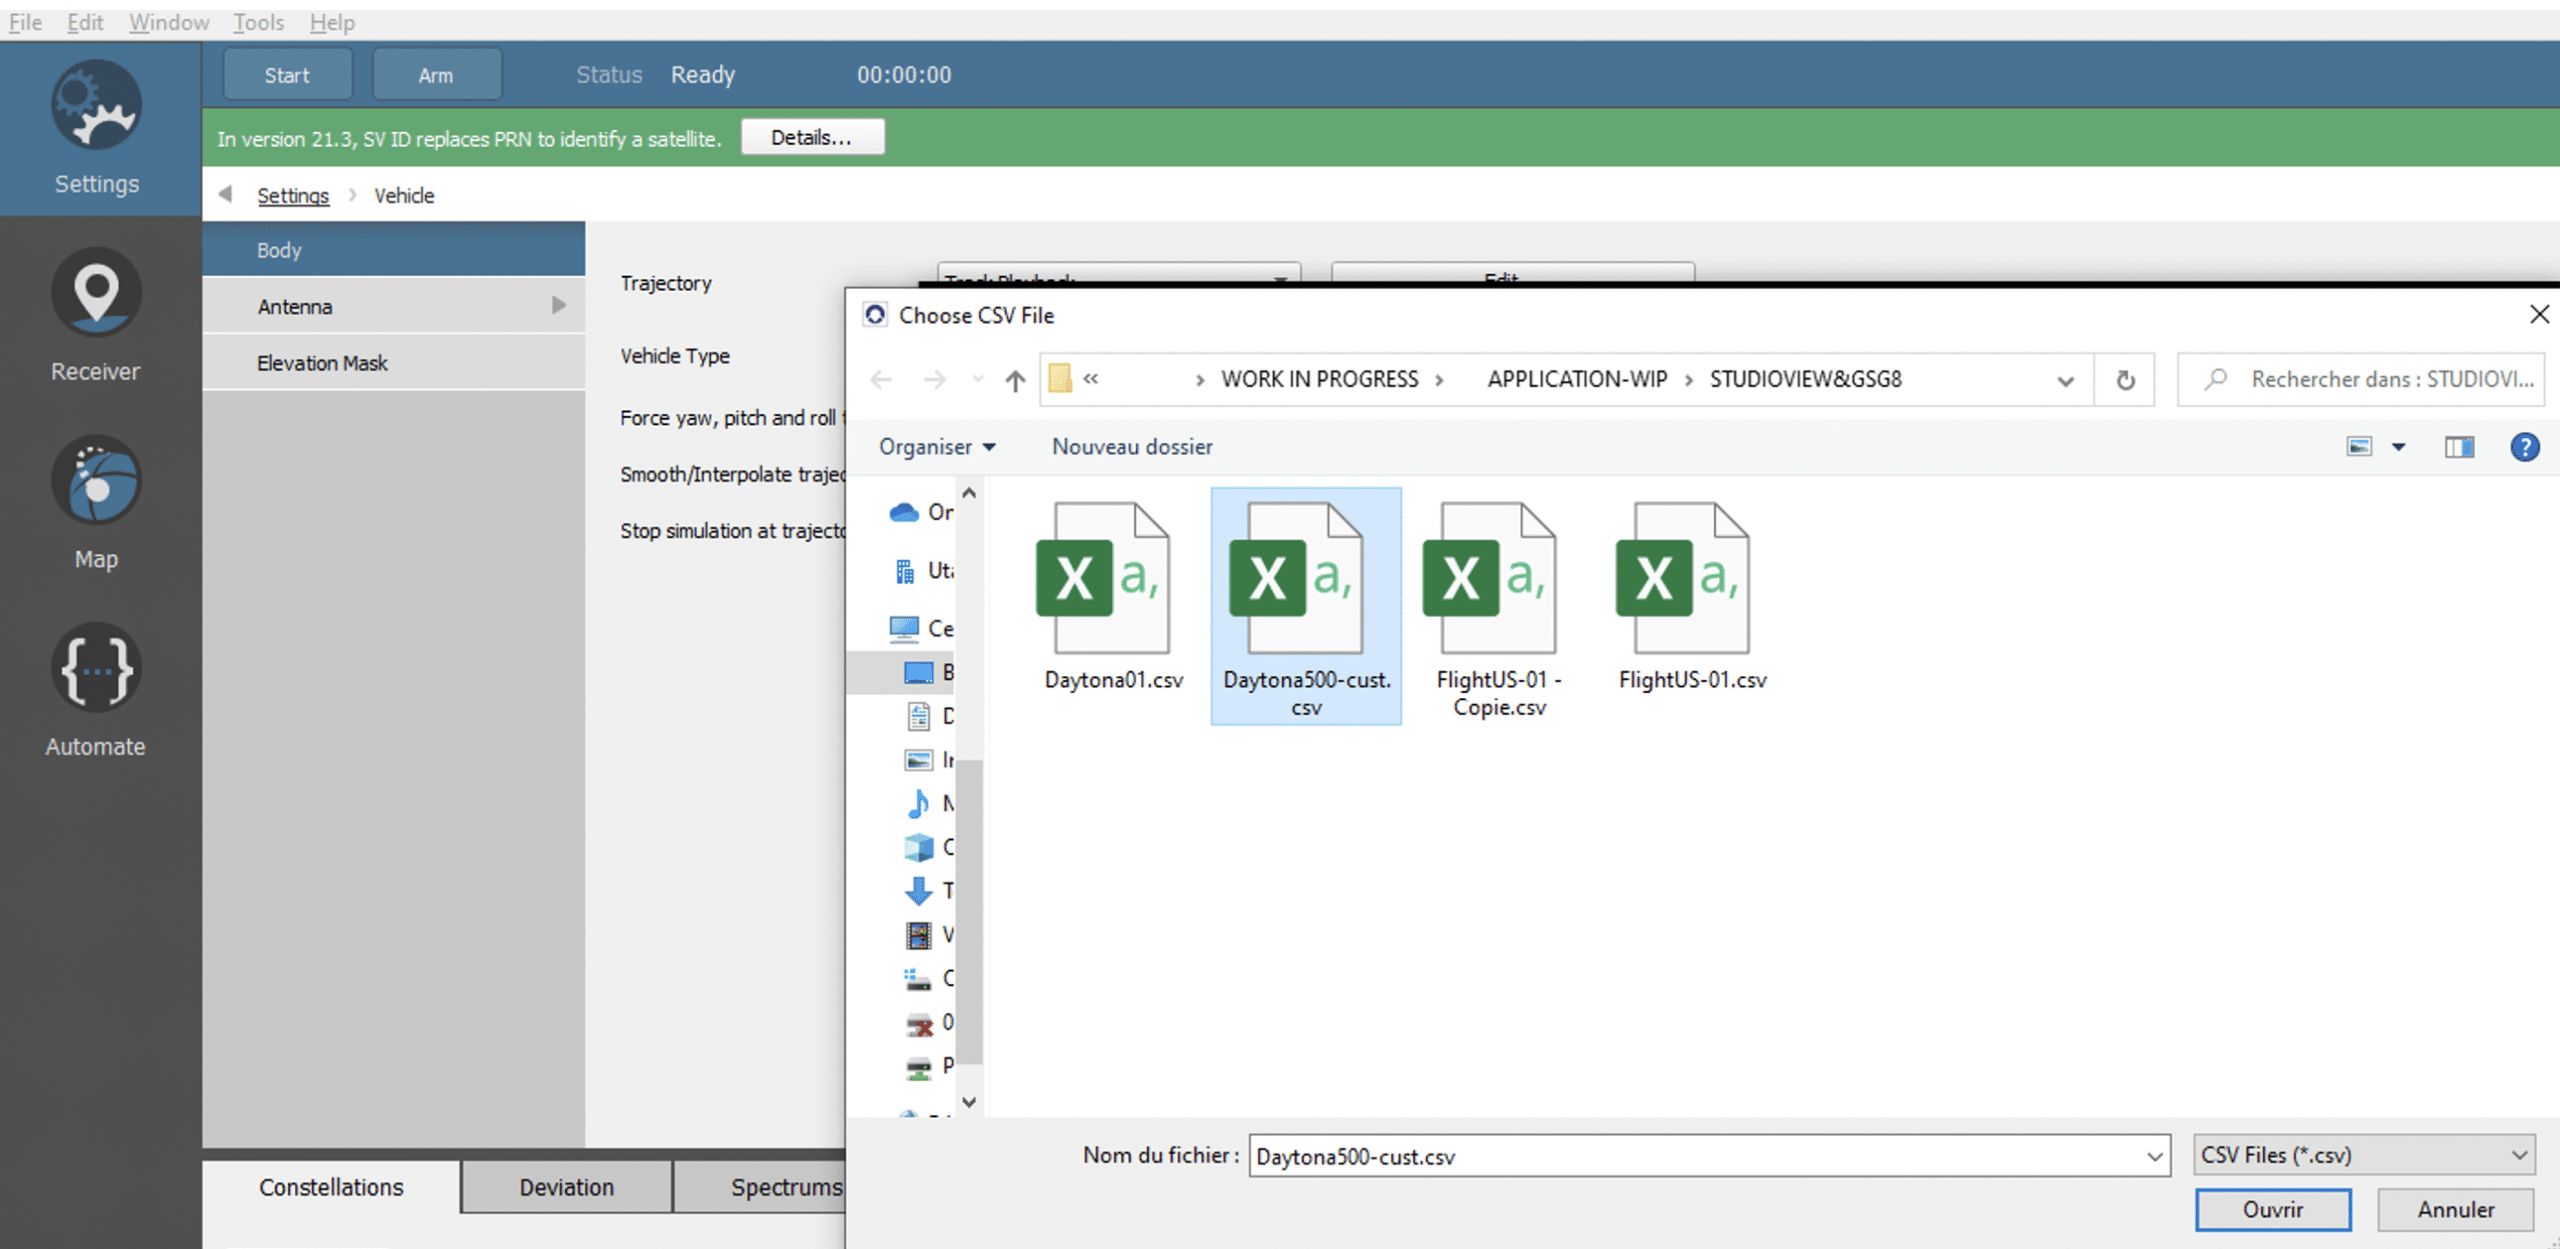
Select columns and filter out header line
Set position tab:
As well as for time:
Click on ‘OK’ and submit your file after finishing.
Your Skydel configuration now has a customized trajectory file “ready to race”. Just set your RF output, your constellations, time …. and then START your simulation!
Conclusion
We expect this application provided help for using StudioView Tool and build new ranges of trajectories for your SKYDEL application.
For StudioView :
Video tutorial (Watch the first minute to see presentation of how to use the trajectory tool) : https://safran-navigation-timing.com/resources/videos/building-gps-simulation-scenarios-gsg-studioview-software
Tip : You can test StudioView on your own system for a 30 Days trial period : software can be downloaded from our web site from this link : https://safran-navigation-timing.com/portal/public-downloads/gsg-5-6-update-files-and-documentation/.
Free StudioView License can be provided under simple demand for each SKYDEL System or GSG8 owner.
For Skydel :
Orolia’s GSG-8: Advanced GNSS Simulation Tutorial : https://safran-navigation-timing.com/orolias-gsg-8-advanced-gnss-simulation-tutorial/
Get information about vehicle setup following this link : https://safran-navigation-timing.com/manuals/skydel/index.html#settings-vehicle-body
